If you’ve ever come across the message “Error Establishing a Database Connection” while visiting your website, you know how worrying it can feel. This error happens when your website cannot connect to its database, which is where all your site’s important information, like posts, pages, and settings, is stored.
This problem is pretty common, especially for websites built with tools like WordPress or other systems that rely heavily on databases. It’s often caused by simple issues like incorrect settings, server problems, or database errors.
For website owners, this error can be frustrating because it makes the entire site inaccessible. Visitors see a blank screen instead of the content they expect, which can hurt your site’s reputation.
The good news? Fixing this error is usually straightforward if you understand what’s causing it. In this post, we’ll explore why this error happens and give you clear, easy-to-follow steps to solve it. By the end, you’ll feel more confident in handling this issue if it ever comes up.
What is the “Error Establishing a Database Connection”?
This error happens when your website can’t connect to its database. The database is like your site’s memory. It stores everything, including your content, user data, and settings. If the connection between your site and the database breaks, your website won’t load properly.
This problem is especially common in platforms like WordPress. That’s because WordPress uses a database to manage all its information, from blog posts to themes and plugins. When the connection fails, your site can’t pull the data it needs to display anything.
The database plays a key role in how your website works. Without it, your site wouldn’t know what to show visitors. This is why fixing this error is so important—it gets your site back up and running smoothly.
Why Does This Error Occur?
The “Error Establishing a Database Connection” can happen for several reasons. Here are the most common causes:
Incorrect Database Credentials: Your website needs the right database name, username, password, and host to connect. If any of these details are wrong, the connection will fail.
Database Server Issues: Sometimes, the server hosting your database is down or overloaded. If the server can’t respond, your site won’t connect to the database.
Corrupted Database: A database can become corrupted due to unexpected crashes or issues during updates. When this happens, the connection might stop working.
Exceeded Hosting Resources: If your hosting plan has limits on storage or traffic and those limits are exceeded, it can disrupt the database connection.
File Corruption: Core files in your website may get corrupted due to failed updates, malware, or accidental changes. This can block the database connection.
Plugin or Theme Conflicts: Sometimes, a poorly coded or incompatible plugin or theme can interfere with your website’s database connection.
Changed Database Location: If your database has been moved to a new server or the hosting environment has changed, your website may need updated connection details.
Permissions Issues: The database user might not have the right permissions to access the data, causing the connection to fail.
By identifying the specific cause, you can take the right steps to fix the error and get your website running again.
How to Identify the Root Cause
When you see the “Error Establishing a Database Connection,” the first step is to figure out what’s causing it. Here’s how you can do that:
Use the CMS Error Message: Sometimes, the error message gives clues. For example, it might mention incorrect credentials or a server issue. Read the message carefully to understand where to start.
Check Server Logs: Look at your server’s error logs. These logs often show detailed information about what went wrong, like a failed connection or a missing file.
Test the Database Connection Manually: You can test if the database is reachable by running a simple PHP script. Here’s an example:
<?php
  // Load WordPress configuration
  require_once('wp-config.php');

  // Attempt database connection
  $connection = new mysqli(DB_HOST, DB_USER, DB_PASSWORD, DB_NAME);

  // Check the connection
  if ($connection->connect_error) {
    die("Database connection failed: " . $connection->connect_error);
  } else {
    echo "Database connection successful!";
  }

  // Close the connection
  $connection->close();
?>
Replace “localhost,” “username,” “password,” and “database_name” with your database details. If the script fails, the issue is likely with the database connection.
Contact Your Hosting Provider: If you can’t find the problem, reach out to your hosting provider. They can check if the server is down or if there’s an issue with your hosting plan.
By following these steps, you can pinpoint the cause and take action to fix the error.
Step-by-Step Guide to Fix the Error
When you see the “Error Establishing a Database Connection,” follow these steps to fix it:
Step 1: Verify Database Credentials
Check if your website has the correct database details.
Open your website’s configuration file. In WordPress, this is the wp-config.php file.
Make sure the database name, username, password, and hostname match your hosting account.
Step 2: Check the Database Server Status
Ensure the database server is running and reachable.
Use a tool like ping or a PHP connection script to test the server.
If the server doesn’t respond, check for high traffic or server issues.
Step 3: Repair a Corrupted Database
If the database is corrupted, repair it.
For WordPress, add this line to wp-config.php:
define('WP_ALLOW_REPAIR', true);
Go to http://yourwebsite.com/wp-admin/maint/repair.php to run the repair.
Alternatively, use phpMyAdmin to repair the database tables.
Step 4: Resolve Hosting Resource Issues
If your hosting plan is overloaded, fix resource problems.
Check if your site is using too much bandwidth, storage, or CPU.
Consider upgrading to a plan with higher limits if needed.
Step 5: Disable Plugins and Themes
A plugin or theme might be causing the problem.
Disable all plugins through your hosting file manager by renaming the plugins folder.
Switch to a default theme by renaming the theme folder.
Test your site. If it works, re-enable plugins and themes one at a time to find the issue.
Step 6: Update Core Files
Replace any corrupted website files.
Download a fresh version of your CMS (e.g., WordPress).
Replace core files except for the configuration file and the wp-content folder.
Always back up your site before making changes.
Step 7: Contact Hosting Support
If the error persists, ask your hosting provider for help.
Explain the issue and steps you’ve tried.
Share any error logs or screenshots to help them identify the problem.
By following these steps, you can fix the error and restore your website. If you’re unsure, don’t hesitate to get professional support!
Preventing the Error in the Future
Avoiding the “Error Establishing a Database Connection” is easier when you take a few precautions. Here’s how you can keep your website running smoothly:
1. Regular Database Backups
Back up your database regularly to avoid losing data.
Use plugins or hosting tools that automate backups.
Keep multiple copies of backups in safe locations, like cloud storage.
2. Monitor Website Traffic
Keep an eye on your website traffic, especially during peak times.
Use tools like Google Analytics to track traffic patterns.
Upgrade your hosting plan if your site is growing and needs more resources.
3. Keep Everything Up-to-Date
Update your CMS, plugins, and themes regularly.
Outdated software can cause bugs or conflicts with the database.
Check for compatibility before installing updates.
4. Choose a Reliable Hosting Provider
Use a hosting provider with a strong reputation for uptime and support.
Pick a plan that fits your site’s needs and can handle growth.
Reliable hosting minimizes server-related errors.
Tools and Resources to Help You
When dealing with the “Error Establishing a Database Connection,” the right tools and resources can make troubleshooting easier. Here are some helpful options:
Tools for Database Management and Repair
phpMyAdmin: A popular tool for managing and repairing your database. Most hosting providers include it in their control panels.
Adminer: A lightweight database management tool that’s simple to use and great for quick fixes.
Backup Plugins: Plugins like UpdraftPlus or WP Database Backup can help restore your database if needed.
Hosting Provider Support Pages
Most hosting providers offer detailed guides and tutorials for common database issues.
Check your hosting provider’s help center for troubleshooting steps or contact their support team.
CMS Documentation
WordPress Documentation: The WordPress support site has a section dedicated to database errors and their solutions.
Other CMS Guides: Platforms like Joomla or Drupal have similar troubleshooting resources available online.
Pro Tip
Bookmark these tools and resources for quick access. They can save you time when troubleshooting database problems. With the right help, you can fix issues and prevent them from happening again!
Understanding the “Error Establishing a Database Connection” is key to resolving it quickly and keeping your website running smoothly. Most of the time, the issue can be fixed with simple troubleshooting steps like checking credentials, repairing the database, or updating files. Staying proactive by maintaining your site and monitoring its health can help prevent such errors in the future.If you need help, Chetaru offers expert WordPress Maintenance Services and Hacked Site Repair Services to ensure your website stays secure and functional. Contact us today to get started!
Shopify is a popular e-commerce platform allowing people to create online stores and sell products online. However, there are many other e-commerce platforms available that offer similar features and benefits. This article will discuss some of the best Shopify alternatives for your online store.
Need for considering Shopify alternatives.
Consider hiring Shopify Experts to help you explore other options because each platform has strengths and weaknesses, and there might be a better fit for your needs. You can also decide which platform is best for you and your business by exploring other options.
This article will cover the main points you should consider when choosing an e-commerce platform. After, we will highlight some of the best Shopify alternatives based on those criteria. This will include a brief overview of each platform’s features, pricing, and overall user experience.
Reasons to Consider Alternatives to Shopify
While Shopify is a popular and reliable e-commerce platform, there are some limitations to consider when choosing an e-commerce platform. These limitations include limited customization options, high transaction fees, and scalability issues. Additionally, different businesses have different needs, and a different platform may be a better fit depending on the specific needs and goals of the business.
Customization Options: While Shopify offers a range of themes and templates, some users may need help with the customization options. According to Colorlib, only 4.1% of Shopify sites use a custom theme, while most rely on pre-made themes. Additionally, some users have reported needing extensive coding knowledge to make specific design changes or add custom functionality to their Shopify sites. This can limit the creative control that businesses have over their online stores.
Pricing Structure: While Shopify offers different pricing tiers to accommodate different business sizes and needs, some users may find the overall pricing structure to be more expensive than they’d like. According to a website builder expert study, the average monthly cost of using Shopify is $79. At the same time, some of the platform’s competitors offer comparable features and functionality at a lower cost. Additionally, some users may find the transaction fees associated with using Shopify’s payment gateway prohibitive, as these fees can add up over time.
Different Business Needs: Different businesses have different needs regarding e-commerce web design. For example, you’re running a small online store with a limited inventory. In that case, you may only need some Shopify features and functionality. Alternatively, suppose you’re running a large-scale e-commerce operation with complex inventory management needs. In that case, you may need a more robust platform than Shopify can provide. According to a study by Ecommerce Platforms, businesses with less than $100k in annual revenue may be better served by a simpler, more cost-effective platform than Shopify.
How different businesses have different needs, and why a different platform may be a better fit
Different businesses have unique needs and requirements when it comes to e-commerce platforms. For example, a small business selling handmade goods may have different needs than a large corporation selling various products. Some factors that can influence a business’s e-commerce needs include the following:
Size: The size of a business can have a significant impact on its e-commerce needs. Small businesses may only need some of the features and functionality that larger businesses require. In comparison, larger companies may need a more robust platform to handle complex inventory management, multi-channel selling, and more.
Budget: A business’s budget can also affect its e-commerce platform needs. Some businesses may need to prioritize cost-effectiveness over advanced features. In contrast, others may have more flexibility to invest in a more expensive platform.
Industry: A business can also influence its e-commerce needs. For example, companies in the fashion industry may have different requirements than those in the electronics industry regarding inventory management, product catalogs, and website design.
By understanding their unique e-commerce needs, businesses can choose a platform that best fits their goals and budget. For example, a small business with a limited budget and simple product offerings may be better served by a more straightforward platform like Square Online or WooCommerce. In contrast, a more significant business with more complex needs may benefit from a more robust platform like Magento or BigCommerce. Additionally, businesses should consider factors like customer support, ease of use, and scalability when choosing an e-commerce platform that fits their needs.
Top Shopify Alternatives to Consider in 2023
If you’re looking for an alternative to Shopify, several e-commerce platforms offer similar features and functionality. This section will explore some of the top Shopify alternatives for your online store. Each of these platforms has its own strengths and weaknesses. By understanding their features, pricing, and overall user experience, you can decide the best fit for your business.
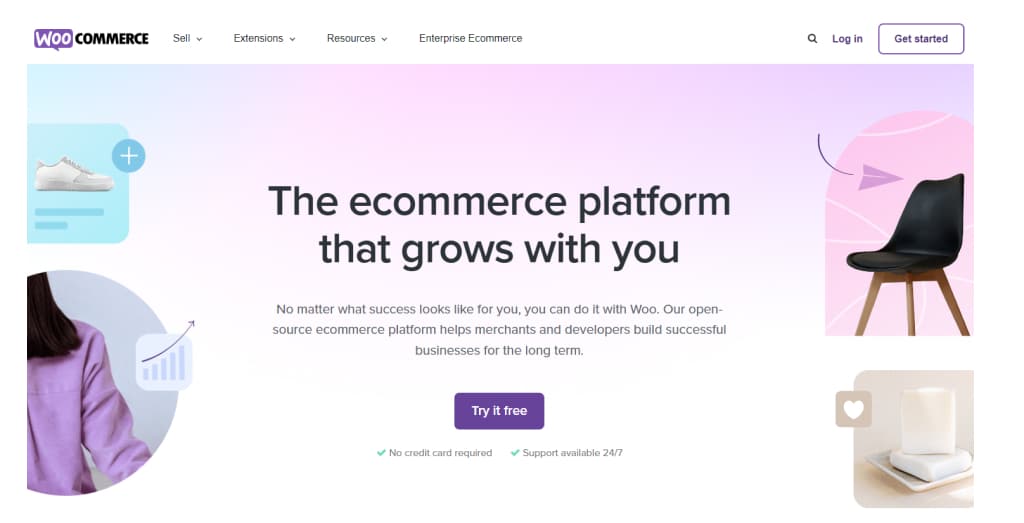
WooCommerce
WooCommerce is an open-source e-commerce plugin for WordPress. It is a popular alternative to Shopify for businesses looking for a customizable and cost-effective solution. It provides a wide range of features, including customizable product listings, flexible shipping options, robust payment processing, and a vast library of extensions and themes that can be tailored to suit the needs of individual businesses. This section will discuss the pros and cons of using WooCommerce as a Shopify alternative and its pricing, features, and industry-specific recommendations.
WooCommerce Pros:
Here are some of the pros of using WooCommerce as an alternative to Shopify:
Flexibility: WooCommerce is highly flexible and customizable, so you can modify your online store to your needs and requirements. This can benefit businesses with unique product offerings or require a high degree of customization in their online store.
Low Cost: One of the major advantages of using WooCommerce is that it is a free platform, meaning you can get started with minimal upfront costs. While some additional costs are associated with using WooCommerce (such as web hosting and payment processing fees), these costs are typically lower than what you would pay for Shopify.
Open-Source: Because WooCommerce is an open-source platform, you can access various resources and community support. This can be especially helpful if you have questions or need assistance customizing your online store.
Integration with WordPress: WooCommerce is built on WordPress, which integrates seamlessly with other WordPress plugins and tools. This can be especially helpful if you already use WordPress for your business website or blog.
Large User Community: WooCommerce has a large user community, meaning you can access a wealth of resources and support when using the platform. This can include tutorials, forums, and other online resources.
Overall, WooCommerce is a highly flexible and cost-effective Shopify alternative, especially for businesses that need a high degree of customization and authority over their online store.
WooCommerce Cons/Limitations:
While WooCommerce has many advantages, there are also some limitations and potential drawbacks to consider:
Technical knowledge Required: WooCommerce is built on WordPress and requires some technical setup, so it may only be the best choice for businesses with technical expertise. Setting up and maintaining a WooCommerce site may require some knowledge of custom WordPress website design and development, which can be a barrier to some companies.
Scalability: While WooCommerce is a powerful platform, there may be better choices for high-traffic e-commerce sites. As your site boost and your traffic increases, you may need to invest additional resources and infrastructure to keep your site running smoothly.
Plugin Compatibility: Because WooCommerce is built on WordPress and relies on third-party plugins for many features, compatibility issues can sometimes arise between different plugins. This can be frustrating to troubleshoot and may require technical support.
While WooCommerce is a powerful and flexible platform, some businesses may have better choices.
Comparison to other platforms
Compared to other e-commerce platforms, WooCommerce has unique advantages and disadvantages regarding pricing, features, and customization options. Here is a brief comparison of WooCommerce to some other popular e-commerce platforms:
Shopify: Shopify is a more expensive platform than WooCommerce, but it offers a wider range of features and is easier to set up and use. However, Shopify may be less customizable than WooCommerce and may not be the best choice for businesses with complex needs.
Magento: Magento is a more robust and scalable platform than WooCommerce. It is also more complex and challenging to set up and maintain. Magento may be better for larger businesses with high traffic volumes and complex inventory management needs.
BigCommerce: BigCommerce is a platform similar to Shopify in terms of pricing and features, but it may offer more customization options and flexibility than Shopify. However, BigCommerce may also be more expensive than WooCommerce and require more technical expertise to set up and maintain.
Industry/Niche-specific recommendations
WooCommerce can be a good choice for many industries and niches, but some may benefit more than others. Here are some examples:
Small businesses with limited budgets: WooCommerce’s low cost and flexibility make it a perfect choice for small businesses needing more resources to invest in an e-commerce platform. With WooCommerce, businesses can get started with minimal upfront costs and scale up as they grow.
Creative industries: WooCommerce’s flexibility and customization options make it a good choice for businesses in creative industries, such as artists, designers, and musicians. These businesses may have unique product offerings and want to create a visually stunning online store that reflects their brand and style.
Non-profits: Non-profit organizations can benefit from WooCommerce’s low cost and flexibility and its integration with WordPress. Non-profits can use WooCommerce to sell merchandise or collect donations. They can customize their online store to reflect their brand and mission.
Service-based businesses: While WooCommerce is primarily designed for selling physical products, it can also be used to sell digital products and services. Service-based businesses, such as consultants, coaches, and freelancers, can use WooCommerce to sell digital products like e-books or courses.
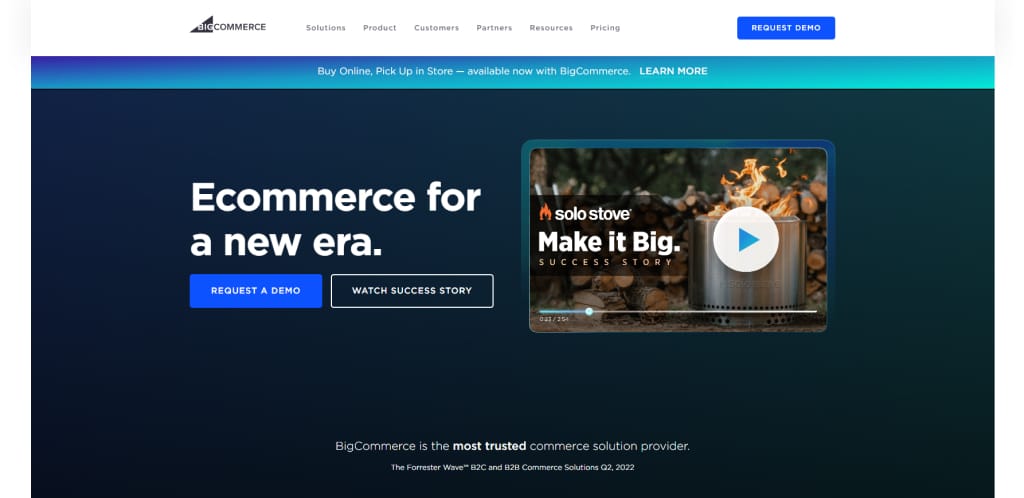
BigCommerce
BigCommerce is an e-commerce platform offering an all-in-one solution for businesses selling their products online. It provides a range of features, including multi-channel selling, flexible shipping options, and advanced analytics, making it a popular Shopify alternative for businesses with complex needs. Additionally, BigCommerce offers a user-friendly interface and a wide range of customizable themes and integrations that suit the needs of individual businesses.
BigCommerce Pros:
Here are some of the pros of using BigCommerce as an alternative to Shopify:
Scalability: BigCommerce is a highly scalable platform that can grow with your business. Whether you’re just a startup or have an established online presence, BigCommerce can accommodate your needs and scale up as your business grows.
Customization: BigCommerce offers a range of customization options, including pre-built templates and the ability to create custom designs. This can be especially beneficial for businesses that like to create a unique online store that reflects their brand and style.
Built-In Features: BigCommerce offers a range of built-in features that can save you time and money. These include features like multi-channel selling, product reviews, and abandoned cart recovery, which can help you improve your conversion rates and customer retention.
Payment Gateways: BigCommerce offers many payment gateway options, including PayPal, Stripe, and Square. This can make it easy for businesses to accept various payment methods and ensure a smooth customer checkout experience.
BigCommerce Cons/Limitations:
While BigCommerce has many advantages, there are also some limitations and potential drawbacks to consider:
Higher Cost: One of the main disadvantages of using BigCommerce is that it can be more expensive than other e-commerce platforms, including WooCommerce. While BigCommerce offers a range of features and built-in tools, businesses may need to pay more for these features.
Technical knowledge Required: Like many e-commerce platforms, BigCommerce may require technical knowledge to fully utilize its features. This can be a barrier for businesses without technical expertise or the resources to hire a developer or agency.
Customization Limitations: While BigCommerce offers a range of customization options, some businesses may find that the platform has limitations in terms of design and functionality. This can be especially frustrating for businesses with unique product offerings or requiring high customization in their online store.
While BigCommerce is a robust and scalable e-commerce platform, some businesses may have better choices. If you’re looking for a cost-effective and easy-to-use platform, or if you don’t have technical expertise, consider other alternatives.
Comparison to other platforms
Compared to other e-commerce platforms, BigCommerce has some unique advantages and disadvantages regarding pricing, features, and customization options. Here is a brief comparison of BigCommerce to some other popular e-commerce platforms:
Shopify: BigCommerce has similar pricing and features but may offer more customization options and flexibility than Shopify. However, BigCommerce may be more expensive than other platforms, including WooCommerce.
WooCommerce: WooCommerce is a free platform that is more cost-effective than BigCommerce. However, WooCommerce may require more effort to set up and maintain and offer fewer built-in features and tools than BigCommerce.
Magento: Magento is a more complex and robust platform than BigCommerce. It may also be more challenging to set up and maintain. Magento may be better for larger businesses with complex inventory management needs.
Industry/Niche-specific recommendations
BigCommerce is a highly customizable and feature-rich e-commerce platform that can benefit businesses in various industries and niches. Here are some examples:
Retail and E-commerce: BigCommerce offers a range of built-in features and integrations to help retail and e-commerce businesses streamline their operations and improve their online sales. For example, BigCommerce offers integrations with popular marketplaces like Amazon and eBay and tools for inventory management and order fulfillment.
B2B and Wholesale: BigCommerce offers a range of B2B and wholesale-specific features, such as custom pricing, account management, and quote management. These features can benefit businesses that sell to other companies or require a high degree of customization in their sales process.
Fashion and Apparel: BigCommerce offers a range of customizable themes and design options, which can be especially beneficial for businesses in the fashion and apparel industry. Additionally, BigCommerce offers features like size and color swatches, which can help enterprises to showcase their products and improve the customer experience.
Food and Beverage: BigCommerce offers features like custom order forms and subscription management, which can be helpful for businesses in the food and beverage industry. BigCommerce offers integrations with popular food delivery services like GrubHub and DoorDash.
Electronics: BigCommerce offers features like advanced product filtering and specifications, which can benefit businesses in the electronics industry. BigCommerce offers integrations with popular payment gateways like PayPal and Stripe, which can help businesses accept various payment methods.
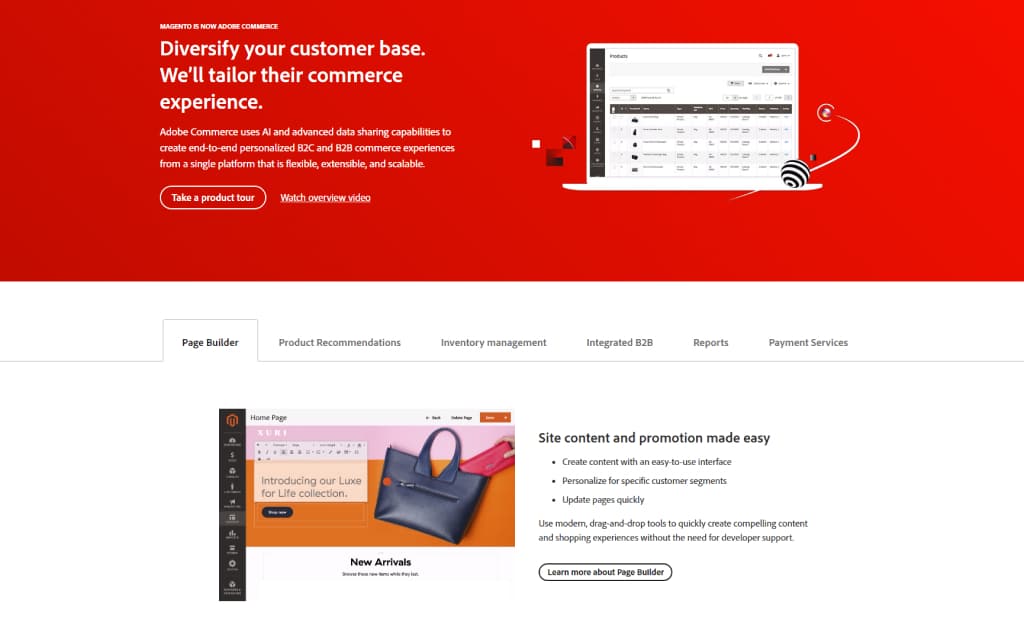
Magento
Magento is a powerful and highly customizable e-commerce platform suitable for businesses of all sizes. It offers a wide range of features, including advanced SEO optimization, flexible pricing and promotions, and robust product management tools, making it a popular Shopify alternative for businesses with complex needs. Additionally, Magento web design provides high customization and scalability, allowing companies to tailor their online store to their specific needs and goals.
Magento Pros:
Here are some of the pros of using Magento as an alternative to Shopify:
Customization: Magento is highly customizable, meaning you can tailor your online store to your needs and requirements. This can be especially beneficial for businesses with unique product offerings or requiring a high degree of customization in their online store.
Scalability: Magento is a highly scalable platform that can grow with your business. Whether you’re just starting out or have an established online presence, Magento can accommodate your needs and scale up as your business grows.
Advanced Features: Magento offers a range of advanced features, including product bundling, custom pricing, and advanced inventory management. These features can benefit businesses with complex product offerings or sales processes.
Overall, Magento is a highly customizable and scalable e-commerce platform that can be a good choice for businesses with complex needs and a high degree of flexibility.
Magento Cons/Limitations:
While Magento has many advantages, there are also some limitations and potential drawbacks to consider:
Technical knowledge Required: Because Magento is a more complex and advanced platform, it may require some technical knowledge to set up and maintain. This can be a barrier for businesses without technical expertise or the resources to hire a developer or agency.
Cost: Magento may be more expensive than other e-commerce platforms, including WooCommerce and BigCommerce. This can disadvantage smaller businesses that may need more resources to invest in an e-commerce platform.
Complexity: While Magento offers a range of advanced features and customization options, it may be too complex for some businesses. This can be incredibly frustrating for businesses starting out or with limited technical resources.
While Magento is a powerful and highly customizable e-commerce platform, some businesses may have better choices. If you’re looking for a platform that is easy to set up and maintain or has limited technical resources, consider other alternatives.
Comparison to other platforms:
Unlike other e-commerce platforms, Magento has unique advantages and disadvantages regarding pricing, features, and customization options. Here is a brief comparison of Magento to some other popular e-commerce platforms:
Shopify: Shopify is a more user-friendly platform than Magento and may be a better choice for businesses that are just starting out or have limited technical expertise. However, Magento may offer more advanced features and customization options than Shopify and may be better for larger businesses with complex needs.
WooCommerce: WooCommerce is a free platform built on WordPress, making it a more cost-effective option than Magento. However, Magento may offer more advanced features and scalability than WooCommerce and may be a better choice for businesses requiring high customization and flexibility.
BigCommerce: BigCommerce is similar to Magento in pricing and features but may offer more built-in tools and integrations. However, Magento may be more customizable than BigCommerce and a better choice for businesses with unique needs or requirements.
Overall, Magento is a highly customizable and feature-rich e-commerce platform that can be a good choice for businesses with complex needs and a high degree of flexibility. However, businesses should also consider other e-commerce platforms based on their needs and requirements.
Industry/Niche-specific recommendations
Magento is a powerful and highly customizable e-commerce platform that can benefit businesses in various industries and niches. Here are some examples:
Large retailers and e-commerce businesses: Magento’s scalability and advanced features make it an ideal choice for larger retailers and e-commerce businesses. It’s customizable design and advanced inventory management tools can help these businesses streamline their operations and improve their online sales.
Fashion and Apparel: Magento’s customizable design options and built-in features like size and color swatches make it an excellent choice for businesses in the fashion and apparel industry. Magento’s advanced product filtering and specifications can help these businesses showcase their products and improve the customer experience.
B2B and Wholesale: Magento offers a range of B2B and wholesale-specific features, such as custom pricing, account management, and quote management. These features can benefit businesses that sell to other businesses or require a high degree of customization in their sales process.
Electronics: Magento’s advanced features, including product bundling and advanced inventory management, can benefit electronics businesses. Additionally, Magento offers integrations with popular payment gateways like PayPal and Stripe, which can help enterprises to accept various payment methods.
Food and Beverage: Magento’s custom order forms and subscription management tools can be helpful for businesses in the food and beverage industry. Additionally, Magento offers integrations with popular food delivery services like GrubHub and DoorDash.
Overall, Magento can be a good choice for businesses in a wide range of industries and niches. Especially those that require a high degree of customization and flexibility in their e-commerce operations. Its advanced features and scalability make it a powerful tool for businesses that want to improve their online visibility and sales.
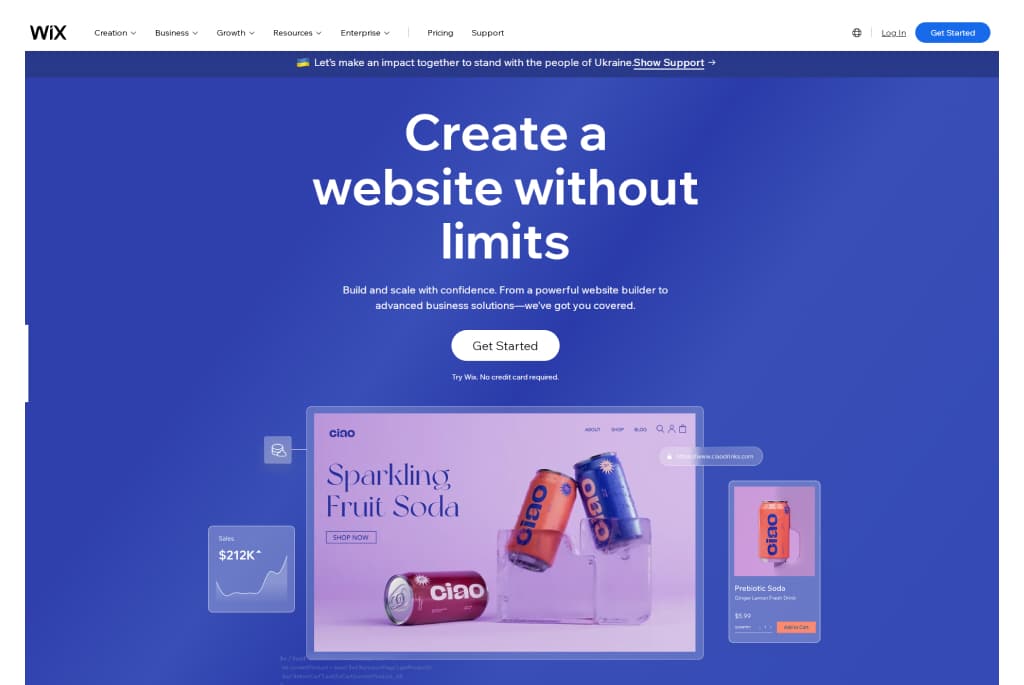
Wix
Wix is a famous website builder that has emerged as a viable alternative to Shopify for businesses looking for an e-commerce platform. It offers a user-friendly drag-and-drop editor, a wide range of features, and affordable pricing plans that can benefit businesses of all sizes. It also provides a variety of customizable templates and design options, which can help companies to create a unique online store that reflects their brand and style.
Wix Pros:
Wix is a popular website builder that also offers e-commerce capabilities. Here are some of the pros of using Wix as a Shopify alternative:
Ease of Use: Wix is known for its user-friendly drag-and-drop editor, making it easy for businesses to create a professional-looking online store without technical expertise.
Affordability: Wix offers a range of affordable pricing plans, which can be especially beneficial for smaller businesses with limited budgets.
Wide Range of Features: Wix offers various features and integrations, including payment options, product galleries, and shipping tools.
Customization: Wix offers a range of customizable templates and design options, which can be especially helpful for businesses that want to create a distinctive online store that reflects their brand and style.
Wix Cons/Limitations:
While Wix has many advantages, there are also some limitations and potential drawbacks to consider:
Limited Customization Options: While Wix offers a range of customizable templates and design options, some businesses may find that the platform has limitations in terms of design and functionality. This can be incredibly frustrating for businesses with unique product offerings or requiring a high degree of customization in their online store.
Scalability: While Wix can be a good choice for smaller businesses, it may not suit larger businesses with complex needs. As the business grows and the online store becomes more complex, Wix may only be unable to accommodate some of the business’s needs.
Advanced Features: Wix may offer fewer advanced features than other e-commerce platforms, including Magento and BigCommerce. This can be a disadvantage for businesses that require a high degree of customization or have unique needs.
Comparison to other platforms
Compared to other e-commerce platforms, Wix has unique advantages and disadvantages regarding pricing, features, and customization options. Here is a brief comparison of Wix to some other popular e-commerce platforms:
Shopify: Shopify offers more advanced features and customization options than Wix, but it may be more expensive. Shopify may be a better choice for businesses that require a high degree of customization and flexibility or have more complex needs.
WooCommerce: WooCommerce is a free platform built on WordPress, making it a more cost-effective option than Wix. However, Wix may offer more user-friendly features and design options and maybe a better choice for businesses that need more technical expertise.
BigCommerce: BigCommerce is similar to Wix in pricing and features but may offer more built-in tools and integrations. However, Wix may be more customizable than BigCommerce and better for businesses with unique needs or requirements.
Overall, Wix is a user-friendly and affordable e-commerce platform. It can be a good choice for businesses without technical expertise or those looking for a simple and inexpensive e-commerce solution. However, businesses should also consider other e-commerce platforms based on their needs and requirements.
Industry/Niche-specific recommendations
Wix is a versatile e-commerce platform that can benefit businesses in various industries and niches. Here are some examples:
Arts and Crafts: Wix’s customizable design options and built-in image galleries can benefit businesses in the arts and crafts industry. Additionally, Wix offers integrations with popular payment gateways like PayPal and Square, which can help companies to accept various payment methods.
Beauty and Wellness: Wix’s appointment booking and scheduling tools can be helpful for businesses in the beauty and wellness industry. Additionally, Wix offers integrations with popular marketing tools like Mailchimp and Facebook Ads, which can help these businesses promote their products and services.
Food and Beverage: Wix’s custom order forms and menu management tools can be helpful for businesses in the food and beverage industry. Additionally, Wix offers integrations with popular food delivery services like GrubHub and DoorDash.
Fashion and Apparel: Wix’s customizable design options and built-in product galleries can benefit businesses in the fashion and apparel industry. Additionally, Wix offers integrations with popular shipping services like USPS and FedEx, which can help these businesses manage their shipping and fulfillment processes.
Overall, Wix can be a good choice for businesses in a huge range of industries and niches, especially those that require a user-friendly and affordable e-commerce platform with a wide range of features and customization options. Its integrations with popular payment and marketing tools can also make it a powerful tool for businesses that want to boost their online visibility and sales.
Squarespace
Squarespace is a famous website builder that has become a viable alternative to Shopify for businesses looking for an e-commerce platform. It offers a wide range of features, customizable templates, and integrations that can benefit businesses of all sizes. It also provides a user-friendly interface that makes it easy for businesses to set up and manage their online store without technical expertise.
Squarespace Pros:
Squarespace has many advantages as an e-commerce platform. Here are some of the pros of using Squarespace as an alternative to Shopify:
Sleek Design Options: Squarespace offers a range of elegant and customizable templates that can help businesses create a professional-looking online store. The platform also provides a drag-and-drop editor that makes it easy for businesses to customize their website without technical expertise.
Built-in Marketing Tools: Squarespace offers a variety of built-in marketing tools, including email campaigns, social media integrations, and search engine optimization (SEO) features. These tools can help businesses promote their online store and improve their visibility.
Easy to Use: Squarespace is known for its user-friendly interface and intuitive design, making it a good choice for businesses without technical expertise.
Squarespace can be a good choice for businesses that want a user-friendly and customizable e-commerce platform with built-in marketing tools.
Squarespace Cons/Limitations:
Limited e-commerce features may not be suitable for businesses with complex needs
While Squarespace has many advantages, there are also some limitations and potential drawbacks to consider:
Limited E-Commerce Features: Squarespace may offer fewer advanced e-commerce features than some other platforms, including Shopify and Magento. This can be a disadvantage for businesses that require a high degree of customization or have unique needs.
Scalability: While Squarespace can be a good choice for smaller businesses, it may not suit larger enterprises with complex needs. As the business grows and the online store becomes more complex, Squarespace may need help to accommodate all of the business’s needs.
Advanced Features: Squarespace may offer fewer advanced features than other e-commerce platforms, including Magento and BigCommerce. This can be a disadvantage for businesses that require a high degree of customization or have unique needs.
While Squarespace can be a good choice for businesses that want a user-friendly and customizable e-commerce platform with built-in marketing tools, some businesses may have better choices.
Comparison to other platforms
Compared to other e-commerce platforms, Squarespace has unique advantages and disadvantages regarding pricing, features, and customization options. Here is a brief comparison of Squarespace to some other popular e-commerce platforms:
Shopify: Shopify offers more advanced features and customization options than Squarespace, but it may be more expensive. Shopify may be a better choice for businesses that require a high degree of customization and flexibility or have more complex needs.
WooCommerce: WooCommerce is a free platform built on WordPress, making it a more cost-effective option than Squarespace. However, Squarespace may offer more user-friendly features and design options and maybe a better choice for businesses that need more technical expertise.
BigCommerce: BigCommerce is similar to Squarespace in pricing and features but may offer more built-in tools and integrations.
Overall, Squarespace is a user-friendly and customizable e-commerce platform that can be a good choice for businesses without technical expertise or those looking for a simple and affordable e-commerce solution. However, businesses should also consider other e-commerce platforms based on their needs and requirements.
Industry/Niche-specific recommendations
Squarespace is a versatile e-commerce platform that can benefit businesses in various industries and niches. Here are some examples:
Home Goods: Squarespace’s customizable templates and built-in image galleries can benefit businesses in the home goods industry. Additionally, Squarespace offers integrations with popular payment gateways like PayPal and Stripe, which can help businesses accept various payment methods.
Art and Photography: Squarespace’s sleek and customizable design options can be helpful for businesses in the art and photography industry. Additionally, Squarespace offers integrations with popular marketing tools like Mailchimp and Instagram, which can help these businesses promote their products and services.
Music and Entertainment: Squarespace’s audio and video integrations can benefit businesses in the music and entertainment industry. Additionally, Squarespace offers integrations with popular ticketing services like Eventbrite, which can help these businesses sell event tickets.
Wedding and Event Planning: Squarespace’s appointment booking and scheduling tools can be helpful for businesses in the wedding and event planning industry. Additionally, Squarespace offers integrations with popular social media platforms like Pinterest, which can help these businesses promote their services and showcase their work.
Overall, Squarespace can be a good choice for businesses in a broad range of industries and niches, especially those that require a user-friendly and customizable e-commerce platform with a wide range of features and customization options. Its integrations with popular payment and marketing tools can also make it a powerful tool for businesses that want to enhance their online visibility and sales.
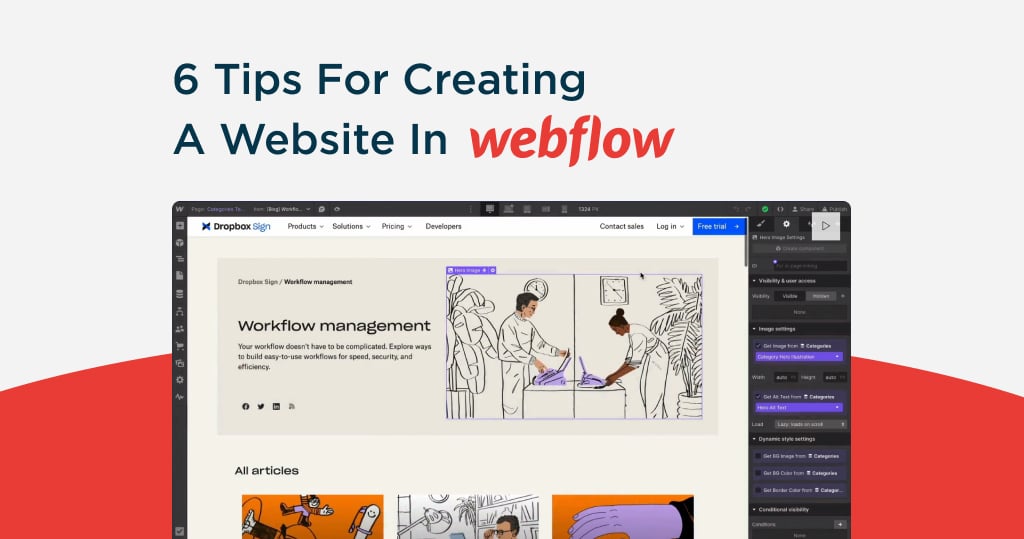
Webflow
Webflow is a design-first platform that combines website creation, content management, and e-commerce. It empowers designers and developers to create fully responsive and visually stunning websites without extensive coding knowledge.
Webflow Pros
Highly customizable and visually intuitive editor.
Built-in hosting with global CDN ensures fast website performance.
Excellent SEO features for on-page optimization.
Scalable for both small and medium businesses.
Webflow Cons/Limitation
Limited pre-designed e-commerce features compared to Shopify.
Learning curve for non-designers.
Pricing for advanced features can be expensive.
Comparison to Other Platforms
Shopify: Webflow is better for design-centric businesses, while Shopify is stronger for quick e-commerce setup with advanced sales tools.
WooCommerce: WooCommerce provides more flexibility with plugins and integrations, while Webflow excels in design freedom.
Magento: Magento offers extensive scalability for large-scale e-commerce, whereas Webflow focuses on creative freedom and ease of use.
Industry/Niche-Specific Recommendations
Ideal for creative professionals, agencies, and businesses prioritizing unique, high-quality designs for portfolio sites or small to medium-sized online stores.
Shift4Shop
Shift4Shop, previously known as 3dcart, is an all-in-one e-commerce platform offering a robust set of tools for building and managing an online store, with a focus on cost-effectiveness.
Shift4Shop Pros
Zero transaction fees.
Comprehensive tools, including SEO optimization and marketing features.
Multiple free templates for quick store setup.
Offers unlimited products and storage even on free plans (for U.S. merchants).
Shift4Shop Cons/Limitation
Limited design customization options compared to competitors.
User interface may feel outdated for modern users.
Less intuitive than platforms like Shopify or Wix.
Comparison to Other Platforms
Shopify: Shopify offers a more polished user experience and advanced integrations, but Shift4Shop provides better value for cost-sensitive merchants.
WooCommerce: WooCommerce offers more flexibility, whereas Shift4Shop provides an all-in-one approach.
Magento: Magento is ideal for enterprise businesses, while Shift4Shop targets small to medium-sized operations with lower budgets.
Industry/Niche-Specific Recommendations
Best for cost-conscious small businesses and U.S.-based merchants looking for a budget-friendly Shopify alternative.
PrestaShop
PrestaShop is an open-source e-commerce platform that enables businesses to build highly customized online stores with extensive functionality.
PrestaShop Pros
No licensing fees (open-source).
Flexible customization options through modules and themes.
Multi-language and multi-currency support.
Strong community support with thousands of add-ons available.
PrestaShop Cons/Limitation
Requires technical expertise for installation and management.
Hosting and security must be managed separately by the user.
Costs can add up with premium modules and third-party integrations.
Comparison to Other Platforms
Shopify: Shopify is easier to use, while PrestaShop requires technical knowledge but offers more flexibility.
WooCommerce: PrestaShop is similar in flexibility but has a steeper learning curve.
Magento: Magento offers superior scalability for large stores, whereas PrestaShop caters to medium-scale operations with customization needs.
Industry/Niche-Specific Recommendations
Perfect for mid-sized businesses and international stores requiring multi-language and multi-currency features.
Odoo
Odoo is an integrated suite of business applications, including an e-commerce module, offering end-to-end solutions for managing operations such as CRM, inventory, and accounting.
Odoo Pros
All-in-one solution with seamless integration across business operations.
Highly customizable with a modular approach.
Cost-effective for businesses already using Odoo’s suite of tools.
User-friendly interface with modern design.
Odoo Cons/Limitation
Implementation can be complex for beginners.
Requires technical expertise for customization and scaling.
Fewer out-of-the-box e-commerce features compared to Shopify.
Comparison to Other Platforms
Shopify: Odoo is better suited for businesses requiring integrated tools beyond e-commerce. Shopify is more specialized for online sales.
WooCommerce: WooCommerce excels in flexibility for store creation, while Odoo stands out with its multi-functional approach.
Magento: Magento is focused on e-commerce scalability, while Odoo offers broader business application integration.
Industry/Niche-Specific Recommendations
Ideal for businesses looking for an integrated ERP solution alongside e-commerce, especially in industries like manufacturing, wholesale, and services.
Conclusion
Choosing the right e-commerce platform is critical for any business selling products online. This article discusses a few top alternatives to Shopify, including WooCommerce, BigCommerce, Magento, Wix, and Squarespace. Each platform has its own set of pros and cons, and the best choice will depend on the specific needs and requirements of the business.
Businesses need to research and compare different e-commerce platforms before making a decision. This includes evaluating pricing, features, customization options, scalability, and industry-specific recommendations. By finding the right platform, businesses can improve their online visibility, increase sales, and succeed tremendously.
If you’re using WordPress to manage your website, you might need to delete a theme. This could be because you’re cleaning up old themes you no longer use or want to simplify your site’s backend. Whatever your reasons, removing themes can help make your site more efficient and reduce security risks associated with outdated software.
Before you start deleting anything, it’s crucial to back up your website. This means saving a copy of your site’s content and settings just how they are now. Backing up is like taking a snapshot; if anything goes wrong, you can restore your site to how it was before you made any changes. Always remember, better safe than sorry!
Preparing to Delete a WordPress Theme
Checking the Active Theme
First, you need to find out which theme your website is currently using. This is important because you don’t want to accidentally delete the theme that’s making your website look and function correctly. To check your active theme, log in to your WordPress dashboard, go to the Appearance menu, and click Themes. Here, you’ll see all the themes you’ve installed. The theme that is currently active will have a label that says Active.
It’s crucial not to delete this active theme directly from your website because it will leave your site without a proper design and could cause display or functionality problems. If you want to delete the active theme, you should activate a different one. This way, your website will remain operational and look good while you make the change.
Backing Up Your Website
Backing up your website is like keeping a safety net under your digital presence. If anything goes wrong, you can use this backup to get your site back to how it was before making any changes. You should always back up your files and your database because your files include your themes, plugins, and media. In contrast, your database holds your posts, comments, and settings.
There are many tools and plugins available to help you with backups. Some popular options include UpdraftPlus, BackWPup, and VaultPress. These plugins can automatically back up your site to a location like Dropbox, Google Drive, or their own cloud services. Select one that fits your requirements and budget, and set it up to regularly save your website data. This way, you’re always prepared for any situation.
Steps to Delete a WordPress Theme
Accessing the Theme Directory
To delete a theme, first, you need to get to the right place in your WordPress dashboard. Log in to your dashboard, click on Appearance, and then choose Themes. This will take you to the theme directory, where you can see all the themes that you have installed on your website.
Deleting the Theme
Once you are in the Themes section, follow these steps to safely remove a theme:
Hover over the theme you need to delete, and a Theme Details button will appear. Click on it.
A new window will pop up showing details about the theme. There is a Delete link at the bottom right of this window. Click on this link.
A confirmation window become visible asking if you want to delete the theme. Click OK to confirm and delete the theme.
Suppose you can’t delete the theme through the dashboard, perhaps because the delete option is not available or it gives an error. In that case, you’ll need to try another method.
Using FTP to Delete a Theme
If deleting from the dashboard doesn’t work, you can delete the theme using FTP (File Transfer Protocol), which lets you manage your site’s files directly on the server.
First, you require to connect to your website using FTP software. Enter your website’s FTP address, username, and password. You can get this information from your web hosting provider.
Once connected, navigate to the wp-content/themes folder. Here, you’ll see folders for each theme installed on your site.
Find the folder of the theme you need to delete. Right-click on it and choose Delete from the menu. Confirm the deletion.
Using FTP is straightforward, but be cautious. Deleting the wrong file or folder can disrupt your site, so double-check before removing anything.
These steps will help you safely remove any WordPress theme, whether directly through your WordPress dashboard or using FTP.
Post-Deletion Steps
Checking the Site’s Functionality
After you’ve deleted a theme, it’s important to ensure your website works properly. Start by going through your website like a visitor. Check different pages to see if they load correctly and look for any errors. If everything seems fine, remove the theme without affecting your site’s performance.
If you notice any issues like pages not loading or displaying errors, here’s what you can do:
Clean your browser’s cache & try loading the site again.
If the problem persists, check if the active theme is properly set up and compatible with your WordPress version.
If necessary, restore your website using the backup you made earlier. This will bring everything back to how it was before you deleted the theme.
Cleaning Up Unused Database Entries
Sometimes, themes leave behind data in your website’s database, even after they’re deleted. Cleaning this up can help keep your site running smoothly.
To clean up leftover data:
Consider using a plugin like WP-Optimize or Advanced Database Cleaner. These tools can help you safely remove unnecessary data without damaging your website.
Install and activate the plugin, then follow its instructions to scan and clean your database.
Remember, while cleaning up the database is helpful, it’s optional unless you’re experiencing specific issues that require it. Always back up your website before making any changes to the database. This way, you’re keeping your site safe while ensuring it runs at its best.
In this guide, we’ve explored the steps for safely deleting a WordPress theme, including preparations like backups, the deletion process, and post-deletion checks to ensure your site remains in top shape. Keeping your WordPress site streamlined by removing unused themes can significantly enhance its performance and security. Now might be an excellent opportunity to explore new themes or rethink your website’s design to ensure it remains appealing and functional.
If you need help with your website or are considering a new design, don’t hesitate to contact Chetaru, a Custom WordPress design agency. We’re here to assist you with all your web design needs.
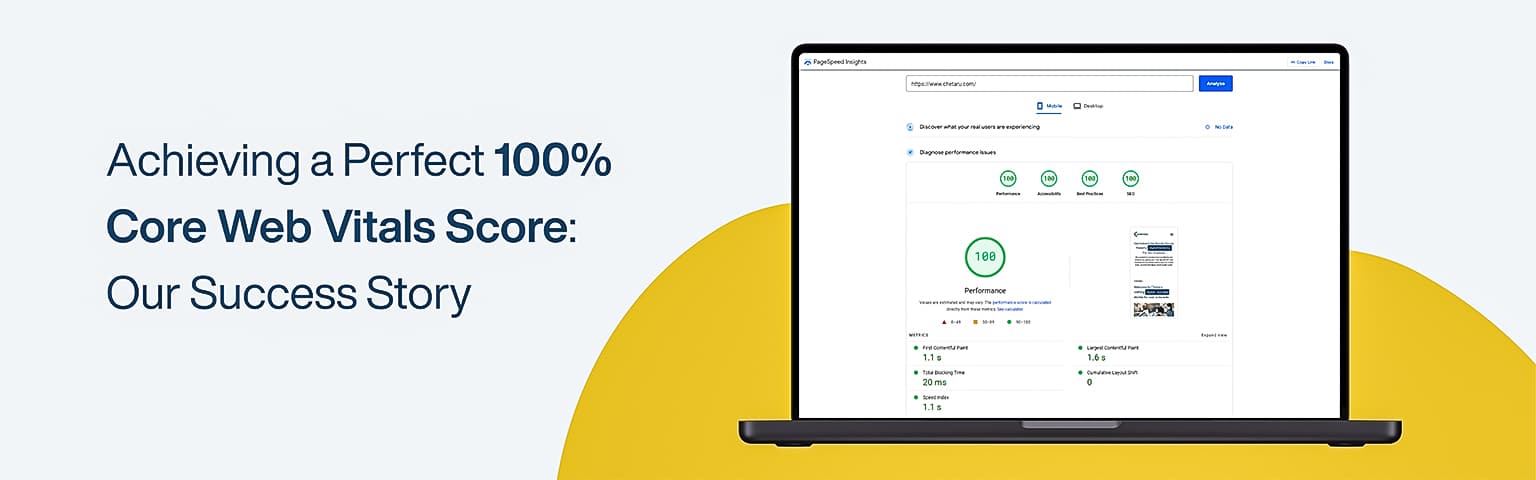
Our website, www.chetaru.com, just hit a perfect 100% score on Core Web Vitals! 🌟 This is a huge milestone for us, reflecting our dedication to providing the best user experience. Before this, our score usually hovered between 95-99%, but we never quite reached that 100% mark on both mobile and desktop. Here’s how we did it and why it matters.
Our Journey to 100%
At WordCamp Europe 2023, I talked to some folks about why our score wasn’t showing up as 100% in the search console. There were several reasons given, but none quite satisfied me. Some suggested our hosting could be an issue, while others pointed to our site’s images or JavaScript. However, we knew our site inside out and felt these weren’t the main problems. Our team decided to dig deeper. We looked at every aspect of our site’s performance and made continuous improvements. We focused on three main areas: Largest Contentful Paint (LCP), First Input Delay (FID), and Cumulative Layout Shift (CLS). These metrics are crucial for user experience and search rankings.
Key Improvements We Made
Largest Contentful Paint (LCP):
We optimized images by using modern formats like WebP.
Implemented lazy loading to delay the loading of offscreen images.
Minimized CSS to speed up the rendering process.
First Input Delay (FID):
Reduced JavaScript execution time by deferring non-essential scripts.
Used web workers to run scripts in the background.
Improved our server response times by optimizing backend processes.
Cumulative Layout Shift (CLS):
Ensured images and ads had explicit size attributes to prevent layout shifts.
Added reserved space for dynamic content like banners.
Improved font loading practices to avoid shifts when fonts load.
The Impact of a 100% Score
Why does this matter? Because Core Web Vitals are crucial for measuring how users experience websites. These metrics directly affect how high-up sites appear in search results and how engaged users are. A perfect score means:
Better Search Rankings: Google rewards sites with good Core Web Vitals by placing them higher in search results.
Enhanced User Experience: Faster load times and smoother interactions make users stay longer and interact more.
Increased Conversions: A seamless user experience encourages visitors to act, whether signing up, buying a product, or contacting us.
Hitting that perfect 100% shows that optimizing for Core Web Vitals isn’t just a wish—it’s totally doable, and it pays off big time!
How We Can Help You Achieve the Same Success
We’re excited to apply the same techniques to our customers’ websites and boost their scores, too. Whether you’re struggling with slow load times, interactivity issues, or layout shifts, we have the expertise to transform your site’s performance.
SEO (Search Engine Optimization) plays a crucial role when building a successful online presence. This is especially true for WordPress websites, which benefit greatly from implementing effective SEO strategies. In this section, we will explore the importance of SEO for WordPress websites and why WordPress is a popular choice for SEO.
Understanding SEO and Its Benefits
SEO involves optimizing your website to upgrade its visibility and ranking on search engine results pages (SERPs). By implementing latest SEO best practices, you can increase organic (non-paid) website traffic, attract potential customers, and enhance your online presence.
The benefits of SEO go beyond just increasing website traffic. Effective SEO can help you:
Improve Brand Visibility: By appearing higher on search engine results, you increase brand visibility and awareness among your target audience.
Drive Targeted Traffic: Through proper keyword targeting and optimization, SEO helps attract users actively searching for the products or services you offer.
Build Credibility and Trust: A well-optimized website that ranks high on search engines is seen as more credible and trustworthy by users.
Enhance User Experience: SEO involves optimizing various aspects of your website, such as website speed, mobile responsiveness, and user-friendly navigation, leading to an improved user experience.
Increase Conversion Rates: When your website ranks high and offers a seamless user experience, visitors will likely convert into customers.
Why WordPress is a Popular Choice for SEO
WordPress is a widely popular content management system (CMS) known for its user-friendly interface and powerful SEO capabilities. Here are some reasons why WordPress is a preferred choice for implementing SEO:
SEO-friendly Architecture: WordPress offers clean and well-structured code, making it easy for search engines to crawl and index the website’s content. Additionally, it provides various SEO plugins and features that simplify the optimization process.
Flexible and Customizable: With thousands of WordPress themes and plugins accessible, you can easily customize your website to meet your SEO needs. These themes and plugins offer features for optimizing headers, meta tags, URLs, and more.
Content Management: WordPress is renowned for its robust content management capabilities, allowing you to create and organize high-quality and relevant content. This is crucial for attracting and engaging your probable audience and improving your search engine rankings.
Regular Updates: WordPress releases updates to enhance security, performance, and SEO capabilities. These updates help ensure that your website adheres to the latest SEO standards and practices.
Large Community Support: WordPress has a vast community of developers, SEO experts, and enthusiasts who actively contribute to its growth. This means you can easily find resources, tutorials, and support to optimize your WordPress website for search engines.
By leveraging the power of SEO and utilizing the SEO-friendly features of the WordPress platform, you can dominate search engines and drive significant organic traffic to your website. Your custom WordPress website can thrive in the competitive online landscape with proper optimization techniques and ongoing efforts.
Optimizing Your WordPress Website for Search Engines
Optimizing various aspects of your site is important to ensure that your custom WordPress website is simply discoverable by search engines and ranks good in search results. This section will discuss three key areas to focus on:
Choosing an SEO-friendly theme.
Optimizing website structure and navigation.
Creating high-quality and relevant content.
Choosing an SEO-friendly Theme
The theme you choose for your WordPress website’s SEO performance is crucial. An SEO-friendly theme has clean code, optimized structure, and responsive design. This ensures that search engines can effortlessly crawl and index your website, improving visibility.
Consider page loading speed, mobile responsiveness, and customizable options when selecting a theme. Look for regularly updated themes to ensure compatibility with the latest WordPress versions and plugins. Additionally, prioritize themes that offer SEO-specific features, such as built-in schema markup or compatibility with popular SEO plugins.
For more information on WordPress themes and their impact on SEO, check out our article on wordpress themes.
Optimizing Website Structure and Navigation
An organized website structure and intuitive navigation are essential for users and search engines. A well-structured website allows search engines to understand the hierarchy and relationship between different pages, making indexing and ranking your content easier.
To optimize your website structure:
Create a logical hierarchy of pages and organize them into relevant categories and subcategories.
Ensure your navigation menu is clear, concise, and easy to navigate.
Use descriptive and keyword-rich anchor text for internal links within your content, helping search engines understand the context and relevance of each page.
For more tips on optimizing your website structure and navigation, check out our article on wordpress website.
Creating High-Quality and Relevant Content
Quality content is the piller of any successful SEO strategy. When creating content for your WordPress website, focus on providing valuable information that meets the requirements of your target audience. High-quality content gets visitors and encourages them to stay on your site, reducing bounce rates and improving engagement metrics.
Ensure your content is well-written, informative, and optimized with relevant keywords. Use headings and subheadings to form your content and make it easier to read. Incorporate internal links to relevant articles or pages within your website to guide visitors to related content. This also helps search engines understand the interconnectedness of your content.
Remember to regularly update your content, adding new information, and keeping it fresh. This indicates to search engines that your website is active and relevant. For more guidance on content creation, check out our article on wordpress blog.
By optimizing your WordPress website in these areas, you lay a solid foundation for effective SEO. However, there are additional techniques and strategies to explore, such as on-page SEO, technical SEO, and SEO plugins. Stay tuned as we dive into these topics in the upcoming sections.
On-Page SEO Techniques for WordPress
Implementing on-page SEO techniques is essential to improve the visibility of your WordPress website in search engine results. These techniques focus on optimizing various elements within your website to make it more search engine-friendly. In this section, we will explore three key on-page SEO techniques for WordPress:
Utilizing proper title tags and headings
Optimizing meta tags and descriptions
Using SEO-friendly URLs and permalinks
Utilizing Proper Title Tags and Headings
Title tags and headings play a crucial role in SEO as they provide context about the content on your web pages. It’s important to ensure that your title tags accurately reflect the topic of each page and incorporate relevant keywords. This helps search engines acknowledge the content and improves the chances of your website appearing in relevant search results.
In WordPress, you can set the title tag for each page using an SEO plugin or by editing the page’s HTML directly. Additionally, structuring your content with proper headings (H1, H2, H3, etc.) helps organize the information and makes it easier for search engines to recognize the hierarchy of your content. Utilize relevant keywords in your headings to further enhance the SEO value of your pages.
Optimizing Meta Tags and Descriptions
Meta tags and descriptions provide concise summaries of the content on your web pages. These factors are displayed in search engine results and can greatly influence whether users click through to your website. When optimizing meta tags and descriptions, it’s important to include relevant keywords and create compelling, informative descriptions that attracts users to visit your site.
WordPress offers various SEO plugins that simplify the process of optimizing meta tags and descriptions. These plugins allow you to customize the metadata for each page, ensuring that it aligns with the content and keywords. By crafting engaging meta tags and descriptions, you can boost the click-through rate from search engine results and gain huge organic traffic to your website.
Using SEO-friendly URLs and Permalinks
URL structure is an often overlooked but crucial aspect of on-page SEO. Using SEO-friendly URLs can improve the visibility of your web pages in search results and make it easier for search engines to appreciate your content. When creating URLs for your WordPress website, consider the following best practices:
Keep URLs concise and descriptive, incorporating relevant keywords.
Use hyphens (-) to separate words, rather than underscores or spaces.
Avoid using special characters or excessive numbers in your URLs.
Customize your permalink structure in WordPress to reflect your content hierarchy.
By using SEO-friendly URLs and permalinks, you enhance the readability of your website’s URLs for both search engines and human visitors. This enhance the overall user experience and can positively impact your search engine rankings.
Implementing these on-page SEO techniques in your WordPress website can significantly enhance its visibility and appeal to search engines. Remember to choose an SEO-friendly theme, optimize your website structure and navigation, and create high-quality and relevant content to further boost your SEO efforts. For more information on optimizing your WordPress website, check out our articles on wordpress themes and wordpress website.
Technical SEO for WordPress
In addition to optimizing the content and structure of your WordPress website, it’s important to focus on technical SEO aspects to ensure optimal performance in search engine rankings. This section will cover key technical SEO techniques for WordPress, including website speed and performance optimization, implementing XML sitemaps, and managing redirects and broken links.
Optimizing Website Speed and Performance
Website speed and performance play a vital part in user experience and SEO. A slow-loading website can negatively impact your search engine rankings and result in higher bounce rates. Here are some techniques to optimize website speed and performance:
Enable caching: Utilize caching plugins to store static versions of your webpages, reducing the time it takes to load.
Optimize images: Compress and resize images to decrease file size without sacrificing image quality. This can significantly improve page load times.
Minify CSS and JavaScript: Remove unnecessary characters and whitespace from your CSS and JavaScript files to reduce their file size.
Use a content delivery network (CDN): A CDN helps deliver your website content from servers closer to your visitors, resulting in faster loading times.
Selecting a reliable web hosting provider: Select a hosting provider with excellent performance, reliable uptime, and fast server response times.
Implementing these optimizations will improve user experience and enhance your website’s appearance in search engine results.
Implementing XML Sitemaps
An XML sitemap is a file that create lists of all the pages on your website, helping search engines analyze the structure and organization of your content. By properly implementing XML sitemaps, you can ensure that search engines crawl and index your pages more efficiently. Here are some best practices for implementing XML sitemaps:
Use a plugin: WordPress offers various plugins that can generate XML sitemaps automatically, such as the Yoast SEO plugin or the Google XML Sitemaps plugin.
Submit your sitemap to search engines: Once you have generate your XML sitemap, submit it to search engines like Bing Webmaster Tools and Google Search Console to facilitate the crawling and indexing process.
By providing search engines with a clear roadmap of your website’s structure, you increase the likelihood of your content being discovered and ranked appropriately.
Managing Redirects and Broken Links
Redirects and broken links can impact user experience and SEO. When a page on your website is moved or deleted, it’s crucial to redirect visitors to the correct page or provide them with relevant alternative content. Here’s how you can effectively manage redirects and broken links:
Implement 301 redirects: Use 301 redirects to new URLs from Old URLs, preserving the link equity and ensuring a seamless user experience.
Regularly check for broken links: Use plugins or online tools to find broken links and fix them promptly. Broken link checker plugins can help automate this process.
By efficiently managing redirects and fixing broken links, you can maintain a smooth user experience, improve SEO, and ensure that search engines can properly crawl and index your website.
Implementing technical SEO techniques for your WordPress website is vital for improving its visibility in search engine rankings. By optimizing website speed and performance, implementing XML sitemaps, and managing redirects and broken links, you can create a solid foundation for a search engine-friendly website.
Plugins for WordPress SEO
Plugins can be incredibly helpful in streamlining the process and enhancing your SEO efforts. This section will explore the importance of using plugins for WordPress SEO and discuss some popular options, essential features to look for, and best practices for plugin configuration.
Popular SEO Plugins for WordPress
Several SEO plugins are available for WordPress, each offering unique features to improve your website’s visibility in search engine results. Some popular options include:
Plugin Name
Description
Yoast SEO
A comprehensive SEO plugin that helps optimize content, meta tags, and XML sitemaps.
All in One SEO Pack
An all-inclusive plugin for optimizing title tags, meta descriptions, and generating XML sitemaps.
Rank Math
A powerful SEO plugin featuring advanced functionality such as keyword optimization and schema markup support.
These plugins offer a various features to optimize your WordPress website, from on-page SEO elements to technical optimizations. Before choosing a plugin, consider your specific SEO needs and research the features each plugin provides to ensure it aligns with your requirements.
Must-Have SEO Plugin Features
When selecting an SEO plugin for your WordPress website, there are certain features that you should prioritize. These features can help you enhance your website’s search engine visibility and improve overall SEO performance. Some must-have SEO plugin features include:
Title and Meta Tag Optimization: The ability to customize and optimize title tags, meta descriptions, and other on-page elements is essential for improving click-through rates and search engine rankings.
XML Sitemap Generation: An XML sitemap helps search engines to analyze the structure of your website and index your content more efficiently. Look for a plugin that can automatically create and update XML sitemaps.
Schema Markup Support: Schema markup provides additional context to search engines, allowing them to display rich snippets in search results. Look for a plugin that supports schema markup implementation.
Social Media Integration: Look for a plugin that permits you to optimize your content for social media sharing and provides social media metadata customization options.
Incorporating these features into your SEO plugin allows you to optimize your WordPress website for better search engine visibility and user experience.
Best Practices for Plugin Configuration
Once you’ve selected an SEO plugin for your WordPress website, it’s important to configure it correctly to maximize its effectiveness. Here are some best practices for plugin configuration:
General Settings: Configure the basic settings of the plugin, such as site-wide title and meta settings, default social media metadata, and XML sitemap generation options.
Permalink Settings: Ensure your plugin is set to optimize your permalinks, making them SEO-friendly and descriptive.
Keyword Optimization: Use the plugin’s keyword optimization features, such as keyword analysis and recommendations, to improve your content’s relevancy and search engine rankings.
Advanced Settings: Explore the advanced settings of the plugin, which may include options for controlling indexing, canonical URLs, and other technical aspects of SEO.
Remember, while plugins can be powerful tools for WordPress SEO, using them wisely and not solely relying on them is important. They should be used with other SEO best practices, such as creating high-quality and relevant content, optimizing website structure, and building quality backlinks.
By choosing the right SEO plugin, utilizing its features effectively, and following best practices for configuration, you can enhance your WordPress website’s visibility in search engine results and dominate search engines with WordPress SEO.
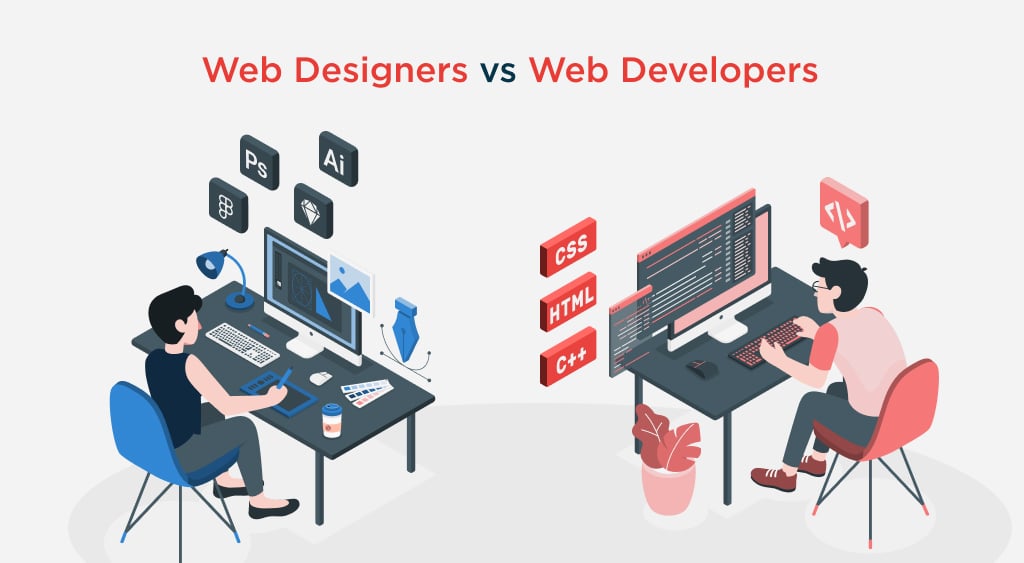
Web designers and developers are the dynamic duos behind creating exceptional websites in today’s digital landscape. While the terms may sound interchangeable, understanding the distinct roles and fostering effective collaboration between these professionals is vital to achieving outstanding results. In this blog, we will explore the world of web designers and web developers, uncovering their unique contributions and emphasizing the importance of bridging the gap between them.
In web development, web designers and developers are the masterminds responsible for crafting captivating and functional websites. Web designers bring aesthetics and user experience to the forefront, employing their artistic skills to create visually appealing interfaces. On the other hand, web developers transform those designs into reality through coding and programming, ensuring seamless functionality and interactivity.
Understanding the roles of web designers and web developers is crucial to appreciating their collaborative efforts. Web designers excel in visual elements, user experience, and creativity, while web developers possess technical expertise in coding, programming, and problem-solving. By recognizing their strengths and the value they bring, teams can foster effective collaboration, resulting in exceptional websites that seamlessly blend form and function.
Throughout this blog, we will explore the similarities and differences between web designers and web developers, exploring their respective approaches and skill sets. We will highlight the significance of collaboration and effective communication between these two roles, sharing strategies for fostering better teamwork. Additionally, we will discuss the benefits of bridging the gap between web designers and web developers, promoting a culture of learning and growth. Finally, we will touch upon the future of web design and development, considering emerging trends and technologies that continue to shape the industry.
By the end of this blog, you will gain a comprehensive understanding of the dynamic interplay between web designers and web developers, realizing the immense potential that collaboration holds in creating unique websites.
Defining Web Designers and Web Developers
In the vast landscape of web development, two key players take center stage: web designers and developers. These professionals bring different skills, perspectives, and expertise, collectively shaping our digital experiences daily. To truly appreciate their contributions and foster effective collaboration, it is essential to understand the roles of web designers and web developers.
Web designers are creative visionaries who craft visually compelling and user-centric interfaces. Their focus extends beyond mere aesthetics; they strive to create intuitive user experiences that captivate and engage visitors. Armed with skills in graphic design, typography, color theory, and layout principles, web designers employ their artistic prowess to bring websites to life. They carefully consider visual elements such as color schemes, imagery, and typography, ensuring that each component harmonizes to convey the desired message and evoke the intended emotions.
Web developers, on the other hand, are the technical maestros who transform designs into functional realities. They are the architects of the digital world, building the foundations upon which websites stand. With coding, programming, and problem-solving expertise, web developers bring interactivity, functionality, and responsiveness to websites. Proficient in languages like HTML, CSS, JavaScript, and backend frameworks, they breathe life into the designs created by web designers. They meticulously write lines of code, ensuring that every feature, from interactive forms to dynamic content, operates seamlessly and delivers the desired user experience.
The Role of a Web Designer:
Web designers are visionary artists who bring creativity and aesthetics to the forefront of website development. They deeply understand user experience and strive to create visually appealing interfaces that engage and delight visitors. A web designer’s role involves the following:
Focus on aesthetics, user experience, and visual elements:
Web designers excel in crafting visually stunning websites that leave a lasting impression on users. They pay meticulous attention to layout, color schemes, imagery, and typography, ensuring the visual elements harmoniously convey the desired message and evoke the intended emotions.
Skills in graphic design, typography, color theory, etc.:
A web designer’s toolkit comprises a wide range of skills and knowledge. They are proficient in graphic design software, leveraging their expertise to create captivating visuals and illustrations. They understand the principles of typography, selecting fonts that enhance readability and contribute to the overall design. Additionally, they have a solid grasp of color theory, utilizing appropriate color palettes to evoke specific moods and create visual hierarchy.
The Role of a Web Developer:
Web developers are technical wizards who bring web designs to life through coding and programming. Their focus lies in ensuring functionality, interactivity, and optimal performance. A web developer’s role involves the following:
Emphasis on coding, programming, and functionality:
Web developers possess a deep understanding of coding languages and frameworks. They utilize their expertise in HTML, CSS, JavaScript, and other programming languages to transform design mockups into fully functional websites. They ensure that every element, from navigation menus to contact forms, works seamlessly and provides the intended functionality.
Skills in HTML, CSS, JavaScript, backend languages, etc.:
Web developers are well-versed in HTML, the markup language that forms the backbone of web pages. They utilize CSS to style and position elements, creating visually appealing layouts. JavaScript is their go-to language for adding interactivity and dynamic features to websites. In addition, they may have proficiency in backend languages such as Python, PHP, or Ruby, which enable them to handle data storage, server-side logic, and database integration.
By combining their technical expertise with a deep understanding of user behavior, web designers and developers collaborate to create websites that blend captivating aesthetics with robust functionality. Their complementary skills and collaborative efforts form the cornerstone of successful web development projects.
Similarities and Differences
Web designers and web developers are two vital pillars, each bringing unique expertise and perspectives. While their roles may seem distinct, there exists a captivating interplay of similarities and differences between these professionals. Understanding their common ground and the contrasting aspects of their approaches and skill sets is essential to fostering effective collaboration and achieving outstanding outcomes. This section will explore the fascinating similarities and differences between web designers and web developers, shedding light on the harmonious synergy that arises when these two roles converge.
Highlighting the Common Ground between Web Designers and Web Developers
When it comes to creating and improving websites, web designers and web developers share common ground in their pursuit of excellence. By exploring this shared territory, we can appreciate the synergistic collaboration between these two roles, ultimately leading to exceptional end products. Here are some critical points of convergence:
Both contribute to website creation and improvement
Web designers and web developers play integral roles in the web development process. Designers bring their artistic vision and expertise in crafting visually appealing interfaces, while developers leverage their technical prowess to transform those designs into functional websites. They combine their skills and knowledge to create websites that resonate with users and fulfill the project’s objectives.
Collaborative efforts for a successful end product
Effective collaboration between web designers and developers is crucial for achieving a successful end product. They work hand in hand, exchanging ideas, feedback, and insights to align their visions and ensure the website’s success. Through open communication, mutual understanding, and respect for each other’s expertise, they navigate challenges, make informed decisions, and ultimately create a website that exceeds expectations.
Exploring the Differences in Their Approaches and Skill Sets
While web designers and developers converge in their pursuit of unique websites, their approaches and skill sets differ significantly. These differences bring unique perspectives to the table, enriching the collaborative process. Let’s delve into the contrasting aspects:
Designers’ focus on visual elements vs. developers’ emphasis on code
Web designers greatly emphasize visual elements, user experience, and aesthetics. They employ their creativity and expertise in graphic design, typography, color theory, and layout principles to create visually beautiful interfaces. In contrast, web developers prioritize the technical aspects of website development, focusing on coding, programming, and ensuring functionality. Their expertise lies in languages like HTML, CSS, JavaScript, and backend frameworks.
Designers’ creativity vs. developers’ technical problem-solving
Web designers harness their creativity and imagination to conceptualize and visualize a website’s overall look and feel. They meticulously craft the user interface, considering user behavior, usability, and engagement. On the other hand, web developers channel their problem-solving skills to translate those designs into functional websites. They tackle technical challenges, optimize performance, and ensure the website functions seamlessly across different platforms and devices.
By recognizing and appreciating the differences between web designers and web developers, teams can foster a collaborative environment that capitalizes on each role’s strengths. When designers and developers embrace their unique perspectives and work synergistically, the result is a harmonious fusion of creativity, aesthetics, and technical excellence.
Collaboration and Communication
Collaboration and communication between web designers and web developers are paramount to the success of any project. The dynamic interplay between these roles, each with unique expertise, forms the foundation of exceptional website creation. Effective collaboration ensures that the designers’ vision harmoniously merges with the technical execution of the developers, resulting in remarkable digital experiences. This blog post will explore the significance of effective collaboration and communication, address the challenges that may arise from miscommunication, and provide strategies to foster better teamwork between designers and developers.
Stressing the Importance of Effective Collaboration between Designers and Developers
Effective collaboration is the linchpin that holds together the web development process. By highlighting the importance of collaboration, we can establish a shared understanding of its significance and lay the groundwork for successful project outcomes. The critical reasons for emphasizing collaboration are:
Maximizing the combined expertise: Web designers bring their creative vision and user-centric approach, while web developers contribute their technical skills and problem-solving abilities. By collaborating effectively, these professionals can leverage their strengths and create a synergistic fusion that enhances the final product.
Streamlining the development process: Collaboration between designers and developers ensures a seamless workflow where design concepts seamlessly transition into functional websites. By working hand in hand, they can align their goals, exchange ideas, and make informed decisions that lead to efficient development cycles.
Discussing Challenges Arising from Miscommunication or Lack of Understanding
Despite the importance of collaboration, challenges can arise when miscommunication or a lack of understanding prevails. Identifying and addressing these challenges is essential for fostering effective teamwork. Common challenges include:
Divergent interpretations: Misalignment between designers and developers may lead to different interpretations of project requirements, resulting in inconsistencies or deviations from the intended vision.
Technical constraints: Designers may only sometimes understand the technical limitations and possibilities, leading to impractical or difficult-to-implement design concepts.
Providing Strategies for Fostering Better Collaboration and Communication
To overcome challenges and ensure smooth collaboration, implementing strategies for effective communication is vital. The following approaches can foster better collaboration between designers and developers:
Regular meetings and discussions: Establish a regular cadence of meetings to facilitate open communication channels. These meetings allow designers and developers to share progress, exchange ideas, and promptly address concerns or challenges.
Sharing design mockups and code prototypes: Designers can provide developers with detailed design mockups and prototypes, enabling a clear visualization of the intended user interface. Conversely, developers can share code prototypes to showcase technical possibilities and constraints, fostering mutual understanding.
Encouraging feedback and constructive criticism: Cultivate an environment where designers and developers feel comfortable providing feedback and constructive criticism. This allows for continuous improvement and refinement of design and development processes, leading to higher-quality outcomes.
Bridging the Gap: Enhancing Collaboration
In web development, bridging the gap between web designers and developers is the key to unlocking the full potential of a project. These two roles, with their distinct skill sets and perspectives, form the backbone of successful website creation. By fostering a culture of collaboration and promoting cross-training, teams can harness the combined expertise of designers and developers, resulting in exceptional digital experiences. Now, we will explore the benefits of bridging the gap between designers and developers, discuss the value of cross-training, and delve into strategies for fostering a collaborative team environment.
Highlighting the Benefits of Bridging the Gap between Designers and Developers
Bridging the gap between designers and developers brings many benefits to web development. By recognizing and leveraging the strengths of each role, teams can achieve remarkable outcomes. Some key benefits include:
Holistic and user-centric approach: When designers and developers collaborate closely, they ensure that the user’s needs and expectations are at the forefront of the project. Designers provide insights into user experience and aesthetics, while developers contribute their technical expertise to create functional and optimized solutions.
Efficient and streamlined workflows: Bridging the gap between designers and developers eliminates unnecessary delays and rework. By fostering collaboration, teams can align their goals, share insights, and iterate efficiently, resulting in faster project completion and improved productivity.
Discussing the Value of Cross-Training and Learning from Each Other
Cross-training and learning from one another’s expertise are pivotal in bridging the gap between designers and developers. By expanding their knowledge and understanding of each other’s disciplines, both parties can enhance their skills and contribute more effectively to the project. Some benefits of cross-training include:
Improved communication and mutual understanding: Learning about each other’s roles and processes allows designers and developers to communicate more effectively. It facilitates a common language, minimizing misinterpretations and promoting more transparent and efficient collaboration.
Enhanced problem-solving capabilities: Cross-training empowers designers and developers to approach challenges from multiple perspectives. By understanding the technical aspects, designers can create feasible and optimized designs for development. Similarly, developers can gain insights into design principles, enabling them to provide valuable input during the development process.
Exploring Ways to Foster a Culture of Collaboration within the Team
Creating a collaborative team environment is essential for bridging the gap between designers and developers. The following strategies can foster a culture of collaboration within the team:
Organizing joint workshops or training sessions: Arrange seminars or sessions where designers and developers can learn about each other’s processes, tools, and methodologies. This cross-pollination of knowledge promotes a shared understanding and appreciation for each other’s work.
Encouraging team-building activities: Foster a sense of camaraderie by organizing team-building activities. These activities range from informal outings to collaborative project exercises, strengthening bonds and facilitating open communication.
Promoting open dialogue and knowledge sharing: Encourage team members to talk and share their expertise openly. Establish platforms or channels for knowledge sharing where designers and developers can exchange insights, seek feedback, and collaborate on problem-solving.
The Future of Web Design and Development
The web design and development industry constantly evolves, driven by emerging trends and technological advancements. As we look ahead, it becomes increasingly crucial for web designers and developers to stay attuned to these changes and adapt their approaches accordingly. Now, we will explore the future of web design and development, touching upon the industry’s emerging trends and technologies. We will delve into the impact of artificial intelligence (AI), responsive design, and user experience (UX) while emphasizing the need for continued collaboration and adaptation in this dynamic landscape.
Touching upon Emerging Trends and Technologies Shaping the Industry:
The future of web design and development is marked by exciting advancements reshaping how we create and experience websites. Some of the key trends and technologies that are driving this transformation include:
AI-powered web experiences: Artificial intelligence is revolutionizing the web development landscape, offering new opportunities for personalized and dynamic user experiences. AI algorithms can analyze user behavior, adapt content, and deliver customized recommendations, enhancing engagement and conversion rates.
Responsive design and mobile-first approach: With the proliferation of mobile devices, responsive design has become necessary. Websites must be optimized for various screen sizes and devices, ensuring a seamless user experience across platforms. The mobile-first approach emphasizes designing for mobile devices first, prioritizing simplicity, speed, and user-friendly interfaces.
Discussing the Impact of AI, Responsive Design, and User Experience:
The advent of AI, the dominance of responsive design, and the focus on user experience reshape the web design and development landscape. These factors have a profound impact on the way websites are built, experienced, and perceived:
AI-driven personalization: AI-powered technologies enable websites to tailor content, product recommendations, and user interfaces based on individual preferences and behavior. This level of personalization enhances user engagement, fosters brand loyalty, and drives conversions.
Responsive design for optimal user experience: Responsive design ensures that websites adapt seamlessly to different screen sizes and devices, providing a consistent and user-friendly experience. With more users accessing the web on mobile devices, responsive design has become paramount for success in the digital landscape.
Highlighting the Need for Continued Collaboration and Adaptation:
Collaboration and adaptation remain fundamental as the web design and development industry evolves. The following points emphasize the importance of these aspects:
Collaboration between designers and developers: As technologies and design principles evolve, collaboration between designers and developers becomes increasingly crucial. By fostering a collaborative mindset, sharing insights, and maintaining open lines of communication, teams can harness the collective creativity and technical expertise needed to stay ahead of the curve.
Adaptation to changing user expectations: User expectations continually evolve, and web designers and developers must adapt to meet these changing needs. Staying up-to-date with emerging trends, technologies, and design practices enables professionals to create websites that resonate with users and deliver exceptional experiences.
Conclusion
This blog has explored the dynamic relationship between web designers and developers, highlighting the importance of collaboration and each role’s distinct contributions. Let’s recap the key points discussed throughout this journey.
We began by defining the roles of web designers and web developers, understanding their focus on aesthetics, user experience, and visual elements versus coding, programming, and functionality, respectively. We then delved into the similarities and differences between these roles, emphasizing their shared goal of creating exceptional websites while acknowledging their divergent approaches and skill sets.
The blog also underscored the significance of effective collaboration and communication between web designers and web developers. We explored the challenges that can arise from miscommunication or a lack of understanding, and we provided strategies to foster better collaboration, including regular meetings, sharing design mockups and code prototypes, and promoting feedback and constructive criticism.
Moreover, we discussed the benefits of bridging the gap between designers and developers, recognizing the value of cross-training and learning from each other’s expertise. By embracing this collaborative mindset, teams can unlock the full potential of their combined skills and create holistic, user-centric solutions.
Looking ahead to the future of web design and development, we touched upon emerging trends and technologies such as AI, responsive design, and user experience. We emphasized the need for continued collaboration and adaptation to stay ahead in this evolving landscape.
In the ever-evolving digital landscape, establishing a strong online presence has become imperative for businesses of all sizes. A crucial aspect of this endeavor is designing and developing a website that effectively represents a brand’s identity and engages its target audience. However, when it comes to website design, businesses often face a critical decision: should they opt for a bespoke design or choose a template-based approach?
“The Battle of Website Design: Bespoke vs. Template-Based” delves into this fundamental question and explores the advantages and drawbacks of each approach. This comprehensive analysis aims to help businesses make an informed choice that aligns with their unique requirements and goals.
While template-based designs offer convenience and affordability, bespoke designs provide unparalleled customization and tailor-made solutions. This blog post aims to shed light on the distinctive characteristics of each approach, enabling businesses to understand the implications and make a decision that suits their specific needs.
Join us on this insightful journey as we compare the strengths and weaknesses of bespoke and template-based website design. By the end of this exploration, you will have a comprehensive understanding of the key factors to consider when embarking on the website design journey and be equipped with the knowledge to choose the approach that best serves your business objectives.
Let’s dive into the battle and uncover the secrets behind successful website design – where the bespoke and template-based approaches collide!
Understanding Bespoke Website Design
Bespoke website design refers to creating a custom website tailored specifically to meet a business’s unique needs, goals, and branding. Unlike template-based designs that rely on pre-designed layouts and structures, bespoke design involves a meticulous process of designing and developing a website from scratch.
The term “bespoke” originates from the world of tailoring, where it refers to custom-made clothing to fit an individual’s specific measurements and preferences. Similarly, in the context of website design, bespoke design offers a tailor-made solution built to align with a business’s specific requirements and objectives.
Bespoke website design begins with a thorough understanding of the business, its target audience, and its branding. The design process involves collaboration between the business and a team of web designers and developers who work closely to create a unique online presence. The team takes into consideration various factors such as the brand’s visual identity, user experience, functionality requirements, and desired features.
Unlike template-based designs, where businesses select a pre-designed layout and make minor modifications, bespoke design allows for complete creative freedom. Every aspect of the website, including the layout, color scheme, typography, and imagery, can be customized to reflect the brand’s identity and create a cohesive visual experience. This level of customization ensures that the website stands out from competitors and creates a lasting impression on visitors.
Furthermore, bespoke website design offers the advantage of tailored user experience. The website can be designed to optimize the user journey, making it intuitive and engaging for visitors. Elements such as navigation, content organization, and interactive features can be strategically implemented to guide users through the website and encourage desired actions, such as making a purchase or submitting a contact form. By tailoring the user experience to meet the specific needs and preferences of the target audience, bespoke design enhances user satisfaction and increases the likelihood of achieving business goals.
Another significant benefit of bespoke website design is its scalability and flexibility. As businesses evolve and grow, their website needs may change. A bespoke website is designed to accommodate future expansion and adapt to evolving requirements. Whether it’s adding new pages, integrating additional functionalities, or incorporating third-party systems, the website can be easily modified and extended without sacrificing its design integrity. This scalability ensures that the website remains relevant and effective in meeting the changing demands of the business.
Advantages of bespoke design
Uniqueness and brand identity: One of the primary advantages of bespoke website design is the ability to create a truly unique website. It allows businesses to stand out from their competitors by incorporating brand identity elements such as logos, color palette, typography, and imagery into the design. A bespoke website reflects the brand’s personality, values, and story, helping to create a strong and memorable impression on visitors.
Tailored user experience: With bespoke design, businesses have full control over the user experience. The website can be designed and optimized to provide visitors with a seamless and intuitive journey. Elements such as navigation, layout, and content structure can be tailored to align with the target audience’s preferences and behaviors. This personalized user experience enhances engagement, encourages conversions, and fosters a positive brand perception.
Scalability and flexibility: Bespoke websites are built with scalability and flexibility. They can easily accommodate future growth, expansion, and evolving business needs. A bespoke website can be modified and extended as a business evolves to include additional functionalities, features, or content without major disruptions. This adaptability ensures that the website remains effective and aligned with the changing requirements of the business.
Exploring Template/Theme Based Design
Template-based website design refers to using pre-designed templates as the foundation for creating a website. These templates are typically developed by professional designers and made available for purchase or download. Instead of building a website from scratch, businesses can select a template that suits their needs and modify it to some extent to reflect their branding and content.
The template-based design offers several advantages, including cost-effectiveness and time efficiency. Since the templates are pre-designed and readily available, businesses can save both time and money compared to the custom development process of bespoke design. Templates often come with pre-built layouts, color schemes, typography choices, and basic functionalities, allowing businesses to establish an online presence quickly.
One of the key benefits of template-based design is its simplicity and ease of use. The templates are designed to be user-friendly, even for individuals without extensive technical knowledge or design skills. Website builders and content management systems (CMS) like WordPress often provide drag-and-drop functionality or intuitive interfaces, making it easy to create a custom WordPress website design and update its content and design elements.
Another advantage of template-based design is the wide variety of options available. There are numerous templates available for different industries, niches, and purposes. Businesses can choose a template that aligns with their specific needs, whether it’s an e-commerce website, a portfolio site, a blog, or a corporate website. Templates also come in various styles and aesthetics, allowing businesses to find a design that matches their brand identity to some extent.
However, template-based design does have limitations. Since templates are pre-designed and used by multiple users, creating a website that looks generic or similar to other websites using the same template is risky. While businesses can customize certain aspects such as colors, images, and content, the overall structure and layout remain the same. This lack of uniqueness may not effectively differentiate the business from its competitors.
Additionally, template-based design may have limitations in terms of scalability and customization. While some templates offer flexibility and options for customization, there are inherent constraints in modifying the template’s structure or adding advanced functionalities. This can be a drawback for businesses with specific or complex requirements that go beyond the capabilities of the chosen template.
Key Differences Between Bespoke and Template-Based Design
Bespoke Design
Template-Based Design
Customization
Fully customizable, tailored to specific business needs
Limited customization options within template limits
Uniqueness
Unique and distinct website design
Possibility of generic or similar-looking websites
Brand Identity
Reflects the brand identity and personality
Limited ability to fully align with brand identity
User Experience
Limitations in the modifying template structure
Limited flexibility in optimizing user experience
Scalability and Flexibility
Highly scalable and flexible for future growth
Less technical expertise is required for customization
Development Time
Tailored user experience to meet the target audience
Faster development due to pre-designed templates
Development Cost
Higher cost due to custom design and development
Lower cost due to pre-designed templates
Technical Expertise
Requires technical expertise for custom development
Less technical expertise required for customization
Unique Features
Ability to incorporate unique features and functionalities
Limited options for advanced or specific features
Update and Maintenance
Potential ease of updates and maintenance
Potential limitations in updating or modifying template-based elements
Factors to Consider When Choosing the Right Approach : Bespoke or Template
Budget: Evaluate your budgetary constraints and determine how much you are willing to invest in your website design. Bespoke design typically requires a higher budget due to its custom nature, while the template-based design offers a more cost-effective solution.
Timeframe: Consider your desired timeline for launching your website. If you have a tight deadline and need a website quickly, a template-based design can be faster since the templates are pre-designed and readily available. Bespoke design usually takes more time due to the custom development process.
Uniqueness: Assess the importance of having a unique and distinct online presence. If standing out from competitors and aligning with your brand identity is crucial, the bespoke design provides greater flexibility for customization and uniqueness. Template-based design, on the other hand, may result in a website that looks similar to others using the same template.
Customization Needs: Determine the level of customization you require for your website. If you have specific design preferences, unique features, or complex functionalities, the bespoke design allows for greater customization to meet your specific requirements. The template-based design may have limitations in modifying the template structure or adding advanced functionalities.
Technical Expertise: Evaluate your technical expertise or the expertise of your team. Bespoke design often requires more technical knowledge for custom development. In contrast, template-based design platforms or CMSs may offer user-friendly interfaces and require less technical expertise for customization and maintenance.
Scalability and Future Growth: Consider your website’s future plans and scalability requirements. If you anticipate significant growth or foresee the need for frequent updates and modifications, the bespoke design provides better scalability and flexibility to accommodate future changes. The template-based design may have limitations in adapting to evolving needs.
Support and Maintenance: Assess the level of support and maintenance required for your website. Template-based designs often come with support from the template provider or a community of users, making it easier to troubleshoot issues. With the bespoke design, ongoing support and maintenance may require a dedicated team or web development agency.
User Experience and Target Audience: Understand your target audience and the importance of tailored user experience. Bespoke design allows for a more customized user experience, optimizing navigation, content structure, and interactions to meet your audience’s needs and preferences. The template-based design may have limitations in tailoring the user experience to a granular level.
In conclusion, the battle between bespoke and template-based website design approaches ultimately boils down to your business’s unique needs and goals. Understanding the differences and considering key factors such as budget, customization, scalability, and user experience will help you make an informed decision.
If you’re seeking a tailored online presence that captures the essence of your brand, engages your target audience, and accommodates future growth, bespoke website design may be the ideal choice. It offers limitless customization possibilities and a unique identity that distinguishes you from the competition. Chetaru, a leading web design agency, specializes in bespoke website design and can bring your vision to life.
Take the next step toward a remarkable online presence by exploring the benefits of bespoke website design with Chetaru. Visit our bespoke design services and discover how we can create a website that truly reflects your brand’s identity and drives your business forward.
Remember, your website is the digital face of your business. Make it stand out, make it memorable, and make it uniquely yours with bespoke website design.
Don’t settle for the ordinary. Choose bespoke. Choose Chetaru
Looking to create a fantastic website for your clients but don’t know much about how to code? Developing a functional and engaging website can be challenging without a background in web design. It’s hard to know what plugins to use, what tools you can access, which decisions are best for increasing your audience, etc. Luckily, Webflow can help!
Because Webflow offers many features, it can be massive initially and take some time to learn. However, after you’ve mastered it, the program will make it much easier to design websites. Webflow has come to be well-loved by many, including those with and those without a coding or web design background.
To help you get to know Webflow, we’ve outlined our top six tips below so you can start creating the website of your dreams!
Webflow Website Building Tip #1. Get a Hold of Flexbox
If you’ve ever built a website, you’ll know how frustrating it can be to align your columns, especially for different devices. Flexbox layout makes this process much easier by allowing you to visually adjust these elements rather than calculating your container’s pixels and testing and retesting until you get the right fit. The module even provides a CSS grid to make scaling as straightforward as possible.
With Flexbox and Webflow, you must set your parent container to ‘flex’ and change your child item widths to percentages. Then, they’ll automatically adjust and scale to the correct size without spending hours tweaking them.
Webflow Website Building Tip #2. Customize Your Content Types
Customizing your website and making it unique to you and your brand is easy with Webflow’s content management system (CMS), which allows you to create custom content and styles and apply them to all pages without changing individual page settings.
Start by creating a collection under ‘Collection Pages.’ Every page in this group will be automatically updated to match the styles of any page in the collection you may be working on, ensuring you have similar layouts throughout and making your website more cohesive without having to review and edit every page individually.
Webflow Website Building Tip #3. Name Your Classes
Every time you create an element, remember to name it carefully. If you don’t name your classes, Webflow will call them for you, and it will be difficult and more time-consuming to edit them in the future. To make things as simple as possible, decide on a rule for naming these classes that will be straightforward to remember and search for and ensure you follow your website redesign agency’s approach if you have one. The BEM (block/element/modifier) method is one of the most common methods, but you can use whatever works best for you and your team.
Webflow Website Building Tip #4. Use Symbols to Hack Page Layouts
You usually have to create each page independently and edit styles accordingly when you build a website. Webflow makes this much easier by allowing you to save elements as symbols. Then, when you want to add a particular asset, you can drag it over from the artboard and drop it into the page, simplifying the process and saving you time. If you want all elements to be the same, you can keep the symbol, and edits will be applied automatically to any linked pieces. Or you can dissociate the aspect from the emblem to make specific and more original changes.
Webflow Website Building Tip #5. Create Cool Animations
Creating interactive and engaging elements is a great way to spice up your website. Still, pulling off can often be quite complicated if you’re unfamiliar with the necessary coding techniques. Webflow makes this much more straightforward by allowing you to add animations quickly and easily. You have to go into the element’s settings you wish to animate and adjust them accordingly. This will enable you to create hover interactions, popup elements, and more!
Webflow Website Building Tip #6. Use Stylesheets to Simplify the Process
The beginning thing you should do when starting to build your website on Webflow is to create a new page and decide on your branding, such as your colors, button styles, typography, sizing, etc. Style your typography using ‘All H1 Headings’ or ‘All Paragraphs’ rather than a unique class name to apply them more easily.
You can then use this tip as a reference to build the rest of the site. This will make the procedure much more accessible than if you were to hop right in and try to figure out your elements and aesthetic on the fly and will make it much simpler to build your pages thanks to Webflow’s CMS and easy-to-use features.
The Bottom Line
Overall, Webflow is a great site. Its customization level allows you to use a wide range of features for free or at a meager cost. Although it takes at least some background knowledge of HTML, it’s still a simple and efficient platform. If you want to fine-tune detailed aspects of your page but don’t have much money to spend, this will surely be a good website builder.
Search engine optimization (SEO) is an essential aspect of digital marketing that involves optimizing a website’s content to rank higher on search engine results pages (SERPs). For SEO agencies, providing top-notch SEO services to their clients is crucial to maintaining a competitive edge in the industry. One way for SEO agencies to expand their service offerings without investing in additional resources is by partnering with white label SEO service providers.
However, outsourcing SEO services can present unique challenges, particularly when it comes to maintaining transparency with clients. SEO agencies must prioritize transparency to ensure that clients receive high-quality services and remain satisfied with their partnership.
In this article, we will discuss the importance of transparency in white-label SEO services, including its benefits to SEO agencies, the common areas where transparency is crucial, the challenges that arise when providing transparent services, and the strategies for maintaining transparency throughout the partnership.
Benefits of Transparency in White Label SEO Services
Transparency is a critical aspect of white label SEO services. By providing open and honest communication, SEO agencies can reap several benefits that contribute to their success. Here are some of the benefits of transparency in white label SEO services:
Building trust with clients: Clients want to work with SEO agencies that they can trust. When SEO agencies provide transparent services, clients better understand what is happening behind the scenes. This transparency helps to build trust and credibility with clients, which is essential to a successful partnership.
Maintaining long-term relationships with clients: Transparency is also key to maintaining long-term relationships with clients. When clients see that an SEO agency is transparent in their actions and communications, they are more likely to feel comfortable continuing their partnership with the agency. This can lead to more extended contracts and higher client retention rates.
Providing better service and results: Transparency in white label SEO services allows clients to understand the strategies and tactics used to improve their website’s SEO. When clients have a clear understanding of the work being done, they can provide feedback and suggestions that help the agency provide better service and results. This collaboration can lead to improved SEO performance and increased client satisfaction.
Increasing client satisfaction and retention rates: Ultimately, the goal of any SEO agency is to provide high-quality services that lead to client satisfaction and retention. Transparency is critical to achieving this goal. When clients are satisfied with the level of transparency provided by an SEO agency, they are more likely to be happy with the results and continue their partnership with the agency.
In summary, transparency in white label SEO services offers numerous benefits to SEO agencies. It helps to build trust, maintain long-term relationships, provide better service and results, and increase client satisfaction and retention rates.
Common Areas for Transparency in White Label SEO Services
In white label SEO services transparency is critical to maintaining a successful partnership with clients. There are several areas where transparency is particularly crucial. Here are some common areas where transparency is essential:
Keyword research and selection: Keyword research is a critical part of SEO, as it helps identify the keywords that potential customers use to search for products or services. SEO agencies should be transparent about the keyword research process, including the tools and techniques used to identify keywords. Additionally, agencies should provide clients with a list of recommended keywords and explain the reasons behind their choices.
On-page optimization: On-page optimization involves optimizing the content and HTML source code of a website to improve its relevance and visibility on search engines. SEO agencies should be transparent about their on-page optimization strategies, including the changes they make to the website’s content and structure. Clients should also be informed of the potential impact of these changes on their website’s SEO performance.
Link building: Link building is a critical aspect of SEO that involves getting other websites to link back to a client’s website. SEO agencies should be transparent about their link building strategies, including the tactics they use to acquire backlinks and the quality of the backlinks they acquire.
Reporting and analytics: Transparency in reporting and analytics is critical to maintaining a successful partnership with clients. SEO agencies should provide regular reports that detail their activities, progress, and results. Additionally, agencies should be transparent about the tools and metrics used to measure SEO performance and explain how these metrics relate to the client’s business goals.
In summary, transparency in white label SEO services is essential for maintaining a successful partnership with clients. By being transparent about the keyword research and selection, on-page and off-page optimization, link building strategies, and reporting and analytics, SEO agencies can build trust and credibility with their clients and provide them with high-quality services.
Challenges to Transparency in White Label SEO Services
Transparency is critical to maintaining a successful partnership between SEO agencies and their clients. However, several challenges can make it challenging to maintain transparency. Here are some common challenges to transparency in white label SEO services:
Client expectations and demands: Clients often have high expectations and demands when it comes to their SEO performance. They may want immediate results or expect their website to rank highly for highly competitive keywords. When these expectations are not met, clients may become frustrated or feel like the SEO agency is not being transparent. To address this challenge, SEO agencies must set clear expectations with clients and provide regular updates on their progress.
Communication with clients: Communication is key to maintaining transparency in white label SEO services. However, poor communication can make it challenging to be transparent. Clients may not understand the SEO terminology used by the agency or may feel like they are not getting enough updates on their progress. To address this challenge, SEO agencies should communicate regularly with their clients and provide clear explanations of their strategies and tactics.
Conflict of interest with other clients: SEO agencies may have multiple clients in the same industry or niche, which can create a conflict of interest when providing white label SEO services. For example, if two clients are competing for the same keyword, the agency must ensure that they are not giving one client an unfair advantage. To address this challenge, SEO agencies should establish clear policies and procedures for managing conflicts of interest and ensure that they are transparent about their strategies and tactics.
In summary, maintaining transparency in white label SEO services can be challenging. Clients’ expectations and demands, communication, and conflicts of interest are common challenges that can make it difficult to maintain transparency. However, by setting clear expectations, communicating regularly with clients, and establishing clear policies and procedures for managing conflicts of interest, SEO agencies can overcome these challenges and provide high-quality services to their clients.
Strategies for Maintaining Transparency in White-Label SEO Services
Maintaining transparency in white label SEO services is essential to building trust and credibility with clients. Here are some strategies for maintaining transparency in white-label SEO services:
Providing detailed reports and analytics: Detailed reports and analytics are essential to maintaining transparency in white label SEO services. Reports should detail the activities, progress, and results of the SEO campaign, and should be easy for clients to understand. Additionally, reports should be delivered on a regular basis, so clients always know what is happening with their campaign
Regular communication with clients: Regular communication with clients is critical to maintaining transparency in white-label SEO services. SEO agencies should communicate regularly with their clients to provide updates on their progress, answer any questions they may have, and address any concerns. Communication should be clear and easy to understand and should be tailored to the client’s level of SEO knowledge.
Avoiding conflicts of interest: Avoiding conflicts of interest is essential to maintaining transparency in white label SEO services. SEO agencies should establish clear policies and procedures for managing conflicts of interest, such as having separate teams for competing clients or creating strict guidelines for link building. Additionally, agencies should be transparent about their strategies and tactics to ensure that they are not giving one client an unfair advantage over another.
In summary, maintaining transparency in white-label SEO services requires setting clear expectations, providing detailed reports and analytics, regular communication with clients, and avoiding conflicts of interest. By following these strategies, SEO agencies can build trust and credibility with their clients and provide high-quality services.
Conclusion
In conclusion, transparency is essential to maintaining a successful partnership between SEO agencies and their clients in white-label SEO services. By being transparent about their strategies and tactics, SEO agencies can build trust and credibility with their clients, provide better service and results, and increase client satisfaction and retention rates.
To maintain transparency, SEO agencies must set clear client expectations, provide detailed reports and analytics, communicate regularly with clients, and avoid conflicts of interest. These strategies help address common transparency challenges, such as client expectations and demands, communication, and conflicts of interest.
Maintaining transparency is critical to building a successful partnership between SEO agencies and their clients. By prioritizing transparency, SEO agencies can provide high-quality services that help their clients achieve their business goals, maintain long-term relationships with clients, and establish a positive reputation in the industry.
As a website owner or content creator, you might often find yourself in situations where you must create multiple pages with a similar layout or content structure or set a homepage in wordpress. Duplicating a page can save you time and effort by allowing you to use an existing page as a template rather than starting from scratch every time.
In this blog post, we will explore the need for duplicating pages in WordPress and walk you through a step-by-step process to achieve this. Whether you are a seasoned WordPress expert or just starting, this guide will assist you to understand how to clone pages efficiently and streamline your content creation process. Let’s dive in and learn the ins and outs of duplicating pages in WordPress!
Duplicate a Page in a WordPress With Plugin
A plugin is one of the most convenient and user-friendly ways to duplicate a page in WordPress. Several plugins are available to help you with this task, but one of the most popular and reliable options is the Duplicate Post plugin. With over 3 million active installations, WordPress users highly recommend this plugin for its ease of use and versatility.
Duplicate Post: Clone Posts, Pages, Or Custom Post Types
The Duplicate Post plugin allows you to clone pages, posts, and custom post types with just a single click.
Here’s a step-by-step guide on how to use the Duplicate Post plugin to duplicate a page in WordPress:
Step 1: Install and Activate the Plugin
Log in to your WordPress dashboard.
Navigate to ‘Plugins’ > ‘Add New’.
Search for ‘Duplicate Post’ in the search bar.
Locate the plugin in the search results, and click the ‘Install Now’ button.
Once the installation is complete, click the ‘Activate’ button to enable the plugin.
Step 2: Duplicate a Page
Go to ‘Pages’ > ‘All Pages’ in your WordPress dashboard.
Locate the page you want to duplicate, and hover your mouse over its title.
You will see a new option called ‘Clone’ under the page title. Click on this option.
The plugin will duplicate the selected page, and you will be redirected to the ‘Edit Page’ screen of the duplicated page.
Customize the duplicated page as needed, and click ‘Publish’ or ‘Update’ to save your changes.
Step 3: Configure the Plugin Settings (Optional)
Go to ‘Settings’ > ‘Duplicate Post’ in your WordPress dashboard.
In the ‘Duplicate Post Settings’ page, you can configure various options for duplicating pages, such as which elements to copy (tags, categories, featured images, custom fields, etc.), and user roles allowed to duplicate pages.
If you want to bulk duplicate multiple pages, you can enable this option under the ‘Bulk actions’ tab in the settings page.
Once you have made the desired changes, click the ‘Save Changes’ button to apply the new settings.
That’s it! You can now easily duplicate pages in WordPress using the Duplicate Post plugin. Review and update the duplicated pages to ensure your content is unique and relevant.
Yoast Duplicate Post: a Compatible Solution for Yoast SEO users
Another excellent option for duplicating pages in WordPress is the Yoast Duplicate Post plugin. Developed by the renowned Yoast team, this plugin provides similar functionality as the Duplicate Post plugin but with added compatibility with Yoast SEO. This makes it an ideal choice for those using Yoast SEO to optimize their website’s search engine performance.
Key features of the Yoast Duplicate Post plugin include:
Cloning of posts, pages, and custom post types
Selective copying of elements, such as tags, categories, featured images, custom fields, and taxonomies
Bulk duplication of multiple pages or posts at once
Compatibility with Yoast SEO for seamless integration
Here’s a step-by-step guide on how to use the Yoast Duplicate Post plugin to duplicate a page in WordPress:
Step 1: Install and Activate the Plugin
Log in to your WordPress dashboard.
Navigate to ‘Plugins’ > ‘Add New’.
Search for ‘Yoast Duplicate Post’ in the search bar.
Locate the plugin in the search results, and click on the ‘Install Now’ button.
Once the installation is complete, click on the ‘Activate’ button to enable the plugin.
Step 2: Duplicate a Page
Go to ‘Pages’ > ‘All Pages’ in your WordPress dashboard.
Locate the page you want to duplicate, and hover your mouse over its title.
You will see a new option called ‘Clone’ under the page title. Click on this option.
The plugin will create a duplicate of the selected page, and you will be redirected to the ‘Edit Page’ screen of the duplicated page.
Customize the duplicated page as needed, and click ‘Publish’ or ‘Update’ to save your changes.
Step 3: Configure the Plugin Settings (Optional)
Go to ‘Settings’ > ‘Duplicate Post’ in your WordPress dashboard.
In the ‘Duplicate Post Settings’ page, you can configure various options for duplicating pages, such as which elements to copy (tags, categories, featured images, custom fields, etc.), and user roles allowed to duplicate pages.
If you want to bulk duplicate multiple pages, you can enable this option under the ‘Bulk actions’ tab in the settings page.
Once you have made the desired changes, click the ‘Save Changes’ button to apply the new settings.
And that’s it! You can now easily duplicate pages in WordPress using the Yoast Duplicate Post plugin while maintaining compatibility with your Yoast SEO settings. Review and update the duplicated pages to ensure your content is unique and relevant.
Post Duplicator: a Lightweight Alternative for Page Duplication
Post Duplicator is a great choice if you’re looking for a simple and lightweight solution to duplicate your WordPress pages. This plugin allows you to easily clone posts, pages, or custom post types without complex settings or configurations.
Key features of the Post Duplicator plugin include:
Duplicating posts, pages, and custom post types with just a few clicks
Option to maintain the original date, status, and other attributes of the duplicated content
A user-friendly interface, making it suitable for WordPress users of all skill levels
Minimal impact on your website’s performance due to its lightweight design
Here’s a step-by-step guide on how to use the Post Duplicator plugin to duplicate a page in WordPress:
Step 1: Install and Activate the Plugin
Log in to your WordPress dashboard.
Navigate to ‘Plugins’ > ‘Add New’.
Search for ‘Post Duplicator’ in the search bar.
Locate the plugin in the search results, and click on the ‘Install Now’ button.
Once the installation is complete, click on the ‘Activate’ button to enable the plugin.
Step 2: Duplicate a Page
Go to ‘Pages’ > ‘All Pages’ in your WordPress dashboard.
Locate the page you want to duplicate, and hover your mouse over its title.
You will see a new option called ‘Duplicate Page’ under the page title. Click on this option.
The plugin will create a duplicate of the selected page, and you will be redirected to the ‘Edit Page’ screen of the duplicated page.
Customize the duplicated page as needed, and click ‘Publish’ or ‘Update’ to save your changes.
Step 3 (Optional): Configure the Plugin Settings
If you want to maintain the duplicate page’s original date, status, or other attributes, go to ‘Settings’ > ‘Post Duplicator’ in your WordPress dashboard.
In the ‘Post Duplicator Settings’ page, you can configure the options for duplicating pages, such as maintaining the original publish date, post status, or other metadata.
Once you have made the desired changes, click the ‘Save Changes’ button to apply the new settings.
And that’s it! You can now easily duplicate pages in WordPress using the Post Duplicator plugin. Review and update the duplicated pages as needed to ensure your content is unique and relevant.
Duplicate Page and Post: a Versatile Solution for Page Duplication
The Duplicate Page and Post plugin is another excellent choice for duplicating pages, posts, and custom post types in WordPress. This plugin offers a variety of customization options, making it an ideal tool for those who want more control over the duplication process.
Key features of the Duplicate Page and Post plugin include:
Duplicating pages, posts, and custom post types with just a few clicks
Choosing the post status (draft, published, private, etc.) for the duplicated content
Configuring redirection settings for the original content after duplication
Setting link title attributes for the duplicated content
Preserving the original date, author, and other metadata of the duplicated content
Here’s a step-by-step guide on how to use the Duplicate Page and Post plugin to duplicate a page in WordPress:
Step 1: Install and Activate the Plugin
Log in to your WordPress dashboard.
Navigate to ‘Plugins’ > ‘Add New’.
Search for ‘Duplicate Page and Post’ in the search bar.
Locate the plugin in the search results, and click on the ‘Install Now’ button.
Once the installation is complete, click on the ‘Activate’ button to enable the plugin.
Step 2: Duplicate a Page
Go to ‘Pages’ > ‘All Pages’ in your WordPress dashboard.
Locate the page you want to duplicate, and hover your mouse over its title.
You will see a new option called ‘Duplicate’ under the page title. Click on this option.
The plugin will duplicate the selected page, and you will be redirected to the ‘Edit Page’ screen of the duplicated page.
Customize the duplicated page as needed, and click ‘Publish’ or ‘Update’ to save your changes.
Step 3: Configure the Plugin Settings (Optional)
Go to ‘Settings’ > ‘Duplicate Page and Post’ in your WordPress dashboard.
In the ‘Duplicate Page and Post Settings’ page, you can configure various options for duplicating pages, such as choosing the post status (draft, published, private, etc.) for the duplicated content, configuring redirection settings for the original content after duplication, and setting link title attributes for the duplicated content.
You can also preserve the duplicated content’s original date, author, and other metadata by enabling the respective options.
Once you have made the desired changes, click the ‘Save Changes’ button to apply the new settings.
And that’s it! You can now easily duplicate pages in WordPress using the Duplicate Page and Post plugin while customizing the post status, redirection settings, and other attributes of the duplicated content. Remember to review and update the duplicated pages as needed to ensure your content is unique and relevant.
WP Page Post Clone: a Straightforward Solution for Page Cloning
WP Page Post Clone is a user-friendly plugin that allows you to clone pages, posts, or custom post types with a single click. It’s a great choice for those looking for an easy-to-use tool that can quickly duplicate content in WordPress.
Key features of the WP Page Post Clone plugin include:
Cloning pages, posts, and custom post types with just one click
Copying content along with its featured image, categories, and tags
Preserving the original author and publish date of the duplicated content
Easy installation and setup
In the following section, we will provide a step-by-step guide on installing and using the WP Page Post Clone plugin to easily duplicate your WordPress pages.
Here’s a step-by-step guide on how to use the WP Page Post Clone plugin to duplicate a page in WordPress:
Step 1: Install and Activate the Plugin
Log in to your WordPress dashboard.
Navigate to ‘Plugins’ > ‘Add New’.
Search for ‘WP Page Post Clone’ in the search bar.
Locate the plugin in the search results, and click on the ‘Install Now’ button.
Once the installation is complete, click on the ‘Activate’ button to enable the plugin.
Step 2: Duplicate a Page
Go to ‘Pages’ > ‘All Pages’ in your WordPress dashboard.
Locate the page you want to duplicate, and hover your mouse over its title.
You will see a new option called ‘Clone’ under the page title. Click on this option.
The plugin will duplicate the selected page, and you will be redirected to the ‘Edit Page’ screen of the duplicated page.
Customize the duplicated page as needed, and click ‘Publish’ or ‘Update’ to save your changes.
WP Page Post Clone has no additional settings to configure, making it a simple solution for duplicating pages in WordPress. By default, the plugin will copy the content along with its featured image, categories, and tags, while preserving the original author and publish date of the duplicated content.
And that’s it! You can now easily duplicate pages in WordPress using the WP Page Post Clone plugin. Review and update the duplicated pages as needed to ensure your content is unique and relevant.
Page And Post Clone: a Simple Tool for Effortless Duplication
Page and Post Clone is a straightforward plugin that allows you to effortlessly clone pages, posts, and custom post types in WordPress. Its simplicity and one-click duplication functionality make it an ideal solution for users who want a quick and hassle-free way to duplicate their content.
Key features of the Page and Post Clone plugin include:
Cloning pages, posts, and custom post types with a single click
Simple and user-friendly interface
Minimal setup and configuration required
Compatibility with most WordPress themes and plugins
Here’s a step-by-step guide on how to use the Page and Post Clone plugin to duplicate a page in WordPress:
Step 1: Install and Activate the Plugin
Log in to your WordPress dashboard.
Navigate to ‘Plugins’ > ‘Add New’.
Search for ‘Page and Post Clone’ in the search bar.
Locate the plugin in the search results, and click on the ‘Install Now’ button.
Once the installation is complete, click on the ‘Activate’ button to enable the plugin.
Step 2: Duplicate a Page
Go to ‘Pages’ > ‘All Pages’ in your WordPress dashboard.
Locate the page you want to duplicate, and hover your mouse over its title.
You will see a new option called ‘Clone’ under the page title. Click on this option.
The plugin will create a duplicate of the selected page, and you will be redirected to the ‘Edit Page’ screen of the duplicated page.
Customize the duplicated page as needed, and click ‘Publish’ or ‘Update’ to save your changes.
The Page and Post Clone plugin does not have any additional settings to configure, making it a simple and hassle-free solution for duplicating pages in WordPress. By default, the plugin clones all the content and settings of the original page, including images, categories, and tags.
And that’s it! You can now easily duplicate pages in WordPress using the Page and Post Clone plugin. Remember to review and update the duplicated pages as needed to ensure your content is unique and relevant.
Duplicate a Page in WordPress Without Plugin: Manual Copy-Pasting
For those who prefer not to use a plugin, you can still duplicate pages in WordPress by manually copying and pasting the content from the original page to a new one. This method is less automated but offers more control over the duplication process.
Here’s a step-by-step guide on how to manually duplicate a page in WordPress:
Step 1: Open the Original Page or Post
Log in to your WordPress dashboard.
Navigate to ‘Pages’ > ‘All Pages’ (or ‘Posts’ > ‘All Posts’, if you want to duplicate a post).
Locate the page or post you want to duplicate, and click on its title to open it in the WordPress editor.
Step 2: Copy the Content
In the WordPress editor, select all the content you want to copy, including any text, images, shortcodes, or embeds.
Right-click and choose ‘Copy’ or use the keyboard shortcut ‘Ctrl + C’ (or ‘Cmd + C’ on a Mac) to copy the selected content to your clipboard.
Step 3: Create a New Page or Post
In the WordPress dashboard, navigate to ‘Pages’ > ‘Add New’ (or ‘Posts’ > ‘Add New’ for a new post).
Enter a title for the new page or post.
Click on the content area to start editing.
Step 4: Paste the Copied Content
Right-click and choose ‘Paste’ or use the keyboard shortcut ‘Ctrl + V’ (or ‘Cmd + V’ on a Mac) to paste the copied content into the new page or post.
Step 5: Adjust Settings and Publish
Modify the permalink, featured image, categories, tags, and other settings as needed.
Once you have made all the necessary adjustments, click on ‘Publish’ or ‘Update’ to save the new page or post.
And that’s it! You have now duplicated a page in WordPress without using a plugin. Remember to review and update the duplicated content as needed to ensure it’s unique and relevant. Remember that this manual method might require more time and effort than using a plugin, but it gives you greater control over the duplication process.
Benefits of Duplicating a Page in WordPress Website
Yes, there are several benefits of duplicating pages in a WordPress website. Some of the key advantages include:
Saving time and effort: Duplicating pages allow you to create new pages or posts with similar content and formatting quickly, without having to recreate everything manually from scratch. This can be particularly useful for websites with many pages or posts that follow a similar structure or layout.
Maintaining consistency: By duplicating existing pages, you can ensure that the design, layout, and formatting of your new pages or posts are consistent with the rest of your website. This helps maintain a cohesive look and feel across your site, providing a better user experience for your visitors.
Template creation: Duplicating pages can help you create templates for different types of content on your website, such as blog posts, landing pages, or product pages. Once you’ve set up a template with the desired layout and design, you can easily duplicate it for new content, making content creation more efficient.
A/B testing: If you want to experiment with different layouts, design elements, or copy on your website, duplicating pages allows you to create variations for A/B testing. By testing different versions of a page, you can gather data on which elements perform better and optimize your website for better user engagement and conversion rates.
Content updates and revisions: Duplicating pages can be helpful when you need to update or revise existing content without affecting the live version of the page. By creating a duplicate, you can make all the necessary changes and review the new version before publishing, ensuring that your updates are accurate and well-formatted.
Backups: In some cases, duplicating a page can serve as a form of backup. If you’re making significant changes to a page or post, having a duplicate ensures you have a copy of the original content should anything go wrong or if you need to revert to a previous version.
Keep in mind that while duplicating pages can be beneficial, it’s important to avoid publishing duplicate content on your website, as this can negatively impact your search engine rankings. Always make sure to review and update duplicated content to ensure it’s unique and relevant before publishing.
Conclusion
In summary, duplicating pages in WordPress streamlines content creation, maintains consistency, and improves efficiency. Utilize plugins, manual copy-pasting, or theme features to achieve this, but always ensure uniqueness and relevance in duplicated content to avoid negative impacts on search engine rankings.
If you’re running a WordPress website, you must use an SEO plugin. There are a lot of different plugins out there, so it can be hard to decide which one is the best for you. Below, we will list some popular SEO plugins. In this blog, we’ll discuss each plugin in detail and help you decide which one is right for you!
Hubspot
Hubspot’s WordPress plugin is a powerful tool to help you get the most out of your website. The plugin allows you to easily connect your WordPress site to Hubspot, making it easy to manage your content and track your results. In addition, the plugin provides several powerful features that can help you improve your website’s performance. For example, the plugin includes a built-in SEO tool to help you optimise your site for search engines. Additionally, the plugin consists of a social media integration tool that makes it easy to share your content on social media. With these powerful features, Hubspot’s WordPress plugin can help you take your website to the next level.
Yoast SEO
WordPress is a popular content management system that helps users easily create and manage their website content. One of the most valuable attributes of WordPress is its plugin architecture, which allows users to extend the functionality of their site with additional features. One popular plugin is Yoast SEO, which helps users to optimise their sites for search engines. Yoast SEO provides various features that allow users to improve their site’s ranking on search engine results pages. For example, Yoast SEO can help users to choose the right keywords for their site and to ensure that their site’s content is well-structured and easy to read. In addition, Yoast SEO can also generate an XML sitemap for your site, which helps search engines to index your site’s content more effectively. As a result, Yoast SEO can be a valuable tool for any WordPress user who wants to improve their site’s visibility in search engine results pages.
MonsterInsight
MonsterInsight is a powerful WordPress plugin that helps you to collect data and analytics about your website traffic. It provides detailed reports about your visitors, including their location, browser, and operating system. MonsterInsight allows you to track conversions and sales and see which of your marketing campaigns are most effective. By identifying your website traffic, you can make informed decisions about how to improve your site and grow your business. MonsterInsight is easy to set up and use, and it’s an essential tool for any WordPress user who wants to understand their website traffic.
Redirection
The Redirection WordPress plugin is a handy tool to help you manage your website’s redirects. Whether moving pages around or changing your domain name, the plugin makes it easy to set up redirects so visitors redirect to the correct page. The plugin also keeps track of your website’s redirects, so you can see how often each redirect is used and ensure that all of your website’s links are working correctly. The Redirection WordPress plugin is an excellent option if you’re looking for an easy way to manage your website’s redirects.
SEOPress
When it comes to SEO, there are a lot of factors to consider. From choosing the right keywords to optimising your website for search engines, it can be hard to keep up with all the latest changes. That’s where SEOPress comes in. SEOPress is a WordPress plugin that helps you automatically optimise your website for search engines. SEOPress allows you to choose the right keywords, create custom titles and descriptions, and even track your rankings over time. Best of all, SEOPress is free and easy to use. This plugin is ideal for business owners who think it’s time for a website redesign. So if you’re looking for a way to improve your website’s SEO, be sure to give SEOPress a try.
WpRocket
WpRocket is a powerful caching plugin for WordPress that can significantly improve the performance of your website. Caching helps to speed up the loading of pages by storing a copy of the page in the browser’s cache so that it does not need to reload every time the user visits the site. WpRocket uses this by creating cached versions of your pages and serving them to users instead of loading the entire page each time. It can dramatically improve page load times and increase search engine rankings and traffic. In addition, WpRocket also includes several other performance-enhancing features, such as minification and Gzip compression. Combined, these make WpRocket an essential tool for any custom WordPress website design looking to improve its performance.
Conclusion
Many different WordPress SEO plugins are available, and choosing the right one for your site can be challenging. However, considering your needs and objectives, you can narrow down the choices and find the best plugin. Whether you’re looking for an easy way to optimise your website or a comprehensive solution that covers all aspects of SEO, there’s a WordPress plugin that’s right for you.
Web design is constantly evolving, shaped by new technologies and changing user preferences. As we step into 2025, staying updated with the latest trends is crucial for creating engaging and user-friendly websites. This year, the focus is on simplicity, speed, and personalization. Designers are finding creative ways to blend aesthetics with functionality, ensuring every website delivers a seamless experience. Let’s explore the key web design trends that will define 2025 and help your website stand out.
Let’s explore the web design trends for 2025 below, highlighting innovative and user-focused designs.
Immersive 3D elements involve incorporating three-dimensional visuals and interactive graphics into web design. These features create a lifelike experience, allowing users to engage with content in ways that feel more dynamic and realistic.
Why It Matters?
Enhanced User Engagement: 3D visuals capture attention faster than flat designs. They invite users to interact with the website, keeping them engaged longer.
Memorable Experiences: The uniqueness of 3D elements makes websites stand out, leaving a lasting impression on users. This can be a game-changer for branding.
Improved Storytelling: Websites can use 3D designs to visually narrate their stories, products, or services, offering more immersive and detailed explanations.
Technological Advancements: With advancements in browser capabilities and faster internet speeds, 3D elements now load quickly and run smoothly, making them more accessible.
Examples of 3D Elements in Use
Interactive 3D Models: Websites like Apple showcase their products in interactive 3D. For instance, users can rotate an iPhone to view it from different angles, offering a more comprehensive product experience.
Isometric Designs: Many tech websites use isometric illustrations for creating engaging visuals. These designs combine a 3D effect with clean and structured layouts.
Floating 3D Elements:Websites like Stripe use subtle floating 3D graphics to add depth to their design without overwhelming the content.
How to Use 3D Elements Effectively
Prioritize Performance: Ensure 3D visuals are optimized to load quickly and work on various devices.
Keep It Relevant: Use 3D graphics that align with your brand’s identity and purpose.
Focus on Interaction: Allow users to interact with the 3D elements for an engaging experience.
Challenges and Considerations
While 3D elements enhance design, they can increase page load times if not optimized properly. Test thoroughly to maintain speed and performance.
Dark mode goes beyond the basic black backgrounds. It incorporates contrasting neon highlights and adaptive color schemes that adjust based on the time of day or user preferences. These enhancements make dark mode designs more vibrant and user-friendly.
Why It Matters?
Reduces Eye Strain: Dark mode helps users browse comfortably, especially in low-light environments. The softer tones are easier on the eyes during long screen sessions.
Boosts Aesthetic Appeal: Combining dark backgrounds with bright neon accents creates a sleek, modern look. It makes content visually striking while maintaining readability.
Increases User Preference: Many users now prefer dark mode for its calming effect and stylish design. Offering this option enhances user satisfaction.
Improves Battery Life: On OLED and AMOLED screens, dark mode saves battery by using less power to display darker colors.
Examples of Websites Using Dark Mode
Spotify: Features dark mode with clean highlights for navigation, making it visually appealing and functional.
Slack: Offers adaptive themes, allowing users to switch between dark and light modes seamlessly.
How to Use Dark Mode Effectively
Focus on Contrast: Ensure text and icons are clear against the dark background.
Add Neon Highlights: Use subtle pops of color for buttons or interactive elements to draw attention.
Offer Customization: Let users choose between dark and light modes to match their preferences.
Challenges and Considerations
Test designs on various devices to ensure readability.
Avoid overusing neon colors, as they can become overwhelming if not balanced.
Minimalist maximalism blends clean and simple layouts with bold, eye-catching design elements. It uses vibrant colors, dramatic typography, and oversized visuals to create a striking yet balanced look.
Why It’s Effective
Balanced Design: It keeps the layout uncluttered while using bold elements to grab attention, creating a unique mix of simplicity and creativity.
Memorable Impact: The dramatic use of oversized visuals and vibrant colors leaves a lasting impression on users.
Improved Readability: Clean layouts ensure easy navigation, while bold typography highlights the most important information.
Brand Personality: This design style allows brands to express creativity without losing a polished, professional appearance.
Examples of Minimalist Maximalism
Airbnb: Combines simple layouts with bold, oversized typography for a modern feel.
Canva: Uses vibrant colors and dramatic design elements while keeping the interface clean and user-friendly.
How to Use It Effectively
Keep It Simple: Maintain white space to avoid clutter.
Focus on Key Elements: Use oversized visuals or typography sparingly to highlight important messages.
Play with Colors: Add vibrant hues to create contrast and draw attention to specific areas.
Challenges and Considerations
Avoid overloading the design with too many bold elements.
Ensure the design aligns with your brand’s tone and purpose.
Scrollytelling uses storytelling techniques in web design, where the narrative unfolds as users scroll. It combines visuals, text, and animations to create an interactive and engaging experience.
Why It’s Effective
Engages Users:Scrolling through a story keeps users interested and encourages them to explore more.
Improves Understanding:By combining visuals and animations, complex ideas or products are explained in an easy-to-follow format.
Makes Content Memorable:The storytelling approach connects with users emotionally, making the content more impactful.
Best Use Cases
Product Showcases: Highlight features and benefits step by step as users scroll.
Portfolio Sites: Display creative work dynamically, keeping visitors intrigued.
Brand Storytelling: Share the journey and mission of your brand in an engaging, visual way.
Examples of Scrollytelling
Apple’s Product Pages: Uses animations and visuals to explain product features interactively.
The New York Times’ Special Stories: Combines text, images, and scrolling animations for immersive storytelling.
How to Use Scrollytelling Effectively
Focus on Flow: Ensure the story progresses naturally without overwhelming the user.
Optimize Performance: Use lightweight animations and visuals to maintain fast loading speeds.
Test for Usability: Make sure scrolling works smoothly on all devices and browsers.
Glassmorphism uses frosted glass effects combined with bold colors and gradients. It creates a transparent, layered look that adds depth and elegance to web designs.
Why It’s Trending
Modern Aesthetic: The sleek and futuristic style makes websites look polished and visually appealing.
Adds Depth: Layering elements with a frosted glass effect creates a sense of dimension, making designs feel dynamic.
Improves Focus: By blurring the background, it highlights the content in the foreground, guiding the user’s attention.
Examples of Glassmorphism in Use
Apple Music: Features frosted effects to enhance its modern interface.
Dribbble Designs: Many UI concepts showcase glassmorphism for card designs and menus.
How to Use Glassmorphism Effectively
Balance the Design: Pair glass effects with simple layouts to avoid visual clutter.
Use Subtle Gradients: Complement the frosted glass with soft gradients for a cohesive look.
Test for Readability: Ensure text and icons remain clear against the frosted background.
Challenges of Glassmorphism
Performance Issues: Frosted glass effects can slow down websites if not optimized, especially on older devices.
Readability Risks: Poor contrast between text and background can make content hard to read.
Overuse of Effects: Excessive glass layers can clutter the design and reduce usability.
Bold typography uses large, expressive fonts that dominate the design. These oversized text elements grab attention and communicate key messages effectively.
Why It’s Trending
Captures Attention:Big, bold fonts instantly draw the user’s eye to important content.
Enhances Readability:Clear and impactful typography ensures users can quickly understand the message.
Builds Strong Branding:Expressive fonts reflect the brand’s personality and make it memorable.
Best Uses
Headlines: Use bold typography to emphasize key messages or announcements.
Hero Sections: Make a strong first impression with striking fonts that dominate the page.
Branding Elements: Incorporate unique typography to align with your brand identity.
Examples of Bold Typography in Use
Nike: Uses bold fonts in its hero sections to emphasize power and energy.
Spotify Wrapped: Features oversized typography to create excitement and highlight key stats.
How to Use Bold Typography Effectively
Keep It Simple: Use minimal text to let the typography shine without overcrowding.
Pair with Clean Layouts: Bold fonts work best with simple, uncluttered designs.
Maintain Contrast: Choose colors that ensure the text stands out against the background.
Challenges of Bold Typography
Overwhelming Design: Overusing bold fonts can make the design feel heavy and distract from the message.
Responsiveness: Large typography can look awkward on smaller screens if not scaled properly.
Font Selection: Using overly decorative fonts can hurt readability and clash with the design.
Micro-Interactions
Micro-interactions are small, subtle animations or effects that happen when users interact with a website. Examples include button hover effects, progress indicators, and feedback animations when an action is completed.
Why It’s Important
Enhances User Engagement: These small details make interactions feel more dynamic and enjoyable, keeping users interested.
Provides Feedback: Micro-interactions confirm user actions, like a subtle animation showing that a form submission was successful.
Improves Navigation: Hover effects and transitions guide users intuitively, making it easier to explore the site.
Examples of Micro-Interactions in Use
LinkedIn: Displays a loading indicator when uploading a file, keeping users informed.
E-commerce Sites: Add to cart buttons often feature animations to confirm the action visually.
How to Use Micro-Interactions Effectively
Keep It Subtle: Avoid overwhelming users with overly flashy animations.
Focus on Functionality: Ensure animations have a purpose, like providing feedback or enhancing navigation.
Optimize for Performance: Test animations to make sure they run smoothly without slowing the site.
Challenges of Micro-Interactions
Overuse: Too many animations can clutter the design and distract users.
Performance Issues: Poorly optimized effects can affect website speed and user experience.
Consistency: Inconsistent interactions across pages may confuse users and break the flow.
Adaptive Color Schemes
Adaptive color schemes change based on factors like the time of day, user preferences, or device settings. For example, a website might shift to dark mode in the evening or align with a user’s chosen theme.
Why It’s Popular
Personalized Experience: Adaptive color schemes cater to user preferences, making browsing feel more tailored.
Improved Comfort: Adjusting colors based on the time of day reduces eye strain and creates a pleasant viewing experience.
Device Compatibility: These schemes sync with device settings like dark or light mode, ensuring consistency across platforms.
Examples of Adaptive Color Schemes in Use
YouTube: Automatically switches between light and dark modes based on device settings.
Twitter: Lets users choose themes or follow system preferences for a consistent experience.
How to Use Adaptive Color Schemes Effectively
Offer Customization: Allow users to switch modes manually if they prefer.
Test Readability: Ensure text and elements are visible and clear in all color variations.
Optimize Transitions: Smoothly transition between schemes to avoid jarring effects.
Challenges of Adaptive Color Schemes
Design Complexity: Maintaining consistent branding across multiple schemes requires extra effort.
Performance Impact: Switching schemes dynamically can slow down poorly optimized websites.
Accessibility: Some color combinations may not be accessible to users with visual impairments.
AR-Enhanced Design
AR-enhanced design integrates augmented reality (AR) features into websites. These elements allow users to interact with digital objects in real-world settings through their devices. Examples include virtual try-ons for shopping or interactive AR games.
Why It’s Trending
Improves User Engagement: AR makes the browsing experience more interactive and exciting.
Enhances Decision-Making: Features like virtual try-ons help users visualize products, leading to more confident purchases.
Adds a Wow Factor: AR elements stand out and create a memorable user experience.
Examples of AR-Enhanced Design in Use
IKEA Place App: Lets users visualize furniture in their space through AR.
Warby Parker: Offers virtual try-ons for glasses directly on their website.
How to Use AR-Enhanced Design Effectively
Focus on Value: Use AR to solve a problem or enhance the user’s experience, like helping them try products virtually.
Ensure Accessibility: Make AR features easy to use on different devices and browsers.
Optimize Performance: Keep AR elements lightweight to avoid slowing down the website.
Challenges of AR-Enhanced Design
Technical Requirements: Users need compatible devices and browsers to access AR features.
Development Complexity: Integrating AR requires specialized skills and tools, increasing development time and cost.
User Adoption: Some users may be unfamiliar with AR or hesitant to use it.
Overlapping Layers
Overlapping layers use elements like images, text, and graphics that stack and intersect to create depth and movement in a design. This approach gives websites a more dynamic and engaging look.
Why It Works
Adds Depth: Overlapping layers create a sense of three-dimensional space, making the design feel richer and more immersive.
Boosts Visual Interest: The interplay of layers draws the user’s eye and keeps them engaged.
Encourages Creativity: Designers can experiment with different combinations to create unique layouts that stand out.
Examples of Overlapping Layers in Use
Creative Agencies: Often use layered text and images in hero sections to showcase bold, artistic designs.
Portfolio Sites: Combine overlapping elements to present work dynamically and visually.
How to Use Overlapping Layers Effectively
Maintain Balance: Avoid overcrowding the layout; use white space to give elements room to breathe.
Ensure Clarity: Test the readability of text and visibility of key graphics in layered designs.
Keep It Responsive: Make sure layers adapt well to different screen sizes without looking cluttered.
Challenges of Overlapping Layers
Overcrowded Design: Too many layers can confuse users and reduce the impact of the design.
Performance Issues: Complex layering can slow down page loading if not optimized.
Device Compatibility: Designs may not look the same across all devices and browsers.
Motion UI involves using smooth animations and transitions to guide users through a website. These movements make interactions more engaging and intuitive, like animated menus, hover effects, or subtle loading screens.
Why It’s Trending
Improves Navigation: Animations provide visual cues, helping users understand how to move through the interface.
Enhances Engagement: Motion adds life to static designs, making the experience more dynamic and enjoyable.
Provides Feedback: Transitions and effects confirm user actions, like a subtle animation when clicking a button.
Best Use Cases
Loading Screens: Use animations to keep users entertained while pages load.
Menu Animations: Highlight transitions between menus or sections for a polished look.
Hover Effects: Add motion to buttons or links to encourage interaction.
Examples of Motion UI in Use
Dropbox: Uses smooth transitions and animations to explain features and guide users.
Asana: Adds subtle hover effects and animations to enhance usability.
How to Use Motion UI Effectively
Keep It Simple: Avoid overly complex animations that might distract users.
Focus on Speed: Ensure animations are quick and don’t delay user actions.
Maintain Consistency: Use motion effects consistently across the site for a cohesive experience.
Challenges of Motion UI
Performance Impact: Heavy animations can slow down websites if not optimized properly.
Device Compatibility: Some animations may not work smoothly on older devices or browsers.
Accessibility: Excessive motion might overwhelm users with sensory sensitivities.
Split-Screen Layouts
Split-screen layouts divide the screen into two or more sections, allowing multiple pieces of content to be displayed side by side. This design helps balance visuals and text or compare different ideas effectively.
Why It’s Useful
Showcases Comparisons: Perfect for highlighting differences or similarities, like product features or before-and-after visuals.
Enhances Storytelling: Split layouts can guide users through a narrative by pairing images and text in an engaging way.
Improves Clarity: By separating content into distinct sections, the design feels clean and organized.
Examples of Split-Screen Layouts in Use
Nike: Uses split screens to display product features alongside visuals, creating a dynamic look.
Portfolio Sites: Many designers showcase projects on one side and descriptions on the other for a balanced presentation.
How to Use Split-Screen Layouts Effectively
Keep It Balanced: Ensure each section gets equal attention and doesn’t overpower the other.
Use Contrast: Apply contrasting colors or visuals to distinguish sections clearly.
Optimize for Mobile: Adapt the layout for smaller screens to ensure readability and usability.
Challenges of Split-Screen Layouts
Mobile Responsiveness: Split designs can become cluttered on small screens if not optimized well.
Visual Overload: Displaying too much content in one view may overwhelm users.
Consistency: Maintaining balance and alignment across sections can be challenging.
Circular Design Elements
Circular design elements focus on rounded shapes and patterns in user interfaces. These include circular buttons, icons, and layouts that create a smooth and cohesive look.
Why It’s Trending
Soft Aesthetic: Rounded shapes feel approachable and friendly, making websites more inviting.
Modern Appeal: Circles and curves give designs a clean, modern feel that stands out.
Focus and Balance: Circular elements naturally draw the eye and create harmony in layouts.
Examples of Circular Design Elements in Use
Google Workspace: Uses circular icons and buttons to maintain a simple and user-friendly design.
Fitness Apps: Often feature circular progress bars to track goals visually.
How to Use Circular Design Elements Effectively
Keep It Simple: Avoid overcrowding the layout with too many rounded shapes.
Highlight Key Features: Use circular designs to draw attention to important buttons or icons.
Blend with Other Shapes: Pair circles with clean lines and rectangles for balance.
Challenges of Circular Design Elements
Limited Space: Circles can restrict the amount of content or text displayed inside them.
Overuse: Too many rounded elements can make the design feel repetitive or overly soft.
Responsive Design: Ensuring circular elements scale well on smaller screens can be tricky.
Gradient Overlays
Gradient overlays use soft color transitions as backgrounds or layered effects on images and text. These gradients range from subtle tonal shifts to vibrant multi-color blends, adding a polished look to web designs.
Why It’s Popular
Adds Depth: Gradients create a sense of dimension, making flat designs more dynamic.
Enhances Visual Appeal: Smooth color transitions bring vibrancy without overpowering other design elements.
Modern Touch: Gradients offer a fresh, contemporary aesthetic that appeals to users.
Examples of Gradient Overlays in Use
Spotify: Uses bold gradients in its backgrounds and promotional banners for a dynamic look.
Instagram: Features its iconic gradient as a central part of its branding and interface.
How to Use Gradient Overlays Effectively
Stay Subtle: Use gradients that complement, rather than overpower, the content.
Match the Brand: Choose gradient colors that align with your brand’s identity.
Test for Contrast: Ensure text and visuals remain clear and readable over the gradient.
Challenges of Gradient Overlays
Overuse: Too many gradients can make the design feel busy or distracting.
Consistency: Creating gradients that look good across devices and screens requires careful testing.
Performance: Large gradient images can affect loading times if not optimized.
Inclusive Design
Inclusive design ensures websites are accessible to everyone, including users with different abilities. It features customizable interfaces, accessible navigation, and support for tools like screen readers.
Why It’s Crucial
Expands Reach: Inclusive websites cater to a wider audience, making them usable for all, including people with disabilities.
Enhances Usability: Features like adjustable text sizes, clear navigation, and color contrast improve the experience for every user.
Supports Legal Compliance: Many regions require websites to meet accessibility standards, such as WCAG guidelines.
Examples of Inclusive Design in Use
BBC: Offers keyboard-friendly navigation and supports screen readers to accommodate all users.
Apple: Includes features like VoiceOver and adjustable settings for accessibility across devices.
How to Use Inclusive Design Effectively
Ensure Text Readability: Use clear fonts, adjustable sizes, and high contrast for visibility.
Optimize Navigation: Include keyboard-friendly controls and clear labels for links and buttons.
Test Accessibility: Use tools like WAVE or Lighthouse to identify and fix accessibility issues.
Challenges of Inclusive Design
Increased Complexity: Designing for diverse needs requires extra time and resources.
Testing Across Devices: Ensuring accessibility on various devices and browsers can be challenging.
Ongoing Updates: Accessibility needs evolve, requiring continuous monitoring and improvements.
Dynamic Cursor Effects
Dynamic cursor effects make the cursor interactive, changing its shape, color, or behavior based on user actions. For instance, the cursor might expand when hovering over links or morph into a different icon when interacting with content.
Why It’s Trending
Engages Users: Interactive cursors add a playful and unique touch, keeping users interested.
Enhances Personalization: Custom cursors create a distinct brand experience, making the website more memorable.
Examples of Dynamic Cursor Effects in Use
Creative Portfolios: Many designers use dynamic cursors to highlight links or emphasize interaction.
Gaming Websites: Incorporate unique cursors that align with the theme of the site.
How to Use Dynamic Cursor Effects Effectively
Keep It Subtle: Avoid overly complex effects that might distract users.
Focus on Functionality: Use changes to guide users, like indicating clickable areas.
Test Responsiveness: Ensure cursors perform well across different devices and browsers.
Challenges of Dynamic Cursor Effects
Overuse: Too many animations can overwhelm users and slow down performance.
Accessibility Issues: Some cursor effects may not work well for users relying on assistive technologies.
Compatibility: Unique cursors might not render correctly on all devices or operating systems.
Textured Backgrounds
Textured backgrounds use subtle patterns or designs to give a website depth and character. These can range from soft gradients to fine grain effects, making the design more engaging and visually appealing.
Why It’s Trending
Adds Depth: Textured backgrounds break away from flat, plain designs, creating a more dynamic feel.
Enhances Sophistication: The tactile quality of textures adds a polished and professional look.
Improves Visual Interest: Patterns and textures draw attention without overpowering the main content.
Examples of Textured Backgrounds in Use
Luxury Brand Sites: Often use fine grain or subtle fabric textures to create a premium feel.
Creative Portfolios: Incorporate watercolor effects or abstract patterns for artistic appeal.
How to Use Textured Backgrounds Effectively
Stay Subtle: Choose textures that complement the content instead of distracting from it.
Match the Brand: Select patterns or effects that align with your brand’s style and tone.
Optimize for Performance: Use lightweight texture files to maintain fast loading speeds.
Challenges of Textured Backgrounds
Overwhelming Designs: Bold or busy textures can overshadow text and visuals, reducing readability.
Consistency: Ensuring textures look good across various devices and screen sizes can be challenging.
Accessibility Concerns: Some textures may make text harder to read for users with visual impairments.
Web design trends for 2025 showcase the perfect blend of creativity, functionality, and inclusivity. From immersive visuals to user-first designs like adaptive color schemes and inclusive layouts, staying updated with these trends can elevate your website’s experience and make it stand out. Whether you’re looking to revamp your site or create a new one, embracing these innovations ensures you stay ahead in the competitive digital landscape.
Ready to implement these trends on your website? At Chetaru, we specialize in crafting stunning, trend-focused websites tailored to your brand’s needs. Let’s work together to build a site that captivates your audience and drives results. Contact us today to get started!