Facebook For Business

What does Facebook for business actually offer?

Facebook for business is the set of tools a company uses to reach and serve customers on Facebook: a business Page, Groups, Marketplace, the advertising system, and the analytics that tie them together. Each tool does a different job, building presence, community, selling, paid reach, and measurement, and they work best as a connected system rather than in isolation. The reason to use them is simple: this is still where an enormous share of your customers spend their time.

Key Takeaways

  • Meta’s apps reach 3.54 billion daily active people, and Facebook alone is reachable with ads by about 2.28 billion users, 27.9% of the world’s population (Meta, 2025; DataReportal, 2025).
  • The core toolkit is the Page, Groups, Marketplace, ads (via Ads Manager), and analytics.
  • 70% of marketing leaders say Facebook delivers positive ROI (Sprout Social, 2026).
  • The tools compound: a Page builds presence, ads drive reach, and analytics tells you what’s working.

For all the talk of newer platforms, Facebook’s scale for business remains hard to match, and its tools have matured into a genuine system for finding, converting, and keeping customers. This guide is the overview: what each tool does, how they fit together, and where to go deeper. It links out to focused guides on the Facebook Ad Manager, Facebook advertising, and Facebook Marketplace, and pairs with our comparison of Instagram vs Facebook for marketing.

The table below maps each tool to the job it does.

ToolWhat it’s forGo deeper
Business PageYour brand’s home on FacebookFacebook business page
GroupsCommunity and engagementThis guide
MarketplaceSelling to local and wider buyersFacebook Marketplace
Ads ManagerPaid reach and targetingFacebook Ad Manager
AnalyticsMeasuring what worksThis guide

Why use Facebook for business at all?

You use Facebook for business because of its reach and the quality of its tools: few channels let you build presence, run sophisticated ads, and sell, all to an audience this large and this measurable. The scale is the starting point, but the targeting and analytics are what make it a serious marketing channel rather than just a big audience.

The numbers explain the pull. Meta’s family of apps reaches 3.54 billion daily active people on average (Meta, 2025), and Facebook by itself can be reached with ads by about 2.28 billion users, roughly 27.9% of everyone on earth (DataReportal, 2025). That reach is why Facebook remains the most-used platform among marketers, and why 70% of marketing leaders report positive ROI from it (Sprout Social, 2026). For most businesses the question isn’t whether to be on Facebook, but how to use its tools well.

What is a Facebook business Page, and how do you use it?

A Facebook business Page is your brand’s home on the platform: a free, public profile where customers find your information, browse your content, and message you directly. It’s the foundation everything else connects to, your ads point to it, your Marketplace listings carry it, and your analytics measure it.

A Page does three things well. It presents the essentials, hours, location, services, photos, and promotions, in a place customers already check. It enables direct communication, so people can message you, leave reviews, and get fast answers, which builds trust and word of mouth. And it acts as the hub your paid activity feeds, since ads and boosted posts run from the Page. Setting it up well, with consistent branding and complete information, is the first step in any Facebook strategy; our dedicated guide to the Facebook business page covers that in detail.

How do you set up a Facebook business Page, step by step?

Setting up a business Page is quick and free, and it’s the first step because everything else, ads, Marketplace, analytics, connects to it. Here’s the essential sequence:

  1. From your personal Facebook account, go to Pages and click Create new Page (a Page is managed through your personal login but kept separate from your personal profile).
  2. Add your business name and category (the one that best describes what you do) and a short description of what you offer.
  3. Add profile and cover images, ideally your logo and an on-brand banner, so the Page looks credible at a glance.
  4. Complete the details: contact info, website, hours, location, and a clear call-to-action button (Call, Message, Shop, or Book).
  5. Add the Page to a Meta Business Portfolio (formerly Business Manager) if you’ll run ads or share access with a team, and add a second admin so the Page is never tied to one account.
  6. Publish a few posts before promoting it, so visitors arrive to an active Page rather than an empty one.

Keep branding and information consistent and complete, since a half-finished Page reads as untrustworthy. Our dedicated guide to the Facebook business page covers optimisation and ongoing management in depth.

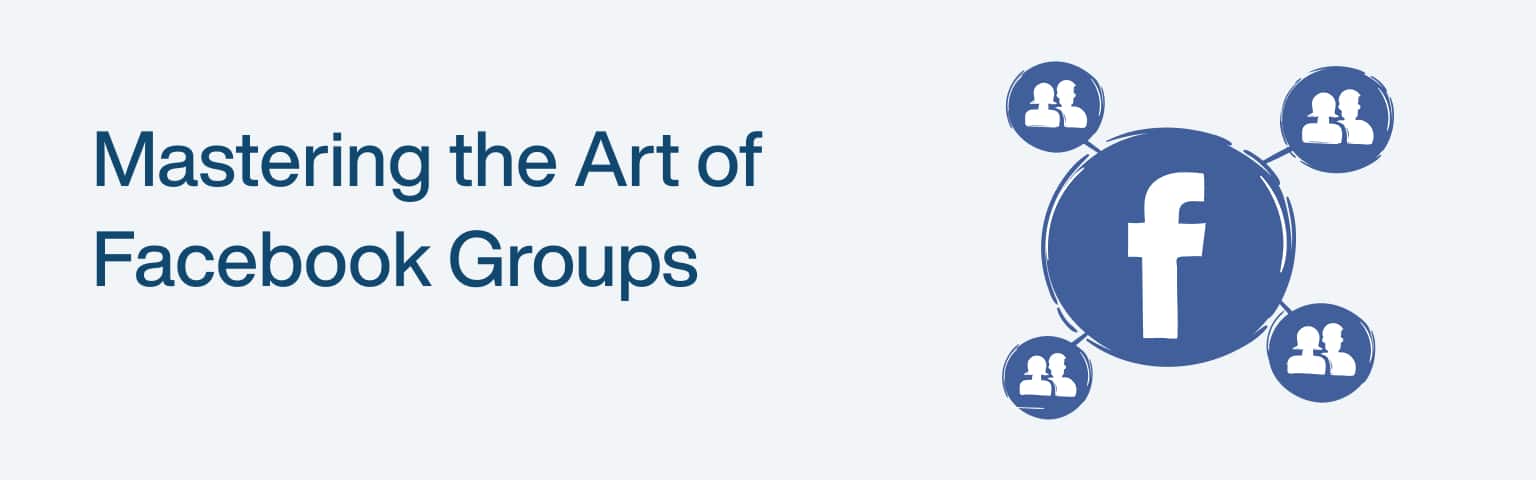
How do Facebook Groups help a business?

Facebook Groups help a business by building an engaged community around its brand, somewhere customers connect with each other and with you, not just receive marketing. Where a Page broadcasts, a Group converses, and that two-way engagement is some of the most valuable activity on the platform.

Used well, a Group becomes a place people choose to spend time. The tactics that work are consistent: share genuinely useful content (guides, insights, answers) rather than constant promotion; recognise and encourage active members so the community feels alive; offer members something real, like early access or member-only deals; and use polls and questions to learn what customers actually want. Clear rules and active moderation keep the space positive. A well-run Group deepens loyalty in a way ads can’t buy, and gives you a direct line to honest customer feedback.

How do Marketplace and advertising fit in?

Marketplace and advertising are how Facebook turns reach into sales: Marketplace is a selling channel where buyers are already shopping, and the ad system is how you reach precise audiences at scale. Together they cover both organic discovery and paid growth.

Facebook Marketplace lets you list products where more than a billion people browse to buy, with businesses reaching shoppers through catalog-connected listings and paid Marketplace placements; our guide to Facebook Marketplace covers how to use it.

The advertising side is run through Ads Manager, Facebook’s hub for building, targeting, and measuring campaigns, with detailed audience options and a range of ad formats. That’s a deep topic, so it has two dedicated guides: Facebook Ad Manager for the tool itself and Facebook advertising for strategy, metrics, and creative. Because Facebook owns Instagram, a single campaign can run across both, which is worth weighing up with our Instagram vs Facebook comparison.

How do you measure what’s working with Facebook analytics?

You measure Facebook performance with the platform’s built-in insights, which show how your Page, content, and ads perform so you can do more of what works. Without measurement you’re guessing; with it, every other tool gets sharper.

Two native tools cover most needs. Page Insights reports reach, engagement, and follower demographics for your organic content, telling you which posts land and who you’re reaching. Ads Manager reports the paid side, reach, impressions, click-through rate, cost per result, and return on ad spend, so you can see what each campaign delivers and shift budget accordingly. The discipline that matters is acting on the data: review regularly, identify what drives results, and feed that back into your content and targeting. Measurement is what turns Facebook from a presence into a performance channel.

Facebook Business Suite vs Creator Studio: what changed?

If you’re following older guidance, an important update: Meta retired Creator Studio in 2024 and consolidated its features into Meta Business Suite, so Creator Studio is no longer the place to manage your content. Any tutorial still pointing you there is out of date.

Meta Business Suite is now the single desktop and mobile hub for managing your Facebook Page and any connected Instagram account: you draft and schedule posts and Reels, manage a unified inbox of comments and messages across both apps, view insights, and reach Ads Manager from one place. The practical takeaways are simple. Use Meta Business Suite for day-to-day content scheduling, messaging, and Page management, the old Creator Studio workflows now live there. The Page itself remains your public presence; Business Suite is the back-office tool you run it from, and Ads Manager (covered in our Facebook Ad Manager guide) is where the paid side happens. If you onboarded a team member on Creator Studio years ago, move them to Business Suite, since that’s where all the tools now are.

Frequently asked questions

Yes, for most businesses. Its reach remains enormous, Meta’s apps reach 3.54 billion daily active people (Meta, 2025), and it’s still the most-used platform among marketers, with 70% of marketing leaders reporting positive ROI (Sprout Social, 2026). Whether it’s right for you depends on where your customers are: if they’re on Facebook, its tools and targeting are hard to beat. Younger, highly visual audiences may be better reached on Instagram, which Facebook also owns, so the two often work together.

Final thoughts

Facebook for business is best understood as a connected toolkit, not a single feature: a Page for presence, Groups for community, Marketplace for selling, Ads Manager for paid reach, and analytics to measure it all. Its scale remains exceptional, and the tools have matured into a genuine system for finding and keeping customers.

Start with a well-built Page, add a Group if community fits your brand, list on Marketplace if you sell products, and layer in advertising once you know what resonates, measuring as you go. For the deeper detail on each piece, follow the guides to the Facebook business page, Facebook Ad Manager, Facebook advertising, and Facebook Marketplace.

Facebook Ad Manager: The Ultimate Guide

What is Facebook Ad Manager?

Facebook Ad Manager, now branded Meta Ads Manager, is the dashboard where you create, target, run, and measure ads across Facebook, Instagram, and Meta’s other surfaces. It’s the single hub for the whole advertising process: you pick a goal, define who sees the ad, set a budget, choose where it appears, and track results, all in one place. If you want to reach Facebook’s audience with paid promotion, this is the tool you use.

Key Takeaways

  • Ads Manager now uses six streamlined objectives under Meta’s ODAX framework: Awareness, Traffic, Engagement, Leads, App promotion, and Sales (Meta).
  • Targeting spans demographics, interests, behaviours, plus Custom and Lookalike Audiences.
  • The Facebook Pixel is now the Meta Pixel, best paired with the Conversions API for accurate tracking.
  • Budget optimisation is now “Advantage campaign budget,” which spreads spend to your best-performing ad sets automatically.

Ads Manager can look daunting at first, but its logic is straightforward once you know the pieces. This guide walks through the parts that matter, objectives, targeting, placements, formats, and optimisation, with the current 2026 terminology, since Meta has renamed and restructured several features. It’s the tool companion to our broader guide on Facebook advertising strategy, and part of our wider look at Facebook for business.

How do you set up a campaign in Ads Manager?

You set up a campaign by choosing an objective, defining your audience, setting a budget, and selecting placements, in that order, because each choice shapes the next. The objective is the most important decision, since it tells Meta what outcome to optimise for.

Meta simplified its objectives in the ODAX framework, consolidating the old eleven into six. The previous “Awareness / Consideration / Conversion” three-stage structure is retired; today you choose directly from:

ObjectiveUse it to
AwarenessReach the most people and build brand recall
TrafficSend people to a website, app, or destination
EngagementGet messages, video views, post engagement, or likes
LeadsCollect leads via forms, messages, or calls
App promotionDrive app installs and in-app actions
SalesDrive purchases and conversions

Pick the objective that matches your real goal, because it drives how Meta delivers your ad. From there you define the audience and budget. The budget tool is now called Advantage campaign budget (formerly Campaign Budget Optimization): you set one budget at the campaign level and Meta distributes it to the ad sets performing best, while you keep control through spending limits.

What targeting options does Ads Manager offer?

Ads Manager offers targeting by demographics, interests, and behaviours, plus Custom and Lookalike Audiences built from your own data, which together let you reach precisely the people most likely to respond. Good targeting is what makes Facebook ads efficient; it’s the difference between paying to reach everyone and paying to reach the right someone.

The core options stack from broad to precise:

  • Demographics: age, gender, location, education, job title, and more.
  • Interests: topics and pages people engage with, signalling what they care about.
  • Behaviours: purchase patterns, device use, and other on- and off-platform activity.
  • Custom Audiences: people built from your existing data, customer lists, website visitors (via the Meta Pixel), or app users.
  • Lookalike Audiences: new people who resemble your best existing customers.

Custom and Lookalike Audiences are usually the highest-performing, because they start from people who already know you or closely match those who do. Increasingly, Meta also offers Advantage+ audience tools that use its own signals to find buyers, which can complement your manual targeting. Whichever you use, the aim is the same: spend your budget on the people most likely to act.

How does the Meta Pixel improve your ads?

The Meta Pixel improves your ads by tracking what people do on your website after they click, so Meta can optimise delivery toward conversions and you can measure real results. The Facebook Pixel was renamed the Meta Pixel in 2022, but its job is the same: connect on-site actions back to your ad spend.

The Pixel is a small piece of code on your site that records events, page views, sign-ups, add-to-carts, and purchases, and reports them to Ads Manager. That data does two things. It lets you build Custom Audiences (for example, everyone who viewed a product but didn’t buy) and Lookalike Audiences from your converters. And it lets Meta optimise toward the action you care about, showing your ad to people most likely to complete it. Because browser tracking has become less reliable, Meta now recommends pairing the Meta Pixel with the Conversions API (CAPI), a server-side method that sends events directly from your server, with deduplication so actions aren’t double-counted (Meta). Together they give far more complete measurement than the Pixel alone.

What ad formats and placements are available?

Ads Manager offers several ad formats, image, video, carousel, and collection, across placements that include the Facebook and Instagram feeds, Stories, Reels, and more. Format and placement together shape how your ad looks and where it appears, so they’re worth matching to your goal.

On formats, image ads are the simplest and most flexible, carrying your message in a single strong visual. Video ads are the most engaging, ideal for telling a story or showing a product in use. Carousel ads show multiple images or videos people can swipe through, good for product ranges or step-by-step messages. On placements, you can run across the Facebook News Feed, Instagram Feed, Stories, Reels, Messenger, and the Audience Network. Right-hand-column ads still exist but are limited, desktop-only and image-only, so they’re a minor placement rather than a primary one. In practice, most advertisers use Advantage+ placements, which let Meta automatically place each ad where it’s likely to perform best, rather than choosing every placement manually.

How do you optimise and manage campaigns?

You optimise campaigns by letting the data guide budget and targeting, using saved audiences, automated rules, and Advantage budget to do more of what works and less of what doesn’t. Setup gets a campaign live; optimisation is what makes it profitable over time.

Three tools help most. Saved Audiences let you store a well-performing audience and reuse it across campaigns, so you’re not rebuilding targeting each time. Automated rules let you set conditions, like “pause any ad set whose cost per result exceeds £X” or “raise the budget when an ad set performs,” so the system adjusts without constant manual checking. And Advantage campaign budget keeps shifting spend toward your strongest ad sets automatically. The overall discipline is to watch your key metrics in Ads Manager, cost per result, click-through rate, and return on ad spend, and act on them: scale what converts, cut what doesn’t, and keep testing. For the metrics and creative side in depth, see our guide to Facebook advertising.

How do you launch your first campaign, step by step?

Launching your first campaign follows the same order every time, objective, audience, budget, placement, creative, so once you’ve done it the structure is always familiar. Here’s the sequence:

  1. Click Create and choose your objective from the six ODAX options (most beginners want Traffic, Leads, or Sales).
  2. Name the campaign and decide between Advantage campaign budget (one budget Meta spreads across ad sets) or ad-set budgets.
  3. Build the ad set: define the audience (start with a focused interest or a Custom Audience, not too broad), set the budget and schedule, and choose placements (Advantage+ placements is the simple default).
  4. Create the ad: pick a format (a single image or video is fine to start), upload your creative, write benefit-led primary text and a headline, and add a clear call to action and destination URL.
  5. Confirm tracking. Make sure your Meta Pixel (and ideally the Conversions API) is connected if you’re optimising for a website action, so results are measured.
  6. Review and publish, then let it run through the learning phase (roughly the first 50 conversions) before judging or heavily editing it.

Resist the urge to change everything in the first few days, frequent edits restart the learning phase. Give it time to deliver, then read the results and adjust.

How do you read and export Ads Manager reports?

Ads Manager reporting is built around columns and breakdowns, and learning to customise them is what turns a wall of numbers into a clear read on performance. The default columns rarely show exactly what you need, so set them up deliberately.

Use the Columns menu to show the metrics that map to your goal, cost per result, results, ROAS, CTR, and spend, rather than vanity metrics, and save that layout as a preset to reuse. Then use Breakdowns to slice performance by age, gender, placement, or time, which reveals where your results actually come from (you might find one placement or age group drives most conversions). To get the data out, use the Reports or Export option to download a CSV or Excel file, or schedule a recurring report to be emailed to you or a client. Set the date range deliberately and compare like-for-like periods. The habit that matters is reading reports to make decisions, shifting budget to what converts and pausing what doesn’t, rather than just admiring the numbers.

What are the most common beginner mistakes in Ads Manager?

Most first-time Ads Manager mistakes are predictable, and avoiding them saves a lot of wasted budget. They cluster around impatience, vague targeting, and weak measurement.

  • Editing during the learning phase. Changing budget, audience, or creative too soon restarts Meta’s learning, so results never stabilise; let an ad set gather data first.
  • Targeting too broad or too narrow. A vague audience wastes spend; an over-narrow one can’t deliver. Start focused but reachable and let Advantage+ tools help.
  • No conversion tracking. Running conversion ads without the Meta Pixel and Conversions API means optimising and measuring blind.
  • Choosing the wrong objective. Picking Traffic when you want sales tells Meta to optimise for clicks, not buyers, match the objective to the real goal.
  • Judging on vanity metrics. Likes and reach feel good but don’t pay; watch cost per result and ROAS.
  • Too little budget or time. Starving a campaign or killing it after a day never gives it a fair test.

The common thread is patience and clarity: pick the right objective, target sensibly, track conversions, and let the data accumulate before you judge. Most beginner failures are one of these, not a flaw in the ads themselves.

Frequently asked questions

Yes, the tool itself is free; you only pay for the ads you run. There’s no charge to access Ads Manager, build campaigns, or use its targeting and analytics, you set a budget and pay for the ad delivery against it. This means you can explore the interface, plan campaigns, and review audience options before spending anything. Your only cost is the advertising budget you choose, which you control entirely, from a few pounds a day to whatever scale you need.

Final thoughts

Meta Ads Manager is the control centre for Facebook advertising, and once you understand its pieces, objective, audience, budget, placement, format, it stops being intimidating. The key is to use current terminology and tools: the six ODAX objectives, the Meta Pixel paired with the Conversions API, and Advantage campaign budget, rather than the older structures many guides still describe.

Start with a clear objective and a tight audience, keep the budget modest while you learn, and let the data drive your optimisation, scaling what converts and cutting what doesn’t. For the strategy, metrics, and creative that make those campaigns land, read our guide to Facebook advertising, and for the wider toolkit, our overview of Facebook for business.

Facebook Marketplace – Everything You Need to Know

What is Facebook Marketplace?

Facebook Marketplace is a buying-and-selling platform built into Facebook where people and businesses list items for sale to local and wider audiences. Launched in October 2016, it lets users browse, search, and message sellers directly inside the app they already use, which is what made it grow so fast. For sellers, it puts your products in front of a huge pool of people who are actively shopping, without needing a separate store.

Key Takeaways

  • More than 1 billion people use Facebook Marketplace each month (Meta, 2025).
  • Listing items is free; Marketplace charges a selling fee only on checkout orders (5%, or a $0.40 minimum, in the US).
  • Businesses reach shoppers through catalog-connected listings and paid Marketplace ad placements.
  • Quick replies, clear photos, honest descriptions, and following Commerce Policies are what drive sales.

Marketplace turned Facebook into a genuine commerce destination: a place people open specifically to find deals, sell what they no longer need, or discover products nearby. For businesses, that intent, people already in a shopping mindset, is what makes it worth using. This guide covers how it works, how businesses can use it, the fees, and how to sell well, and it’s part of our wider look at Facebook for business.

How does buying and selling work on Marketplace?

Buying and selling on Marketplace works through search, filters, and direct messaging: buyers find items by keyword and location, then message the seller to arrange the deal. It’s designed to feel local and personal, with most transactions happening between people in the same area.

For buyers, the experience is simple: search for what you want, filter by location, category, and price, and message a seller through Messenger to ask questions or agree a price. Listings are personalised, surfacing items near you and matching your interests. For sellers, listing is quick: add a title, description, price, up to ten photos, and a category, and your item appears to local browsers. Communication stays in Messenger, so personal contact details aren’t exposed publicly until you choose to share them. Much of Marketplace remains local pickup, though desktop access and shipping options support higher-value categories like furniture, vehicles, and rentals.

How do you create a Marketplace listing step by step?

Creating a Marketplace listing takes a couple of minutes, and getting the details right is what makes it sell. The flow is the same on mobile and desktop.

  1. Open Marketplace and tap or click Create new listing, then choose the type, Item for sale, Vehicle for sale, or Home for sale or rent.
  2. Add photos. Upload up to 10 clear, well-lit images from several angles; the photos do most of the selling, so make the first one strong.
  3. Write the title and price. Use a clear, searchable title (include the brand and model), set a competitive price by checking similar listings, and mark it free or negotiable if relevant.
  4. Choose a category and condition, and add the location buyers will search from.
  5. Write an honest, detailed description with the keywords people would search, condition, dimensions, age, and any faults.
  6. Set the audience and publish. List to Marketplace (and relevant local buy-and-sell groups if you choose), then publish.

Once it’s live, respond to messages fast, edit the listing if it isn’t getting interest (usually the price or the lead photo), and mark it sold when it goes so your listings stay tidy. Keeping communication in Messenger and following Facebook’s Commerce Policies keeps the listing safe and visible.

How can businesses use Facebook Marketplace?

Businesses use Facebook Marketplace by listing products where over a billion people already shop, reaching both local buyers and, through catalog and ads, a wider audience. It’s a low-cost extra channel that taps shopping intent you’d otherwise pay to create elsewhere.

There are two main routes. Smaller sellers can list items directly, as an individual would, to reach local buyers for free. Businesses with a product catalog can connect it to Marketplace so eligible inventory appears in the relevant categories, and can run paid ads that place listings in the Marketplace feed to reach beyond their local area. Either way, the appeal is the audience’s intent: people on Marketplace are actively looking to buy, which tends to convert better than interrupting them elsewhere. Pairing Marketplace listings with the rest of your Facebook presence, your Page, ads, and analytics, lets you turn one-off buyers into followers and repeat customers, which is where the Facebook Ad Manager and broader Facebook advertising tools come in.

What does it cost to sell on Marketplace?

Listing on Marketplace is free, and a selling fee applies only when you process an order through Facebook checkout, not for local cash deals. This makes it one of the cheaper places to start selling online, especially for local pickup where no fee applies at all.

The fee structure is straightforward. Creating a listing costs nothing, however many you post. When a customer buys through Facebook’s checkout (where available, primarily in the US), Marketplace charges a selling fee of 5% per shipment, or a flat $0.40 for shipments of $8 or less. For local sales arranged through Messenger and paid in person, there’s no Marketplace fee at all, since Facebook isn’t processing the payment. Compared with the listing and final-value fees on many other marketplaces, this is competitive, but build the checkout fee into your pricing where it applies so it doesn’t eat your margin.

ActionCost
Listing an itemFree
Local sale (paid in person)No Marketplace fee
Checkout order (US)5% per shipment, or $0.40 minimum

What are Marketplace’s specialised categories (vehicles, rentals, and property)?

Beyond everyday items, Marketplace has dedicated categories for higher-value listings, vehicles, property rentals, and homes for sale, which have their own fields and reach a wider, often non-local audience. They work a little differently from a standard item listing.

Vehicles use a “Vehicle for sale” listing type with fields for make, model, year, mileage, and condition, and they’re browsed by people specifically shopping for cars, so accurate details and plenty of photos matter. Property listings (“Home for sale or rent”) let landlords and agents post rentals or sales with bedrooms, bathrooms, price, and availability, reaching people searching by area. These categories often support wider-area discovery rather than pure local pickup, because buyers will travel for the right car or home. The practical upshot: if you’re listing a vehicle or property, use the dedicated type rather than a generic item listing, fill in every structured field (buyers filter on them), and expect interest from beyond your immediate area. Note that the availability of some specialised categories, and the rules around them, can vary by region.

Facebook Marketplace vs eBay vs Craigslist: which should you use?

The three platforms suit different sales, so the right choice depends on what you’re selling and how far you’ll ship. In short: Marketplace is best for local and social selling, eBay for shipped and collectible items with buyer protection, and Craigslist for purely local, no-frills listings.

  • Facebook Marketplace is free to list, tied to real Facebook profiles (which adds a layer of trust), and strong for local pickup and visual, everyday items. Its huge built-in audience and in-app messaging make it the fastest way to reach nearby buyers, and checkout or shipping extends it where available.
  • eBay is built for shipping nationwide and for collectibles, electronics, and niche goods, with structured buyer and seller protection and auction or fixed-price formats, but it charges listing and final-value fees and is far less local.
  • Craigslist is stripped-back and local, free in most categories, with no profile-based trust layer or built-in payments, which suits quick local sales but offers the least protection and reach.

For most casual and local selling, Marketplace’s reach, free listings, and profile-based trust make it the default. Reach for eBay when you need to ship to a national audience or sell something niche with protection, and Craigslist when you just want a fast, local, no-frills listing. Many sellers cross-post to more than one to widen reach.

How do you sell effectively and safely on Marketplace?

You sell effectively on Marketplace by responding quickly, presenting items well, and following Facebook’s Commerce Policies, and safely by keeping communication and payment within Facebook’s tools. Speed and trust are the two biggest factors in turning interest into a sale.

On effectiveness, reply fast: buyers often message several sellers, so the quickest, most helpful response usually wins the sale. Use clear, well-lit photos (up to ten), write honest, detailed descriptions with relevant keywords, and price competitively by checking similar listings. On safety, keep conversations in Messenger so your contact details stay private, meet in public places for local exchanges, and use secure payment methods rather than untraceable transfers. Stay within Facebook’s Commerce Policies, which set out what can and can’t be sold, to avoid having listings removed. Popular, well-performing categories include home and garden, furniture, electronics, clothing, and vehicles, items people actively search Marketplace to find.

Frequently asked questions

Yes, for listing and for local sales. Creating listings is free no matter how many you post, and if you sell to a local buyer who pays in person, Facebook takes no fee because it isn’t processing the payment. A selling fee (5% per shipment, or a $0.40 minimum) applies only when an order goes through Facebook’s checkout system, mainly in the US. For most casual and local selling, Marketplace costs nothing, which is a big part of why it grew so quickly.

Final thoughts

Facebook Marketplace turned Facebook into a real shopping destination, a place more than a billion people visit each month specifically to buy and sell. For sellers, that built-in shopping intent, combined with free listings and low fees, makes it one of the easier and cheaper ways to reach buyers, whether you’re clearing out a garage or running a growing business.

Sell well by responding fast, presenting items clearly, and pricing against the competition, and sell safely by keeping communication and payment inside Facebook’s tools. For businesses, Marketplace works best as one piece of a connected Facebook presence alongside your Page and ads. To see how the pieces fit together, read our overview of Facebook for business.

How to Eliminate Render-Blocking Resources Using JavaScript Fold 

What are render-blocking resources?

Render-blocking resources are CSS and JavaScript files that the browser must download and process before it can display the page, so they delay the moment anything appears on screen. When a browser hits a render-blocking file in the page’s head, it pauses rendering until that file loads, which is exactly why a page can sit blank for a beat before content shows. Eliminating or deferring these resources is one of the most effective ways to speed up loading and improve Largest Contentful Paint, the loading Core Web Vital.

Key Takeaways

  • Render-blocking resources are CSS and JS the browser must process before it can paint the page, delaying what users see.
  • They’re a leading cause of slow Largest Contentful Paint (LCP), which should be 2.5 seconds or less (web.dev).
  • The fixes: defer or async non-critical JavaScript, inline critical CSS and defer the rest, and minify both.
  • PageSpeed Insights flags render-blocking resources directly, so you can see exactly which files to address.

Render-blocking resources are one of the most common performance problems and, helpfully, one of the most fixable, because the browser tells you exactly which files are the culprits. Speeding up rendering directly improves perceived speed and your loading metric, which matters because the chance of a bounce rises 123% as load time goes from 1 to 10 seconds (Think with Google, 2017). This guide explains what these resources are and how to eliminate their blocking effect, complementing our guide to improving Largest Contentful Paint.

The table below maps render-blocking resource types to their fix.

ResourceWhy it blocksFix
CSS in the headBrowser won’t paint until CSS loadsInline critical CSS, defer the rest
Synchronous JS in the headBlocks parsing and renderingAdd defer or async, or move to footer
Large CSS/JS filesTake longer to download and parseMinify, split, remove unused code
Third-party scriptsBlock while fetching from elsewhereDefer, async, or load conditionally

Why do render-blocking resources slow your site?

Render-blocking resources slow your site because the browser has to stop and deal with them before it can show anything, delaying the first meaningful paint. By default, when the browser parses your HTML and encounters a stylesheet or a synchronous script in the head, it must download and process that file before continuing to render. If those files are large or numerous, the user stares at a blank or unstyled page while the browser works through them.

This hits your Core Web Vitals directly, especially LCP. Since LCP measures when the largest visible element appears, and render-blocking resources delay all rendering, they’re a frequent reason a page fails the 2.5-second LCP threshold (web.dev). Synchronous JavaScript is the worst offender, because it blocks both parsing and rendering until it finishes executing, but render-blocking CSS delays painting too.

The cost is both experiential and measurable. Users perceive a render-blocked page as slow regardless of how fast the rest loads, and that perceived slowness drives the bounces the Think with Google data captures. Because page experience, including LCP, is a signal Google’s ranking systems reward (web.dev), render-blocking resources can quietly work against both your users and your search performance, which is why eliminating them is high-value.

How do you eliminate render-blocking JavaScript?

You eliminate render-blocking JavaScript by telling the browser it doesn’t need to wait for scripts before rendering, using the defer or async attributes, and by reducing the script you ship. By default a script in the head blocks rendering; these attributes change that behaviour so the page can paint while scripts load.

  1. Add defer to scripts. The defer attribute downloads the script in parallel without blocking rendering, then runs it after the HTML is parsed, in order. This is the safest default for most scripts that aren’t needed immediately.
  2. Use async where order doesn’t matter. The async attribute also downloads without blocking and runs as soon as it’s ready. It suits independent scripts (like some analytics) where execution order isn’t important.
  3. Move non-critical scripts out of the head. Scripts that don’t need to run early can load at the end of the body or be deferred, so they don’t hold up the initial render.
  4. Reduce and audit JavaScript. Remove unused scripts, question heavy libraries, and audit third-party tags (ads, analytics, widgets), since each one is potential blocking weight. Less JavaScript means less to block on.

Reducing render-blocking JavaScript also helps interaction responsiveness (INP), since the same scripts that block rendering often tie up the main thread, which our guide to optimising responsiveness (INP) covers. So this work pays off across more than one metric.

How do you handle render-blocking CSS?

You handle render-blocking CSS by getting the styles needed for above-the-fold content to the browser fast and deferring the rest, so the page can paint quickly. CSS is render-blocking by nature, the browser won’t show an unstyled page, so the goal isn’t to remove it but to minimise how much blocks the initial render.

The main technique is to inline critical CSS: identify the small subset of styles needed to render the visible, above-the-fold content, and place that directly in the HTML head so the browser has it immediately, without a separate file fetch. The remaining, non-critical CSS can then be loaded in a non-blocking way (for example, loaded asynchronously), so it doesn’t delay the first paint. This gets the visible content styled and showing fast while the rest arrives behind it.

Beyond that, reduce the CSS itself: minify it to cut file size, and remove unused styles, since large frameworks often ship far more CSS than a page actually uses. Smaller stylesheets download and process faster, lessening their blocking effect. Together, inlining critical CSS, deferring the rest, and trimming unused styles can dramatically cut the render-blocking delay, the same speed fundamentals our guide to website speed optimization addresses.

How do you find and fix render-blocking resources?

You find render-blocking resources using free tools that name the exact files, then apply the defer, inline, and minify fixes to each. Diagnosis is straightforward because the tools do the identifying for you, so you’re never guessing which files to address.

Start with PageSpeed Insights: run any URL and it lists the specific render-blocking resources under its opportunities, often with the estimated time you’d save by addressing each. Chrome’s built-in Lighthouse report (in DevTools) does the same and lets you test as you make changes. These tools turn an abstract problem into a concrete to-do list of named files.

Then work through the list by type: add defer or async to blocking scripts (or move them out of the head), inline the critical CSS and defer the rest, and minify everything. Re-run the tool after each change to confirm the resource is no longer blocking and that your LCP has improved, and verify the gain in Search Console’s field data over time, since that reflects real users. Because the fixes are well-defined and the tools point you straight at the problem files, eliminating render-blocking resources is one of the more satisfying, high-impact performance jobs, a key part of passing the loading metric in our Core Web Vitals beginner’s guide.

What do render-blocking fixes look like? Before and after

The clearest way to see the fix is side by side. Here’s a typical page head before optimisation, where every resource blocks the first paint:

<head>
  <link rel="stylesheet" href="/css/styles.css">
  <script src="/js/app.js"></script>
  <script src="/js/analytics.js"></script>
</head>

The stylesheet blocks rendering until it downloads, and each synchronous script blocks parsing until it executes, so the browser can’t paint anything until all three are handled. Here’s the same head after applying the fixes:

<head>
  <style>/* critical above-the-fold CSS inlined here */</style>
  <link rel="preload" href="/css/styles.css" as="style" onload="this.rel='stylesheet'">
  <script src="/js/app.js" defer></script>
  <script src="/js/analytics.js" async></script>
</head>

Now the critical CSS is inlined so the page can paint immediately, the full stylesheet loads without blocking, defer lets app.js download in parallel and run after parsing, and async lets the independent analytics script load without holding anything up. The visible content appears almost at once instead of waiting for every resource, which is exactly the improvement PageSpeed Insights rewards in your LCP.

How do you fix render-blocking resources on WordPress?

On WordPress you usually don’t hand-edit this code, a performance or caching plugin applies the same fixes through settings, which is the practical route for most sites. The principle is identical; the plugin just does the deferring, inlining, and minifying for you.

The common approach is to install a caching and optimisation plugin, popular options include WP Rocket (paid) and free plugins like Autoptimize or LiteSpeed Cache, and enable its render-blocking options: defer JavaScript, eliminate or defer render-blocking CSS (often labelled “Optimize CSS delivery” or “generate critical CSS”), and minify CSS and JavaScript. Most also let you delay JavaScript until user interaction, which is powerful for third-party scripts. Two cautions matter on WordPress specifically: deferring or combining scripts can occasionally break a theme or plugin that expects a script to load early, so test the site after enabling each option, and change one setting at a time so you can tell what caused any issue. Pair the plugin with a good host and a CDN, then re-run PageSpeed Insights to confirm the render-blocking warnings have cleared. If a particular script breaks when deferred, most plugins let you exclude it by name while still optimising the rest.

Frequently asked questions

It means a resource (a CSS or JavaScript file) that the browser must download and process before it can render, or continue rendering, the page. When the browser parses your HTML and hits a render-blocking file in the head, it pauses showing content until that file is handled. The result is a delay before anything appears on screen, which makes the page feel slow and harms your Largest Contentful Paint, the loading Core Web Vital.

Final thoughts

Render-blocking resources are a common, fixable cause of slow pages: CSS and JavaScript that force the browser to wait before showing content. Because they delay the first paint, they’re a frequent reason a page fails its Largest Contentful Paint target and feels sluggish to users, which costs both engagement and page-experience standing.

The fixes are well-defined and the tools point you straight at the offending files: defer or async non-critical JavaScript, inline the critical CSS and defer the rest, and minify everything, then re-measure. It’s one of the higher-return performance jobs because the diagnosis is easy and the impact on perceived speed is immediate. For the metric this most affects, see our guide to improving Largest Contentful Paint.

The Best Shopify Stores

What makes the best Shopify stores stand out?

The best Shopify stores stand out by doing the fundamentals exceptionally well on a platform built for it: distinctive branding, fast and flawless mobile, a frictionless checkout, and obvious trust signals. Shopify gives every store the same underlying capability, so what separates the standout stores isn’t the platform, it’s how they use it. Studying them is most useful when you extract those repeatable decisions rather than copying a look, because the decisions, not the design, are what you can apply to your own Shopify store.

Key Takeaways

  • Shopify powers about 31% of all ecommerce systems, so it’s the platform behind a huge share of standout stores (W3Techs, 2026).
  • What sets the best apart is execution, not the platform: branding, mobile, checkout, and trust.
  • Shopify’s strength is removing technical friction so you can focus on those things.
  • Extract the repeatable lessons from great stores rather than copying their specific design.

Shopify’s popularity means there’s no shortage of excellent stores to learn from, and because they all run on the same platform, the lessons transfer cleanly to your own store. The platform handles hosting, security, and checkout infrastructure, so the great stores compete on branding, experience, and merchandising, exactly the areas you control too. This guide covers what the best Shopify stores get right and how to apply it, building on our broader guide to the best ecommerce store examples.

The table below maps what standout Shopify stores do well to why it works.

What they do wellWhat it looks likeWhy it works
Distinctive brandingConsistent voice, look, storyMemorable; builds loyalty
Fast mobile experienceQuick, easy to browse and buy on phonesWhere much shopping happens
Frictionless checkoutFew steps, guest checkout, clear costsFewer drop-offs at the final stage
Visible trustReviews, policies, securityReassures buyers to commit
Strong product pagesGreat images, detail, social proofAnswers questions, reduces hesitation

Why do so many great stores run on Shopify?

So many great stores run on Shopify because it removes the technical burden of running an online store, letting businesses focus on branding, products, and customer experience rather than infrastructure. Shopify is a fully hosted platform: hosting, security, updates, and checkout are handled for you, which is why it powers about 31% of all ecommerce systems (W3Techs, 2026) and is the default for so many direct-to-consumer brands.

That hosted model is the practical reason behind its dominance. A business can launch and run a capable store without a development team, and scale it by moving up plan tiers rather than re-engineering, so the energy goes into selling, not server management. For most merchants that trade, simplicity and speed in exchange for subscription costs and less low-level control, is well worth it, which is why Shopify and self-hosted alternatives suit different businesses, as our comparison of Shopify vs Magento explains.

The lesson for your own store isn’t that Shopify is the only right choice, but that choosing a capable platform frees you to compete where it counts. The best Shopify stores aren’t great because they’re on Shopify; they’re great because the platform let them pour their effort into branding, experience, and merchandising. That’s the reframe: pick a platform that removes friction, then win on the things customers actually notice.

What lessons can you take from the best Shopify stores?

The lessons from the best Shopify stores are the same execution fundamentals that separate any great store: distinctive branding, an excellent mobile experience, a frictionless checkout, and visible trust. Because Shopify gives everyone the same baseline, these are precisely the areas where the standout stores pull ahead, and where you can too.

Branding comes first. The best Shopify stores have a clear, consistent identity, voice, visuals, and story, that makes them memorable and builds loyalty beyond price. You don’t need a big budget for this, just clarity about who you are and the discipline to apply it across every page. Mobile is the second lesson: the best stores are fast and effortless on phones, where much shopping now happens, and they keep performance tight because slow pages lose buyers, with bounce probability rising 123% as load time goes from 1 to 10 seconds (Think with Google, 2017).

Checkout and trust complete the set. Great stores make buying frictionless, few steps, guest checkout, costs shown early, and make trust obvious through reviews, clear policies, and visible security. Their product pages answer every question a buyer would have, with strong images and social proof. None of this is Shopify-specific; it’s what converts on any store, which is why these lessons apply whether you’re on Shopify or elsewhere, and why our guides to ecommerce website design and launching a profitable online store focus on exactly these fundamentals.

Which Shopify stores succeed, and why?

A few well-known brands built on Shopify show these lessons in practice. They’re named as illustrations rather than linked, since stores redesign constantly, but each isolates a principle worth learning.

  • Allbirds succeeds on clear, consistent brand storytelling: a sustainability message runs through every page, which justifies premium pricing and builds loyalty beyond the product itself.
  • Gymshark, which runs on Shopify Plus, succeeds on community and mobile: it grew through influencer partnerships and an experience built for how young customers actually shop on their phones.
  • Kylie Cosmetics, an early high-profile Shopify brand, succeeds on focus and urgency: a tight catalogue and timed product drops create demand, on a checkout engineered to handle big traffic spikes.
  • Fashion Nova succeeds on speed and social proof: a fast-moving catalogue tied closely to social media, with heavy use of customer photos and reviews to reassure buyers.

Look past what each sells and you see the same repeatable choices from the lessons above, a distinctive brand, a fast mobile experience, visible social proof, and a frictionless path to buy. That’s what to take from them: not the products, but the decisions any store can apply.

Frequently asked questions

Strong execution of the fundamentals: distinctive, consistent branding; a fast, easy mobile experience; a frictionless checkout with few steps and clear costs; visible trust signals like reviews and policies; and product pages that answer every buyer question. Because Shopify gives all stores the same technical baseline, these execution choices are what separate the standouts. The common thread is that they reduce friction and build confidence between a visitor landing and buying, which is what converts browsers into customers.

Final thoughts

The best Shopify stores teach a clarifying lesson: the platform isn’t what makes them great. Shopify gives every store the same solid foundation by handling hosting, security, and checkout, so the standouts win on the things customers actually notice, distinctive branding, a fast mobile experience, a frictionless checkout, and obvious trust. Those are the repeatable decisions worth taking from them.

So when you study a Shopify store you admire, look past the design to the choice underneath, then apply that choice to your own store. Pick a capable platform to remove technical friction, then pour your effort into branding, experience, and merchandising. That’s how the best stores got there, and it’s available to you too. For the wider set of examples and the build itself, see our guides to the best ecommerce store examples and launching a profitable online store.

Key Steps in the Start-Up Journey: A Comprehensive Checklist

What are the key steps in the start-up journey?

The key steps in the start-up journey are, in order: validate the idea, plan the business, handle the legal and financial setup, build your product and online presence, launch, and then measure and grow. Working through them in sequence matters, because each stage de-risks the next, and skipping one (most often validation or planning) is where avoidable failures begin. This checklist lays out the journey stage by stage so you build in the right order rather than rushing to launch and backfilling the foundations later.

Key Takeaways

  • The journey runs in stages: validate, plan, set up legally and financially, build, launch, then measure and grow.
  • Order matters: each stage de-risks the next, and skipping validation or planning causes most avoidable failures.
  • Planning improves your odds; research suggests founders who write a business plan are more likely to succeed (HBR, 2017).
  • The reality check: about half of new businesses survive past five years (BLS), so disciplined execution matters as much as the idea.

A startup can feel overwhelming because there’s so much to do and no obvious order. A checklist fixes that: it turns a vague, daunting goal into a sequence of concrete steps you can work through and tick off. This guide is that checklist, covering each stage of the journey with what to do and why it comes when it does, complementing the mindset side in our guide to becoming a successful entrepreneur.

The table below summarises the stages of the start-up journey.

StageWhat you doWhy it comes here
1. ValidateConfirm real demand for the ideaAvoids building the unwanted
2. PlanBusiness plan, numbers, strategyClarifies path; improves odds
3. Set upLegal structure, finances, adminOperate legally and funded
4. BuildProduct/service + online presenceSomething to sell and be found by
5. LaunchGet it in front of customersWhere real feedback begins
6. GrowMeasure, optimise, scaleTurns a launch into a business

How do you validate and plan a start-up?

You validate and plan a start-up by confirming real demand before you build, then capturing the strategy and numbers in a business plan. These first two stages are the most skipped and the most important, because a startup that builds something nobody wants, or runs out of money it never planned for, fails regardless of effort.

Validation comes first. Before investing time and money, confirm people actually want what you’re offering: research the market and competitors, talk to potential customers, and test cheaply where you can (a prototype, a pre-sale, a minimum version) before committing fully. Real evidence of demand beats conviction every time, and it’s far cheaper to learn before you build than after.

Planning turns that evidence into a roadmap. A business plan forces you to work through your goals, target customers, pricing, costs, funding needs, and how you’ll reach the market. It needn’t be elaborate, but the discipline pays off: research suggests founders who write a plan are more likely to succeed (HBR, 2017), and you’ll need it for any funding. Together, validation and planning are the foundation the rest of the journey rests on, get them right and everything after is more likely to work.

What setup and build steps come next?

After validating and planning, the next steps are handling your legal and financial setup, then building your product or service and the online presence that lets customers find you. These turn a validated plan into an operating business, and doing them properly avoids problems that are expensive to fix later.

On setup, work through the essentials: register an appropriate business structure, sort any licences or permits your activity needs, set up business finances (a separate bank account, basic bookkeeping, an understanding of tax), and secure any funding your plan calls for. Requirements vary by location and business type, so check what applies to you, but every startup needs these foundations in place before trading.

On building, create your product or service to a standard you can stand behind, then build the online presence that will sell it. In 2026, customers find and judge businesses online first, so a credible website is part of launching, not an afterthought, whether that’s an ecommerce store, a service site, or a portfolio. For product businesses our guide to starting a manufacturing business covers production; for the online side, being findable through search matters from day one, which our SEO services approach addresses. Keep costs lean here, especially if you started without much investment.

How do you fund a start-up? Funding paths and resources

Funding is part of the setup stage, and most start-ups use one of a few paths, chosen by how much capital they need and how much control they’re willing to trade. Match the route to your business rather than defaulting to one.

  • Bootstrapping. Funding from savings and early revenue, the most common route for small and online start-ups, because it keeps full ownership and forces lean discipline. It pairs naturally with starting without much investment.
  • Loans and credit. Bank loans, small-business lending, and government-backed schemes provide capital you repay over time without giving up equity, useful when you need to buy stock or equipment.
  • Grants and competitions. Government and industry grants, and start-up competitions, offer non-dilutive money; they’re competitive and slow, but worth checking for your sector and region.
  • Investors (angel and venture). Selling equity for capital suits high-growth start-ups that need to scale fast, but it means giving up a share and answering to investors, so it’s the wrong fit for most small starts.
  • Crowdfunding. Pre-selling a product to early backers raises money and validates demand at the same time.

Whatever the route, financial discipline matters more than the amount: keep business and personal finances separate, track cash flow closely (running out of cash, not lack of profit, sinks most start-ups), and keep a runway buffer. Build the funding need into your business plan at stage two so you’re raising deliberately, not scrambling.

What technology and tools does a start-up need?

Every modern start-up needs a basic technology stack, and the central piece is a credible website, because in 2026 customers find and judge a business online before they ever make contact. Getting the essentials in place early avoids bolting them on awkwardly later.

A lean starting stack covers a handful of needs:

  • A website or online store. Your most important asset: a professional site (or an ecommerce store if you sell products) that explains what you offer and lets customers act. It’s part of launching, not an afterthought, and being findable through search matters from day one, which our SEO services approach addresses.
  • Email and communication. A professional email address on your own domain, plus whatever messaging or scheduling your customers expect.
  • Payments and finance. A way to take payment (a payment processor or your store’s checkout) and simple accounting or bookkeeping software to track the numbers.
  • Customer and marketing tools. A simple CRM or contact list, an email-marketing tool to build a list you own, and analytics to see what’s working.
  • Productivity and storage. Document, file-storage, and project tools to keep the operation organised as it grows.

Start with the essentials and add tools only as a real need appears, over-buying software early is a common, avoidable cost. For the build itself, a fast, trustworthy site is the foundation everything else hangs on, which our guides to ecommerce website design and professional website design cover.

How do you launch and grow a start-up?

You launch by getting your product in front of real customers, then grow by measuring what happens and improving, rather than treating launch as the finish line. Many founders over-polish before launching; in practice, launching, even imperfectly, is when you start getting the real feedback that no amount of planning can substitute for.

At launch, focus on reaching your first customers through the channels your plan identified, your website and SEO, social media, your network, paid ads if the budget fits, and any partnerships. Don’t wait for everything to be perfect; a real launch that generates feedback beats a flawless plan that never ships. Early customers teach you what actually resonates, which is worth more than your assumptions.

Then grow through measurement and iteration. Track what’s working, which channels bring customers, what converts, where you lose people, and double down on what works while fixing what doesn’t. This is also where the survival reality bites: about half of new businesses don’t reach five years (BLS), and the difference is usually disciplined execution, managing cash, responding to feedback, and persisting through hard periods, more than the original idea. Growth is a loop of measure, improve, repeat, the unglamorous engine behind lasting businesses, as our guide to becoming a successful entrepreneur explores.

What common mistakes derail start-ups, and how do you avoid them?

The common mistakes that derail start-ups map directly onto the stages of the journey: skipping validation, under-planning the finances, over-building before launch, and stopping at launch instead of measuring and adapting. Knowing them as you work through the checklist helps you avoid the avoidable ones, which is most of them.

The earliest and costliest mistake is building before validating, pouring time and money into something the market hasn’t confirmed it wants. The fix is discipline at stage one: get real evidence of demand before you commit. The next is under-planning the money, underestimating costs or running out of cash before the business reaches stability. Build a realistic plan with a buffer, since cash-flow problems sink many startups that had a viable idea.

Two later mistakes are perfectionism and complacency. Over-polishing before launch delays the real feedback that only customers provide, so launch before it’s perfect and improve from there. And treating launch as the finish line, rather than the start of a measure-and-improve loop, stalls growth. Given that about half of new businesses don’t reach five years (BLS), avoiding these four mistakes, through validation, financial discipline, shipping, and iterating, is much of what separates the startups that last from those that don’t. The checklist exists to keep you from skipping the steps that prevent them.

Frequently asked questions

Validating your idea, confirming real demand before you invest. Many founders jump to building or branding first, but if the market doesn’t want what you’re making, none of that matters. Research the market and competitors, talk to potential customers, and test cheaply (a prototype, pre-orders, a minimum version) before committing fully. Real evidence that people will pay is the foundation everything else builds on, and getting it first saves you from expensive mistakes later in the journey.

Final thoughts

The start-up journey is most manageable when you treat it as a sequence rather than a scramble: validate the idea, plan the business, set up the legal and financial foundations, build the product and online presence, launch, then measure and grow. Each stage de-risks the next, which is why the order matters and why skipping the early, unglamorous steps (validation and planning) causes so many avoidable failures.

Use this as a checklist: work through each stage, tick it off when it’s genuinely done, and resist the urge to jump ahead to the exciting parts. Combined with disciplined execution after launch, that sequence is what gives a startup its best chance against the odds. For the mindset and habits that carry you through, pair this with our guide to becoming a successful entrepreneur.

Part-Time Business Ideas

What are the best part-time business ideas?

The best part-time business ideas are flexible, low-time-commitment ventures you can run around a job: freelance services, online selling, content and digital products, tutoring, and other skill-based work that doesn’t demand fixed hours or a physical location. The defining constraint of a part-time business is time, you have limited, often irregular hours, so the ideas that work are ones you can do in evenings and weekends, scale gradually, and pause when life gets busy, without losing everything. The internet makes most of these viable, since you can sell and serve customers on your own schedule.

Key Takeaways

  • The 15 ideas below span 5 types that fit limited, flexible hours: services, online selling, content, tutoring, and local side work.
  • The constraint is time, not capital, so choose ideas you can run in evenings and weekends and scale gradually.
  • Many can start with little money and grow into full-time ventures if they take off.
  • An online presence does the selling while you’re at your day job, which is what makes part-time work.

A part-time business is the lowest-risk way to start: you keep the security of your job while you test an idea, build skills, and grow income on the side. The key is matching the idea to your available time and energy, an over-demanding venture collapses against a full-time job, while a well-chosen one fits into the gaps. This guide covers part-time ideas that genuinely work around employment and how to start one, building on our guides to starting a business from home and without investment.

The table below groups part-time business ideas by type.

TypeExamplesWhy it suits part-time
Freelance servicesWriting, design, dev, marketing, adminProject-based, fits flexible hours
Online sellingHandmade goods, dropshipping, resellingSells while you’re at work
Content & digitalBlog/channel, courses, templatesCreate once, earn over time
Tutoring & coachingAcademic, skills, fitnessScheduled around your availability
Local side servicesPet care, gardening, eventsEvenings/weekends, local demand

Which part-time businesses fit limited hours?

The part-time businesses that fit limited hours are ones with flexible scheduling and no requirement to be available during the workday, which rules in most skill-based and online ventures and rules out anything needing fixed daytime hours. The filter is simple: can you do this in evenings, weekends, and spare moments, and can it run or sell without you being present? If yes, it suits part-time.

Freelance services top the list because they’re project-based: you take on work that fits your capacity and do it when you can. Writing, design, development, marketing, bookkeeping, and virtual assistance all work this way, and they start with essentially no cost beyond your skill. Online selling fits because the store works while you don’t, an ecommerce shop, dropshipping, or selling handmade goods keeps taking orders during your day job, with fulfilment handled in your own time.

Content and digital products suit part-time especially well because the work compounds: you create something once (a blog, a course, a template, a video) and it can earn repeatedly without ongoing hours. Tutoring, coaching, and local side services (pet care, gardening, event help) round out the options, scheduled around your availability. What unites them all is that they don’t require you to abandon your job’s hours, which is the whole point of part-time, and our guide to business ideas for rural areas lists more that fit a small, flexible footprint.

15 part-time business ideas to consider

Here are 15 concrete part-time business ideas across the types above, all runnable around a job. Use them as a starting point and match one to your skills, time, and interests rather than chasing whichever sounds most appealing.

  1. Freelance writing or copywriting, project-based work you fit around your hours.
  2. Graphic or web design for small businesses needing one-off projects.
  3. Web development or building sites for local businesses on evenings and weekends.
  4. Social media management for a handful of small clients.
  5. Bookkeeping or virtual assistance, steady, schedulable admin work.
  6. Online tutoring in a subject or skill you know well.
  7. Selling handmade goods through an online shop or marketplace.
  8. Dropshipping, an online store where suppliers handle fulfilment.
  9. Print-on-demand designs (apparel, prints) sold online with no stock.
  10. Reselling, sourcing and selling products through online marketplaces.
  11. Creating an online course or digital templates that sell repeatedly.
  12. Starting a blog or channel monetised through content, affiliates, or ads.
  13. Photography, events, portraits, or stock, booked around your schedule.
  14. Fitness or skills coaching, sessions scheduled in your free time.
  15. Local side services, pet care, gardening, cleaning, or event help on weekends.

The right choice is the one that fits your available hours and plays to a skill you already have, since in a part-time venture your time is the scarcest resource. Most of these can start cheaply and scale as they prove themselves.

How much do these ideas cost to start? A startup-cost classification

Part-time ideas differ mainly in time, but startup cost still varies, and grouping them by cost helps you pick one that fits both your hours and your budget. Most fall into three tiers.

  • Near-zero cost (just your skills and a laptop): freelance writing, design, development, marketing, virtual assistance, bookkeeping, online tutoring, and coaching. You’re selling time and expertise, so the only real outlay is a website to be found on. These are the fastest to start and the lowest-risk.
  • Low cost (small, variable outlay): dropshipping, print-on-demand, reselling, a blog or channel, and digital products like courses or templates. You’ll spend a little on a store, hosting, sample products, or tools, but you hold little or no inventory, so the risk stays small.
  • Moderate cost (some upfront investment): selling handmade goods (materials and equipment), photography (a camera and kit), and some local services (tools, insurance, travel). These need real, if modest, investment before you earn, so validate demand before you spend.

The practical rule for a part-time venture is to start in the lowest tier you can and reinvest early earnings rather than risking savings upfront, the prove-it-first approach our guide to starting a business without investment sets out. Classifying by cost also helps you sequence: begin with a near-zero-cost service to generate cash, then fund a higher-cost idea from its profits if you want to expand.

How do you start a business part-time alongside a job?

You start a part-time business by choosing a time-realistic idea, setting boundaries that protect both the business and your job, and using your online presence to do the selling while you work. The biggest risk isn’t the idea; it’s burnout or neglect from trying to run a venture in hours you don’t really have, so realism about time is the first decision.

  1. Pick an idea that fits your actual hours. Be honest about the time you can give weekly, and choose something that works within it rather than an over-demanding venture you can’t sustain alongside employment.
  2. Set boundaries and a routine. Decide when you’ll work on the business (specific evenings or weekend blocks) and protect that time, while keeping it from bleeding into your job or burning you out.
  3. Let your online presence sell for you. A simple website or store works around the clock, capturing customers while you’re at your day job, which is what makes a part-time business viable. Even a basic professional site does this.
  4. Start small and reinvest. Keep startup costs low, prove the idea, and reinvest early earnings, so the business funds its own growth without risking your financial security.

Check any employment contract or conflict-of-interest rules before starting, too, since some jobs restrict outside work. Done sensibly, a part-time business lets you build income and test an idea at low risk, and if it grows, you can transition to it full-time, the path our guide to becoming a successful entrepreneur describes.

Frequently asked questions

A freelance or service business based on a skill you already have, because it needs almost no startup cost and fits flexible, project-based hours. If you can write, design, code, market, tutor, or provide another in-demand skill, you can offer it in evenings and weekends and scale as you win clients. Online selling and digital products are also strong part-time options, but freelancing is usually the fastest and cheapest to start because your existing skill is the entire product.

Final thoughts

Part-time business ideas work when they respect the one resource you’re short on: time. The ventures that succeed alongside a job are flexible and skill- or online-based, freelancing, online selling, content, tutoring, things you can run in evenings and weekends and that keep working (or selling) while you’re at work. The constraint is hours, not capital, so the right idea fits your real schedule.

Start with something that genuinely fits your available time, set boundaries to protect both the business and your job, and let an online presence do the selling around the clock. Because you keep your income while you test and grow, it’s the lowest-risk way to start, and if it takes off, it can become your full-time work. For the foundations, see our guides to starting a business from home and starting without investment.

Decode Your Website’s Speed with Core Web Vitals 

How do you measure your website’s speed?

You measure your website’s speed using Core Web Vitals (Google’s three real-world performance metrics) and free Google tools like PageSpeed Insights and Search Console that report them. Rather than a single vague “speed score,” Core Web Vitals break performance into three specific, measurable things: loading (LCP), responsiveness (INP), and visual stability (CLS). Reading those numbers correctly, and knowing where they come from, is what lets you diagnose exactly what’s slow and what to fix, instead of guessing.

Key Takeaways

  • Measure speed with Core Web Vitals: LCP (loading, 2.5s), INP (responsiveness, 200ms), and CLS (stability, 0.1) (web.dev).
  • Use free tools: PageSpeed Insights for any page, Search Console for site-wide field data.
  • Know lab vs field data: field data (real users) is what Google assesses; lab data is for diagnosing.
  • The numbers are measured at the 75th percentile, so a page must be fast for most users, not just on your device.

Most people sense their site is “slow” but can’t say why or by how much, which makes it hard to fix. Core Web Vitals turn that vague feeling into concrete numbers you can read, compare, and act on. This guide focuses on the measurement and interpretation side, how to get your site’s speed data, what each number means, and how to read it to find the problem, which then points you to the fixes in our guide to improving Core Web Vitals.

The table below lists the tools for measuring site speed and what each is best for.

ToolWhat it showsBest for
PageSpeed InsightsLab + field data + diagnostics for a URLChecking and diagnosing a single page
Google Search ConsoleField data across your whole siteFinding which pages site-wide need work
Chrome DevTools / LighthouseLab data as you developTesting changes during development
Chrome UX Report (CrUX)Real-user field dataThe underlying field-data source

What do the Core Web Vitals numbers mean?

The Core Web Vitals numbers each measure a different part of speed, and knowing what “good” looks like lets you read them at a glance. There are three, and Google sets a clear threshold for each, measured at the 75th percentile of real visits (web.dev).

Largest Contentful Paint (LCP) measures loading, how long until the largest visible element appears, and good is 2.5 seconds or less. Interaction to Next Paint (INP) measures responsiveness, how quickly the page reacts to interaction, and good is 200 milliseconds or less; INP replaced the older First Input Delay metric in March 2024. Cumulative Layout Shift (CLS) measures visual stability, how much the page unexpectedly moves as it loads, and good is 0.1 or less.

Reading them together gives a complete picture: a page can load fast (good LCP) yet feel laggy (poor INP) or jumpy (poor CLS). That’s the value of measuring all three rather than a single number, you see exactly which dimension of speed is the problem. Each maps to specific causes and fixes, which our dedicated guides to LCP and the other metrics cover, and the full definitions are in our Core Web Vitals beginner’s guide.

What tools measure Core Web Vitals?

The tools that measure Core Web Vitals are all free from Google, and each suits a different job: PageSpeed Insights for a single page, Search Console for your whole site, and Chrome’s DevTools for testing during development. Knowing which to use when saves time and avoids confusion.

PageSpeed Insights is the best starting point. Paste in any URL and it shows both your real-user (field) data and a lab test, plus a prioritised list of specific issues and the estimated time each fix would save. It’s how you diagnose one page in depth. Google Search Console takes the wider view: its Core Web Vitals report shows how your real pages perform across the entire site, grouped by issue and status (good, needs improvement, poor), so you can find which pages or templates need attention site-wide.

For development, Chrome’s built-in DevTools and the Lighthouse report let you test pages as you change them, useful lab data for confirming a fix before it goes live. Underpinning the field data in PageSpeed Insights and Search Console is the Chrome User Experience Report (CrUX), Google’s dataset of real-user measurements. The practical workflow: use Search Console to find problem pages, PageSpeed Insights to diagnose each one, and DevTools to test your fixes.

How do you run a PageSpeed Insights test, and what about mobile vs desktop?

Running a PageSpeed Insights test takes seconds: go to pagespeed.web.dev, paste the full URL of the page you want to check, and click Analyse. PageSpeed Insights then returns a report with your real-user (field) data at the top, a lab test below it, and a prioritised list of issues, scored separately for mobile and desktop.

The mobile/desktop split matters more than people expect. PSI shows two tabs, and the scores are almost always different, mobile is usually lower, because it simulates a mid-range phone on a slower connection, which is a harder test than a desktop on broadband. Since Google indexes the mobile version of your site and most traffic is mobile, treat the mobile tab as the one that counts and fix for it first; a good desktop score alongside a poor mobile score is still a problem. Test the specific pages that matter (your homepage, top landing pages, key product pages) rather than only the homepage, since different templates can perform very differently. Run each on both tabs, note where the field data says you stand, then use the lab section below to dig into why.

How do you read the data correctly (lab vs field)?

You read Core Web Vitals data correctly by understanding the crucial difference between lab data and field data, and knowing that Google assesses your site on field data. Confusing the two is the most common mistake, and it leads people to “fix” a lab score while their real-user performance, the thing that actually counts, stays poor.

Field data comes from real users visiting your site over time (via the Chrome UX Report), and it’s what Google uses to assess page experience. It reflects the full range of your visitors’ devices and connections, which is why it’s the source of truth. Lab data comes from a single simulated test in a controlled environment (like Lighthouse), which is perfectly repeatable and great for debugging, but it represents one synthetic run, not your real audience. A page can score well in the lab on a fast simulated connection yet fail in the field because many real users are on slower devices.

The other essential detail is the 75th percentile: Core Web Vitals are judged on the experience of the slowest 25% of visits, meaning 75% of real loads must hit the threshold to pass. This is why your own quick test on a fast laptop can mislead you, your experience isn’t representative. The right habit is to trust the field data for judging where you stand, and use lab data to diagnose and test fixes, then confirm improvement in the field data over the following weeks.

How do you read the Opportunities and Diagnostics sections?

Below the scores, PageSpeed Insights lists Opportunities and Diagnostics, and this is the part that tells you exactly what to fix. Opportunities are specific changes with an estimated time saving attached (for example, “Eliminate render-blocking resources” or “Properly size images”), while Diagnostics give more context on how the page is built and where the cost is going.

Read them in order of estimated saving rather than top to bottom, the biggest numbers are usually images, render-blocking CSS or JavaScript, and unused code, so start there. Expand each item to see the exact files or elements responsible, which turns a vague “it’s slow” into a named to-do list: this image, that script. Two cautions: the time savings are lab estimates, not guarantees, so use them to prioritise rather than treat as exact, and confirm any fix in field data over the following weeks, not just by re-running the lab test. The Diagnostics section is often where you’ll spot the root cause behind several Opportunities at once, a single heavy third-party script, say, that inflates both blocking time and total page weight.

How do you turn the measurements into action?

You turn Core Web Vitals measurements into action by letting the data point you to the specific bottleneck, then applying the fix for that metric, rather than trying to improve “speed” in general. The whole value of measuring is that it tells you exactly what to do next, so the workflow is diagnose, fix, re-measure.

Start by reading which metric is failing and on which pages. If LCP is poor, the data usually points to a heavy image, a slow server, or render-blocking resources, so you optimise images, improve hosting, and defer blocking files. If INP is poor, the cause is almost always too much JavaScript tying up the main thread, so you reduce and defer scripts. If CLS is poor, the tool shows which elements shift, so you reserve space for images, ads, and fonts. The measurement names the problem; the fix follows from which metric and which element the tool flags.

Then work in priority order. Fix the metric furthest from passing, and the pages that matter most for your business, first, rather than spreading effort thinly. After each change, re-test in PageSpeed Insights to confirm the lab improvement, then watch Search Console’s field data over the following weeks to confirm it for real users. This loop, measure, fix the specific cause, re-measure, is how diagnosis becomes faster pages, and it’s exactly what our guide to improving Core Web Vitals details metric by metric.

Frequently asked questions

PageSpeed Insights is the best starting point: it’s free, works on any URL, and shows both real-user (field) and lab data along with a prioritised list of specific issues to fix. For a site-wide view, Google Search Console’s Core Web Vitals report shows how all your pages perform using real-user data. For testing changes during development, Chrome’s built-in Lighthouse report helps. Start with PageSpeed Insights for a single page, then use Search Console to find issues across the whole site.

Final thoughts

Measuring your website’s speed properly means moving past a vague sense of “slow” to the three concrete Core Web Vitals, loading (LCP), responsiveness (INP), and stability (CLS), read through Google’s free tools. That’s what turns performance from guesswork into a diagnosable, fixable problem: you can see exactly which dimension is weak and which pages need work.

The two things to get right are using the correct tool for the job (PageSpeed Insights to diagnose a page, Search Console to find site-wide issues) and trusting field data over lab data, since field data is what Google assesses and what reflects your real users. Once you can read the numbers, you know what to fix, which is where our guide to improving Core Web Vitals takes over.

Facebook Groups: How to Build, Grow, and Manage a Community

What are Facebook Groups and why do they matter?

Facebook Groups are spaces where people gather around a shared interest, cause, or location to post, discuss, and connect, and they’re one of the most engaged parts of the platform. Unlike a Page, which broadcasts to followers, a Group is two-way: members talk to each other and to you. That makes Groups valuable both for individuals seeking community and for businesses building an audience that actually participates rather than just scrolls past.

Key Takeaways

  • Around 1.8 billion people use Facebook Groups each month (Meta, 2021 figure, still cited).
  • Groups now have two privacy settings: Public and Private (Private can be Visible or Hidden).
  • Admins control settings and see Group Insights; moderators handle content and members.
  • For businesses, a Group builds engaged community in a way a Page or ad can’t.

Groups are where Facebook’s community really lives, and Meta has leaned into them precisely because the engagement is so high. This guide covers how to find, join, create, and manage Groups, with current 2026 features and terminology, and how businesses can use them well. It’s part of our wider look at Facebook for business.

How do you find and join Facebook Groups?

You find Facebook Groups by searching keywords related to your interest, then filtering and requesting to join the ones that fit. Facebook also recommends Groups based on your interests and what your friends have joined, so discovery is partly automatic.

The process is simple: sign in, use the search bar to look up a topic, and filter the results. Before joining, read the group’s description and rules to check it’s the right fit, then click Join; some Groups admit you instantly, while others require admin approval or a few membership questions to keep the community relevant. Once you’re in, review the notification settings (under the group, you can choose all posts, highlights, or off) so you get the right amount of activity without being overwhelmed. A quick note on privacy you’ll see when browsing: Groups are now either Public (anyone can see posts and members) or Private (only members can), and a Private group is additionally either Visible or Hidden in search. This replaced the older Public/Closed/Secret labels, so if you remember those, Closed is now Private-Visible and Secret is now Private-Hidden.

How do you create and manage your own Group?

You create a Group from the Create menu, set its name, privacy, and purpose, then manage it through admin tools and consistent engagement. Starting a Group is quick; growing a healthy one is the real work, and it comes down to clear purpose, active moderation, and giving members a reason to participate.

To set one up: choose Create, then Group; name it; pick Public or Private; add a description, cover photo, and rules; and invite some initial members. From there, management rests on two roles. Admins have full control, settings, membership, rules, and access to Group Insights (a dashboard showing growth, engagement, and active times). Moderators are a step down: they review and remove posts, manage members, and enforce the rules, but can’t change settings.

Admin Assist lets you automate moderation with rules (for example, auto-declining posts with certain keywords), which saves time as a group grows. The current feature set also includes Guides (the structured-content feature formerly called Units, useful for educational groups). A couple of older features have gone, Watch Parties were retired in 2021, so don’t plan around them. The constant across all of it is engagement: welcome new members, post consistently, ask questions, and respond, because a Group lives or dies on participation.

How can businesses use Facebook Groups?

Businesses use Facebook Groups to build an engaged community around their brand, somewhere customers connect with each other and with you, rather than just receive marketing. Because Groups are built for conversation, they create the kind of loyalty and direct feedback that a Page or an ad campaign can’t.

The approach that works is to lead with value, not promotion. A business Group succeeds when it gives members a reason to be there: useful discussion, early access, support, or a community of people with a shared interest your brand serves. Practical tactics include welcoming new members personally, sharing genuinely helpful content and behind-the-scenes updates, running polls to learn what customers want, featuring members, and hosting events. Clear rules and active moderation keep it a positive space.

Used this way, a Group becomes a direct line to your most engaged customers and a source of honest feedback, complementing your Facebook business page and advertising rather than replacing them. It’s also worth weighing where your audience actually engages most, which our comparison of Instagram vs Facebook for marketing can help with.

How do you link a Facebook Group to your Business Page?

You can link a Group to your Page, and it’s still supported in 2026, though the option moved with the new Pages experience. Linking ties your community to your brand presence, so members can find the Group from your Page and you can manage both from one place.

Switch into your Page, open the Groups tab (or the Professional dashboard), and choose to create a new linked group or link an existing one. A Page can link more than one Group, and once linked, the Group appears in the Page’s Groups section, where you can post to it as the Page and invite your followers to join. If you’re following an older tutorial that points to the classic “Settings then Templates and Tabs” path, look in the Groups tab or Professional dashboard instead, the navigation changed but the capability remains.

Can you monetise a Facebook Group with subscriptions or paid access?

This is where guidance dates quickly, so it’s worth being precise: Facebook no longer offers a standalone “charge people to join my group” toggle that any admin can switch on. The original subscription-groups feature was restructured, and paid access now survives only as a perk of Facebook Subscriptions, which run on an eligible Page rather than on the group itself.

In practice that means a creator who meets Facebook’s Subscriptions eligibility (generally around 10,000 followers, or meeting its engagement criteria) can offer a subscriber-only group as one of their subscription benefits. A plain group admin without an eligible Page can’t charge for access natively, they’d collect payment through an external tool and add members manually, which is more work and sits outside Facebook’s system. Other monetisation routes open to creators and Pages include Stars, Facebook’s content-monetisation programme (ads on reels and video), and brand partnerships, none of which charge the group’s members directly. One more thing worth knowing if you plan to use external community tools: Meta discontinued third-party API access to Groups, so many older “group management” and monetisation integrations no longer work. The honest summary is to treat a Facebook Group as a community and lead-building asset rather than a direct paywalled revenue stream.

How do you set up Admin Assist to automate moderation?

Admin Assist is Facebook’s built-in automation for Groups, and it’s the single biggest time-saver as a community grows. It lets you set criteria that automatically approve or decline pending posts, hold or decline member requests, and remove content that breaks your conditions, so routine moderation handles itself and you focus on the edge cases.

To set it up, open your group’s Admin Tools and choose Admin Assist, then add criteria from Facebook’s suggested options or build your own. Useful starting rules include declining posts that contain specific links or keywords, holding posts from members who joined in the last few days, declining join requests from accounts that don’t meet your criteria, and automatically removing a post once a set number of members report it. A couple of best practices keep it from misfiring: start with narrow, specific rules rather than broad keyword blocks (which catch innocent posts), and review the Admin Assist activity log periodically to see what it’s actioning and tune the rules. Pair it with required rule agreement (below) and most spam never reaches the feed.

What are Group Rules best practices, with examples?

Clear Group Rules are the foundation of low-effort moderation: Facebook lets admins set up to 10 rules, and you can require new members to agree to them before joining, which both sets expectations and feeds your Admin Assist automation. Vague rules cause disputes; specific, enforceable ones prevent them.

Set them under Admin Tools then Group Rules, using Facebook’s templates or your own (keep each title short and the description concrete). Good rules are specific and tied to a behaviour, for example:

  • “Be respectful, no harassment.” No personal attacks, hate speech, or bullying; members who break this are removed.
  • “No spam or self-promotion.” No unsolicited ads or affiliate links; promotion only in the weekly pinned thread.
  • “Stay on topic.” Posts must relate to the group’s subject; off-topic posts will be removed.
  • “Back up claims.” Support health, legal, or financial advice with a credible source.

Require members to accept the rules on joining, pin them so they’re easy to find, and enforce them consistently, applying a rule to some members but not others is what erodes trust. Reviewed occasionally and backed by Admin Assist, a tight set of rules does most of your moderation for you.

What makes a Facebook Group thrive?

A Facebook Group thrives on consistent engagement, clear rules, and a strong sense of purpose, members need a reason to return and to contribute, not just to join. The setup is the easy part; an active, healthy community is the result of ongoing attention.

The habits that build it are straightforward but require consistency. Welcome new members so they feel part of something. Post regularly and ask questions, polls, prompts, and discussion starters keep the group alive. Recognise and feature active members to reward participation. Organise events or meetups, online or off, to deepen connections. Seek feedback so members feel ownership. And enforce clear rules, no spam, stay on topic, be respectful, so the space stays welcoming. Group Insights helps here by showing when your members are most active and which posts land, so you can time and shape content around real behaviour. The underlying principle is reciprocity: a group where the admin and members both give gets a culture of participation, which is what turns a list of members into a genuine community.

Frequently asked questions

A Page is your official, public brand presence, broadcast-style, where you post updates and run ads. A Group is a community space built for two-way conversation, where members interact with each other and with you. Most businesses benefit from both: the Page for information, content, and advertising; the Group for deeper engagement, loyalty, and feedback. They complement each other rather than competing, the Page reaches a broad audience, while the Group turns a slice of that audience into an active community. Our guide to Facebook for business covers how the pieces fit together.

Final thoughts

Facebook Groups are where the platform’s community genuinely lives, and that engagement is exactly what makes them valuable, for individuals finding their people, and for businesses building a loyal, participating audience. The mechanics are simple: find and join with the search and privacy settings in mind, or create your own and manage it with admin tools and consistent engagement.

For a business, a Group works best as the community layer alongside your Page and ads, somewhere you lead with value and earn loyalty rather than broadcast. Keep the purpose clear, the rules fair, and the engagement constant, and a Group becomes one of the most rewarding parts of a Facebook presence. To see how it fits the whole toolkit, read our overview of Facebook for business.

Facebook Account Recovery: How to Get Back Into Your Account

How do you recover a Facebook account?

You recover a Facebook account through the “Forgotten password?” flow: enter the email, phone number, or username linked to the account, then confirm your identity with a code sent to your email or phone. If that doesn’t work, Facebook offers further options, logging in from a device you’ve used before, verifying with a government ID, or, for a hacked account, the dedicated recovery process. The right path depends on whether you’ve simply forgotten your password or lost the account to someone else.

Key Takeaways

  • Start at the “Forgotten password?” link and recover via a code sent to your email or phone.
  • If you can’t get a code, Facebook can verify you through a recognised device or a government-issued ID.
  • For a hacked account, use facebook.com/hacked, the dedicated compromised-account flow.
  • Prevent future lockouts with two-factor authentication, login alerts, and Facebook’s newer passkey sign-in.

Losing access to Facebook can mean losing years of photos, messages, and connections, and for businesses, access to Pages and ad accounts too. The recovery process is designed to confirm you’re the real owner, which is why it can take patience. This guide covers the current 2026 methods step by step, and how to secure your account so you don’t need them again. If your account runs business assets, our overview of Facebook for business is worth a look once you’re back in.

What are the first steps to regain access?

The first steps are to go to the login page, click “Forgotten password?”, and identify your account, then receive and enter a recovery code sent to your registered email or phone. This is the standard route and resolves most lockouts, provided you still have access to the email or phone number on the account.

Here’s the process:

  1. On the Facebook login page, click Forgotten password?
  2. Enter the email, phone number, or username linked to your account so Facebook can find it.
  3. Choose where to send your login code, your registered email or phone.
  4. Enter the code, then create a new, strong password you haven’t used elsewhere.

The whole flow hinges on having access to the email or phone on the account, which is why keeping those current matters so much. Note that older recovery shortcuts have been retired: Facebook no longer uses security questions, and the “Trusted Contacts” feature (which let friends hold recovery codes for you) was discontinued in 2022, so ignore any guide that still recommends it. If the standard code route doesn’t work, the next section covers the alternatives.

What if you can’t get a recovery code?

If you can’t receive a code because you’ve lost access to the email or phone, Facebook can still verify you through a device you’ve previously used or by checking a government-issued ID. These fallback options exist precisely for the harder cases where the usual contact methods are out of reach.

Two routes help here. First, try logging in from a device or browser you’ve used to access Facebook before, Facebook often recognises a trusted device and lets you confirm it’s you that way. Second, Facebook may offer identity verification, where you upload a photo of a government ID (passport, driving licence, or national ID); it checks the name and details against the account and restores access once confirmed. This is slower and more involved, but it’s the legitimate path when you’ve genuinely lost your contact methods. Throughout, only use Facebook’s official flows, never a third-party “recovery service,” which are almost always scams that will take your money or your remaining access.

How do you recover a hacked or disabled account?

For a hacked account, you use Facebook’s dedicated compromised-account process at facebook.com/hacked; for a disabled account, you appeal through the on-screen prompts or the Help Centre. The route differs from a simple lockout because someone else may have changed your details, so Facebook has a separate flow to prove ownership and lock the attacker out.

If your account is hacked, act fast: go to facebook.com/hacked, and Facebook walks you through securing it, reviewing recent changes (like an altered email, password, or name), reverting them, and locking out the intruder. If the attacker changed your contact email, Facebook can often still recover the account using your original details or ID verification. If your account was disabled for a suspected policy violation rather than hacked, you’ll usually see an option to request a review or appeal; provide the information requested and wait for Facebook’s decision. In both cases, patience and using only the official process are what get you back in, and once recovered, change your password immediately and turn on the security features below.

What if your recovery request is rejected?

If Facebook rejects your ID or identity check, you’re not out of options, you can retry with a clearer submission, use a different ID, or appeal. Rejections usually come down to a photo Facebook can’t read or details that don’t match the account.

First, retry the upload with a clear, well-lit photo showing all four corners of the document and no glare, and make sure the name matches the one on the account. If it still fails, try a different accepted ID type (passport, driving licence, or national ID). Beyond that, use Facebook’s appeal and review process; Meta has been streamlining account-support requests into a faster flow with fewer steps and AI-assisted review for eligible cases, and in some cases offers a short selfie-video check to confirm you’re a real person (Meta). Recovery of this kind is rarely instant, a person or system has to review it, so submit once and wait for the decision rather than firing off repeated requests, and never pay a third-party “recovery service” promising to speed it up.

What if the linked email or phone is also inaccessible?

If you’ve lost the email and phone on the account too, you can still get in through a device Facebook recognises or by verifying your identity, you’re not solely dependent on receiving a code.

Start by logging in from a device and location you normally use: Facebook’s systems recognise trusted devices and familiar locations and may let you confirm it’s you that way without a code. If that’s not possible, fall back to the government-ID verification covered above. Once you’re back in, the first thing to do is update your recovery details and review where you’re logged in, ideally in Accounts Centre (see below), so a future lockout has an easy route out. The old friend-based “Trusted Contacts” recovery is no longer available, so don’t rely on it; today the dependable safeguards are an up-to-date phone, a recognised device, and 2FA.

How do you recover a Facebook Business Page if you lose your personal account?

Facebook Pages are managed through a Meta Business Portfolio (formerly Business Manager) and the personal accounts that have admin access, so recovering a Page almost always starts with recovering the personal account that administers it. Regain the personal account and your Page access typically returns with it.

The route depends on the cause. If another person still has admin access, the quickest fix is for them to re-add you in Meta Business Suite under Settings then People. If you lost the Page because your personal account was hacked, recover that first at facebook.com/hacked, since Page access flows through it. And if you were the only admin and can’t get back in, use Meta’s Business Help Center “lost access” flow to request access to the business asset. The lasting safeguard is structural: always keep at least two admins on a Page and on the business portfolio that owns it, so a single lost personal account can never orphan it. Our guide to Facebook for business covers setting that up.

What is Accounts Centre, and how does it help recovery?

Accounts Centre is Meta’s single hub for managing your linked Facebook and Instagram accounts, your password, two-factor authentication, and recovery details all in one place, which makes it the best place to keep your recovery options current. Setting it up well is what turns a future lockout from a crisis into a two-minute fix.

It’s worth knowing this is changing: in April 2026 Meta began upgrading Accounts Centre into the “Meta Account,” a simpler way to access and manage your Meta apps and devices in one place, with a single optional password and passkey sign-in across apps, and Meta says existing Accounts Centre setups are updated to a Meta Account automatically over the year (Meta). Whatever it’s called when you read this, the action is the same: open it, confirm your recovery email and phone are current, turn on two-factor authentication and a passkey, and check your linked accounts, so that if you ever lose access to one, you have a verified route back in through the others.

How do you secure your account against future lockouts?

You secure your Facebook account by turning on two-factor authentication, enabling login alerts, keeping your contact details current, and using Facebook’s newer passkey sign-in. Prevention is far easier than recovery, and a few minutes of setup removes most of the risk.

The essentials, found under Security and login in your settings (now grouped in the Meta Account / Accounts Centre), are:

  • Two-factor authentication (2FA). Requires a second step (an authenticator app or SMS code) on top of your password, so a stolen password alone can’t get someone in.
  • Login alerts. Notify you of logins from unrecognised devices, your early warning that something’s wrong.
  • Up-to-date email and phone. These are your recovery lifeline; keep them current and you keep the easy recovery route open.
  • Passkeys. Facebook added passkey sign-in in 2025, letting you log in with your device’s fingerprint, face, or PIN instead of a password, a phishing-resistant option worth enabling (Meta, 2025).

A strong, unique password (12+ characters, stored in a password manager) underpins all of this. Run Facebook’s Security Checkup periodically to confirm these are in place. Together they make a lockout or hack far less likely, and far easier to undo if it happens.

Frequently asked questions

Then use Facebook’s identity-verification route: try logging in from a device you’ve previously used (Facebook may recognise it), and if that fails, follow the prompts to verify with a government-issued ID. Facebook checks the ID against the account and restores access once confirmed. It’s slower than a simple code, but it’s the legitimate path when your contact methods are gone. Avoid any third-party “account recovery” service, these are scams. Once you’re back in, immediately update your email and phone so future recovery is straightforward.

Final thoughts

Recovering a Facebook account comes down to proving you’re the real owner: start with the “Forgotten password?” code to your email or phone, fall back to a recognised device or government-ID verification if needed, and use facebook.com/hacked for a compromised account. Ignore outdated advice like Trusted Contacts, and never trust a third-party recovery service.

The real lesson is prevention. Turn on two-factor authentication, enable login alerts, keep your email and phone current, and consider Facebook’s passkey sign-in. A few minutes of setup makes a lockout far less likely and far quicker to undo. Once you’re back in and secured, our guide to Facebook for business helps you make the most of the account.

Snapchat for Business: A Strategy Guide to Reaching Younger Audiences

Is Snapchat right for your business?

Snapchat is right for your business if your customers are young: it reaches a large, highly engaged audience of teens and young adults, but it’s a weak fit for older demographics. The platform’s whole value for business comes down to who’s on it, so the first decision isn’t how to use Snapchat, it’s whether your audience is even there. If it is, Snapchat offers creative, interactive ways to build a brand that few other channels match.

Key Takeaways

  • Snapchat has 483 million daily active users and reaches 90% of 13-to-24-year-olds in its core markets (Snap Inc., 2026; Snap for Business).
  • Under-35s make up roughly three-quarters of the audience (DataReportal, 2025).
  • Its standout business tools are AR Lenses, Filters, and a full ad platform via Snapchat Ads Manager.
  • Use it as a specialist channel for young audiences, not a general-purpose one.

Snapchat rewards brands that lean into its creative, playful nature rather than treating it like another broadcast channel. This guide covers whether it fits your business, how to build a presence, the tools available, and how to measure results, complementing our practical guide to Snapchat advertising and our overview of the Snapchat app.

Who does Snapchat reach, and why does that matter?

Snapchat reaches a young, highly engaged audience: 483 million daily users, with under-35s making up roughly three-quarters of them and 90% reach among 13-to-24-year-olds in its core markets (Snap Inc., 2026; DataReportal, 2025). That concentration is the single most important fact for any business considering the platform.

The audience, not the size, is what should drive your decision. If you sell to teenagers and young adults, fashion, beauty, gaming, entertainment, food, apps, Snapchat reaches them at a frequency few channels match, since users open the app more than 30 times a day. They also engage closely with friends, which makes the environment feel personal and can make brands more welcome when they show up authentically.

The flip side is just as important: if your customers are older, Snapchat is the wrong place to concentrate your effort, and a platform like Facebook will serve you better, a trade-off our Instagram vs Facebook for marketing comparison and Facebook for business guide both speak to. Treat Snapchat as a specialist tool, and the audience filter as your first strategic decision.

How do you build a business presence on Snapchat?

You build a business presence on Snapchat by setting up the right account, creating content that fits the platform’s casual, creative feel, and using its tools to engage rather than broadcast. The brands that succeed here behave like a fun participant, not an intruder.

Start with a Public Profile or business account, which gives you a presence people can discover and follow, and access to Snapchat’s creative and ad tools. Then focus on content that suits the platform: vertical, authentic, and timely, behind-the-scenes clips, quick product looks, events, and playful moments, rather than polished corporate ads that feel out of place. Snapchat’s defining business tools are creative: AR Lenses let people interact with your brand by putting it on their face or in their space, and Filters and Geofilters let you brand moments tied to an event or location. Used well, these turn your audience into participants who share your brand with their friends, which is reach you don’t pay for. Consistency and authenticity matter more than production value here; the platform rewards brands that feel native to it.

How do you set up a Snapchat Public Profile for your business?

A Public Profile is your brand’s permanent home on Snapchat, a persistent presence that hosts your Snaps, Stories, Highlights, and links rather than letting everything disappear, and it’s required if you want to run Snapchat ads (Snapchat for Business). It’s the foundation of a business presence, so set it up properly before you start posting.

To qualify you need to represent a real, registered business, keep the account in good standing with Snapchat’s Community Guidelines, and be 18 or over. You create it through Snapchat Ads Manager rather than the personal in-app flow: log in, open Public Profiles from the top-left menu, click Create Profile, and enter your business name, username, and details. Once it’s live, fill it out the way you would any storefront, profile and cover photos, a clear bio, your business category, and links to your website or product catalogue, so visitors immediately understand who you are and can act. You get one Public Profile per username, so set the naming up cleanly from the start.

How often should you post, and how do you plan a content calendar?

Snapchat doesn’t publish a fixed posting-frequency number; its official advice is about consistency and quality rather than a quota, notably the guidance to “open your story every day with a strong and compelling hook” that keeps your audience invested (Snapchat Support). In practice that points to a roughly daily Story rhythm built around timely, narrative content, not a set number of posts.

A simple content calendar keeps that rhythm sustainable. Plan a recurring weekly mix, behind-the-scenes clips, quick product moments, user-generated content, and the occasional event or launch Story, and slot them against the dates and moments that matter to your audience, so you’re never scrambling for something to post. Lead each Story with a strong opening, give it a clear beginning, middle, and end, and keep it native to the platform rather than recycled corporate video. (Marketing tools often suggest rough cadences like a couple of posts and several Stories a week, but treat those as industry rules of thumb, not official Snapchat targets.) The discipline that actually moves the needle is showing up consistently with content that feels made for Snapchat.

What tools and ad formats does Snapchat offer businesses?

Snapchat offers businesses a full advertising platform run through Snapchat Ads Manager, plus creative tools like AR Lenses and Filters, all built for its vertical, full-screen environment. Together they cover everything from organic brand-building to paid, targeted campaigns.

On the paid side, Ads Manager is the hub for creating, targeting, and measuring campaigns, with formats including Single Image or Video Ads, Story Ads, Collection Ads (good for ecommerce), Commercials, and Sponsored AR Lenses and Filters. The Snap Pixel, installed on your website, tracks what people do after clicking so you can optimise toward conversions and measure return, the same role a conversion pixel plays on other platforms. The creative AR tools are Snapchat’s real differentiator: a branded Lens can drive engagement and brand recall no static ad can.

Because the advertising side is detailed, we cover it in full in our dedicated guide to Snapchat advertising, this strategy guide focuses on the bigger picture of fit, presence, and measurement. The practical point is that Snapchat gives small and large businesses alike the tools to run real campaigns, provided the audience fits.

How do you target and measure results on Snapchat?

You target on Snapchat using demographics, interests, and behaviours, plus Custom Audiences from your own data, and you measure results through Ads Manager and the Snap Pixel. Good targeting and honest measurement are what separate spending on Snapchat from investing in it.

On targeting, you can reach users by age, gender, and location, by interests and the content they engage with, and by behaviours, then build Custom Audiences from your customer data or website visitors (via the Snap Pixel) and Lookalikes from your best customers. This lets even a modest budget reach a specific, relevant slice of Snapchat’s young audience rather than spraying broadly. On measurement, focus on outcomes: reach and impressions show exposure, but conversions and return on ad spend (ROAS) show whether it works, with the Snap Pixel connecting on-site actions back to your spend. Track cost per result over time and against your goals, and let the data guide where budget goes, scaling what converts and cutting what doesn’t. The discipline is the same as any channel; what’s specific to Snapchat is the creative and the audience.

Frequently asked questions

It can be, if your customers are young and your brand suits visual, playful content. The targeting lets a small budget reach a specific young audience efficiently, and creative tools like AR Lenses can punch above their weight on engagement. The deciding factor is audience fit: a small business selling to teens or young adults, a streetwear label, a local cafe near a campus, can do well, while one selling to an older demographic generally shouldn’t start here. Begin with organic content to learn what resonates, then add modest paid campaigns and measure return before scaling.

Final thoughts

Snapchat for business is a specialist play: it does one thing exceptionally well, reaching young, engaged audiences with creative, interactive content, and it’s the wrong tool if your customers are older. So the first and most important decision is audience fit. Get that right, and Snapchat offers AR Lenses, native content, and a full ad platform to build a brand that young people actually engage with.

If it fits, build an authentic presence first, lean into the creative tools, target precisely, and measure real conversions with the Snap Pixel before scaling spend. Treat it as the young-audience specialist in a wider marketing mix, not a standalone solution. For the paid mechanics, see our Snapchat advertising guide, and for the platform basics, our overview of the Snapchat app.

Snapchat Memories: How to Save, Organise, and Relive Your Snaps

What is Snapchat Memories?

Snapchat Memories is a built-in archive that lets you save snaps and stories inside the app instead of letting them disappear, so you can view, edit, and reshare them later. It’s Snapchat’s answer to its own disappearing nature: a private collection where your favourite moments live on, organised by date and searchable. For anyone who’s ever wished a good snap didn’t vanish, Memories is the feature that keeps it.

Key Takeaways

  • Memories saves snaps permanently inside Snapchat; introduced in 2016, it’s now core to the app’s 483 million daily users (Snap Inc., 2026).
  • Save a snap with the Save icon; access Memories by swiping up (or down) from the camera.
  • My Eyes Only locks sensitive snaps behind a passcode that cannot be recovered if forgotten.
  • You can back snaps up to your camera roll and relive them through auto-generated stories.

Memories turned Snapchat from a purely in-the-moment app into one you can also look back on, without losing the casual feel that defines it. This guide covers how to save, find, edit, protect, and relive your snaps, and it’s part of our wider guide to the Snapchat app.

How do you save and access Memories?

You save a snap to Memories by tapping the Save icon after capturing it, and you access your Memories by swiping up from the camera screen. Saved snaps are organised by date, so your collection builds into a chronological archive you can scroll through anytime.

The basics are quick. After taking a photo or video, tap the Save (download) icon to store it in Memories rather than only sending it. To open your collection, swipe up (on some versions, down) from the main camera screen, where snaps appear grouped by date. From there you can view any snap, and the search function makes a large collection manageable: type a keyword like “beach,” “birthday,” or “dog,” and Snapchat surfaces matching snaps (it recognises places, objects, and dates), even compiling related ones into a quick story. Memories effectively becomes a personal, searchable scrapbook of everything you’ve chosen to keep, which is what makes it so much more useful than a folder of saved photos.

How do you edit, share, and back up Memories?

You can edit a saved snap with Snapchat’s creative tools, reshare it to friends or your story, and back it up to your device’s camera roll. Memories isn’t just storage; it’s a place to revisit and repurpose your snaps long after you took them.

To edit, open a snap in Memories and tap the edit icon, then add text, stickers, filters, or lenses just as you would on a fresh snap, handy for polishing an old photo before resharing. To share, send it to friends, post it to your story, or export it. Backing up matters most: you can save snaps from Memories to your phone’s camera roll, giving you a copy outside Snapchat in case you ever lose access to the app. Snapchat also resurfaces your saved snaps automatically, through “On This Day” style flashbacks and a year-end recap story it compiles from your Memories, an easy, often delightful way to relive past moments without digging for them. The combination of edit, reshare, and back up means your saved snaps stay useful rather than just sitting in storage.

How do Memories back up, and how is that different from your Camera Roll?

Snapchat gives a snap two separate places to live, and they work very differently. Memories are stored in Snapchat’s cloud and tied to your account, so they sync to any phone you log into; your device’s Camera Roll holds a local copy on that one phone only. Crucially, Snapchat does not back your Camera Roll up to Memories, so saving to one doesn’t put it in the other (Snapchat Support).

What changed recently is how much cloud space you get. Since late September 2025, free Memories storage is capped at 5GB; beyond that, Snapchat offers paid Memories Storage Plans, with Snapchat+ raising the allowance to 250GB and Snapchat+ Platinum to 5TB (Snapchat points you to the app for current regional pricing) (Snap Newsroom). It’s worth being precise here: Snapchat+ doesn’t add a separate “backup” feature, Memories already back up to the cloud for free up to the 5GB cap, the subscription simply expands how much you can store. If you’re near the limit, Snapchat gives a grace period before older Memories are at risk, so upgrade, delete, or keep your own copies. For anything irreplaceable, saving to the Camera Roll (or exporting your data, below) is the real safety net, because it doesn’t depend on your Snapchat account or storage plan at all. It’s also worth turning on Smart Backup so Memories back up over mobile data when Wi-Fi isn’t available, and checking that Backup Progress shows “Complete” before you ever log out.

How do you create a highlight story from saved Memories?

You can turn saved Memories into a Story rather than leaving them sitting in the archive: select the snaps you want, arrange them, and post them as a new Story or save them as a Highlight on your profile. It’s the easiest way to give old snaps a second life.

In your Memories, tap Select, choose the photos and videos you want to feature, then use the share or “Create Story” option to publish them together. Snapchat also builds Stories for you automatically, the “On This Day” flashbacks and the year-end recap it compiles from your Memories, which you can edit before sharing. If you maintain a Public Profile (common for creators and businesses), you can pin these collections as Highlights so they stay visible on your profile instead of vanishing after 24 hours. The practical tip is to keep each set short and themed, an event, a trip, a product launch, so the resulting Story has a clear beginning and end rather than being a random dump of snaps.

What happens to your Memories when you switch phones or accounts?

Because Memories live with your account rather than your device, they follow you to a new phone automatically, as long as they were fully backed up first. Log into the same account on the new device and your Memories sync down from the cloud; they were never stored only on the old phone (unless you also saved them to its Camera Roll).

Two caveats matter. First, confirm your backup shows “Complete” before you switch or uninstall, because Snapchat warns it cannot recover Memories that weren’t successfully backed up (Snapchat Support). Second, Memories do not transfer between different accounts, there’s no account-to-account migration, so if you’re moving to a new username you’ll need to save the snaps to your device and re-upload them. For a full copy of everything, use Snapchat’s My Data export at accounts.snapchat.com: toggle “Export your Memories,” submit the request, and Snapchat emails you a downloadable archive, usually within about seven days (Snapchat Support). That export is the cleanest way to keep your snaps independent of any single phone or account.

How does My Eyes Only protect private snaps?

My Eyes Only protects sensitive snaps by locking them in a separate, passcode-protected section of Memories that only you can open. It’s Snapchat’s built-in privacy vault, for snaps you want to keep but not have visible if someone picks up your phone or scrolls your Memories.

To use it, move a saved snap into My Eyes Only and set a passcode; from then on, those snaps are hidden behind it and require the code to view. The crucial caveat, and it’s a big one, is that the passcode cannot be recovered if you forget it: Snapchat can’t reset it for you, and the snaps inside become permanently inaccessible. So choose a code you’ll remember (or store it securely in a password manager), and don’t rely on My Eyes Only as your only copy of something irreplaceable, back genuinely important snaps up to your camera roll as well. Used sensibly, it’s a useful extra layer of privacy; used carelessly, the unrecoverable passcode can cost you the very snaps you were trying to protect.

Can businesses use Snapchat Memories?

Businesses can use Snapchat Memories to store and repurpose branded snaps, building a library of polished content to reuse across campaigns and other channels. While Memories is mainly a personal feature, it has practical value for brands that maintain a Snapchat presence.

The main benefit is content management: a brand can save high-quality snaps, behind-the-scenes clips, event footage, product shots, into Memories, then reuse and reshare them rather than recreating content each time. This lets businesses keep a consistent, on-brand library and post polished material that fits Snapchat’s casual feel without looking out of place. It pairs naturally with the platform’s advertising and AR tools, so the saved content can feed into wider campaigns. For the strategy side of using Snapchat commercially, see our guides to Snapchat for business and Snapchat advertising. For most brands, Memories is a supporting tool, a content store, rather than a marketing channel in itself, but it’s a useful one.

Frequently asked questions

No, Memories are stored in the cloud on Snapchat’s servers, not on your phone, so they don’t use your device storage unless you choose to export them to your camera roll. This means your saved snaps stay safe even if you change phones, as long as you can log into your account. The trade-off is that they depend on your account: if you lose access to Snapchat, you could lose Memories you haven’t backed up. For anything irreplaceable, save a copy to your camera roll so you have it independently of the app.

Final thoughts

Snapchat Memories is the feature that lets you have it both ways: the casual, disappearing fun of Snapchat, plus a permanent, searchable archive of the moments worth keeping. Save snaps with a tap, find them by keyword, edit and reshare them, and let Snapchat resurface them through flashbacks and year-end recaps.

Two things are worth remembering: back genuinely important snaps up to your camera roll so you’re not dependent on the app, and treat the My Eyes Only passcode with care, since it can’t be recovered. Used well, Memories turns Snapchat into a digital scrapbook of your life. For the bigger picture of how the app works, see our guide to the Snapchat app.