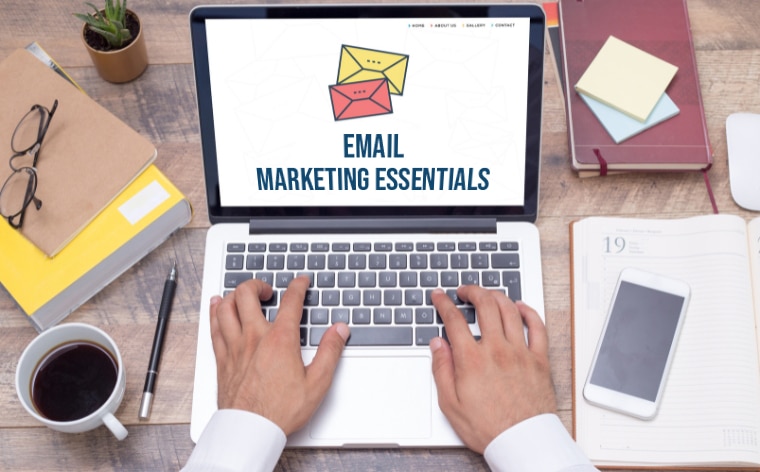
Email Marketing Essentials: Best Practices for Effective Campaigns

Introduction

Email marketing is one of the most powerful tools for connecting with your audience and driving business growth. It lets you reach your customers directly, providing valuable information, offers, and updates. However, following best practices is essential to maximize your email marketing efforts. This ensures that your campaigns are effective and engaging and deliver the desired results.

This blog will explore the essential best practices for creating successful email marketing campaigns. From understanding your audience to crafting compelling subject lines, personalizing your messages, and analyzing your performance, we’ll cover all the essentials you need to know. Let’s dive in and discover how you can enhance your email marketing strategy and achieve better results.

Understand Your Audience

Understanding your audience is the foundation of any successful email marketing campaign. Knowing who your subscribers are and what they care about allows you to tailor your messages to meet their needs and interests.When you understand your audience, you can create content that resonates with them. This leads to higher engagement rates, increased loyalty, and better overall campaign performance. By speaking directly to the interests and needs of your subscribers, you build trust and foster long-term relationships.

How to Identify Your Audience

To identify your email marketing audience, gather direct insights through surveys and feedback to understand preferences and pain points.Analyzing customer data to uncover demographics,buying behaviors, and purchase history Create detailed customer personas to capture fundamental interests and motivations. Use segmentation to divide your email list into targeted groups based on demographics, behavior, and preferences. This approach ensures your email marketing is personalized, relevant, engaging, and converting to your audience.

  • Surveys and Feedback: Conduct surveys and ask for feedback to gain insights into your audience’s preferences, needs, and pain points. This direct input is invaluable for tailoring your content.
  • Customer Data: Analyze existing customer data to understand demographics, buying behaviour, and interaction patterns. Look at metrics such as age, gender, location, purchase history, and website activity.
  • Create Customer Personas: Develop detailed personas representing different segments of your audience. These personas should include demographic information, interests, challenges, and motivations.
  • Segmentation: Segmentation divides your email list into smaller, more targeted groups based on specific criteria. This allows you to send more relevant and personalized content to each group.
    • Demographics: Segment by age, gender, income, location, etc.
    • Behavior: Group subscribers based on past behavior, such as purchase history or email engagement.
    • Preferences: Use preferences subscribers indicate to tailor your content, such as interests or product preferences.

By understanding your audience and effectively segmenting your email list, you can ensure your messages are relevant and engaging. This improves open and click-through rates and fosters stronger connections with your subscribers.

Craft Compelling Subject Lines

Crafting compelling subject lines is crucial for the success of your email marketing campaigns. The subject line is the first thing your recipients see, significantly affecting whether they open your email.A well-crafted subject line grabs attention and piques curiosity, leading to higher open rates. It sets the tone for the content inside and can significantly impact the effectiveness of your email marketing efforts.

Best Practices for Crafting Subject Lines

  • Keep It Short and Clear: Aim for a concise and to-the-point subject line. Ideally, it should be around 40-50 characters to ensure it’s evident on mobile devices.
  • Use Action-Oriented Language: Encourage your recipients to take action by using solid and actionable verbs. For example, “Unlock Your Special Discount” or “Discover the Latest Trends.”
  • Personalize When Possible: Adding the recipient’s name or other personal details can make the subject line more relevant and engaging. For instance, “John, Don’t Miss Your Exclusive Offer!”
  • Create a Sense of Urgency: Phrases like “Limited Time Offer” or “Only a Few Left” can create a sense of urgency, prompting recipients to open the email immediately.
  • Avoid Spammy Words: Avoid words that might trigger spam filters, such as “Free,” “Buy Now,” or excessive punctuation and capitalization.
  • Test Different Approaches: Use A/B testing to experiment with different subject lines. This helps you understand what resonates best with your audience and refine your approach.

Following these best practices, you can craft subject lines that capture attention and encourage recipients to open your emails. Effective subject lines are a vital component of successful email marketing campaigns, helping to increase engagement and drive better results.

Personalize Your Emails

Personalizing your emails is essential for creating a solid connection with your audience and improving engagement. Personalized emails show your subscribers that you understand their preferences and needs, making them more likely to respond positively to your messages.Personalized emails can lead to higher open rates, click-through rates, and conversions. They make your subscribers feel valued and recognized, fostering loyalty and trust. By delivering relevant content, you enhance the overall customer experience.

Techniques for Personalizing Your Emails

  • Use the Recipient’s Name: Addressing your subscribers by their name in the subject line or greeting can make your emails feel more personal and engaging. For example, “Hi Sarah, Here’s Your Special Offer!”
  • Tailor Content to Individual Preferences: Customize the content of your emails based on the recipient’s preferences, behavior, or past interactions. Send them related offers or updates if a subscriber is interested in a specific product category.
  • Dynamic Content: Implement dynamic content blocks that change based on the recipient’s data. For example, display different images, offers, or messages to different audience segments within the same email.
  • Behavior-Based Triggers: Set up automated emails triggered by specific actions, such as browsing behavior, past purchases, or cart abandonment. This ensures that your emails are timely and relevant to the recipient’s interests.
  • Personalized Recommendations: Use data on past purchases or browsing history to suggest products or services the recipient might be interested in. For example, “We thought you might like these new arrivals.”
  • Anniversary and Birthday Emails: Send special emails to celebrate important dates like anniversaries or birthdays. These emails can include personalized messages and exclusive offers, making your subscribers feel special.

Benefits of Personalization

  • Increased Engagement: Personalized emails are likelier to be opened and clicked, leading to higher engagement rates.
  • Improved Customer Experience: By delivering relevant and timely content, you enhance the overall experience for your subscribers.
  • Higher Conversion Rates: Personalized offers and recommendations can increase conversions and sales.
  • Enhanced Loyalty: Showing you understand and value your subscribers fosters long-term loyalty and trust.

By implementing these personalization techniques, you can create more engaging and effective email marketing campaigns that resonate with your audience and drive better results. Personalization is a powerful tool that can significantly enhance your email marketing strategy.

Design for All Devices

Designing your emails to be compatible with all devices is crucial for ensuring that your messages are accessible and visually appealing to every recipient, regardless of how they access their email. With the growing use of smartphones and tablets, your emails must look great on any screen size.A significant portion of your audience will open your emails on mobile devices. If your emails are optimized for mobile, you can avoid losing engagement and conversions due to poor user experience. Ensuring that your emails are mobile-friendly can significantly enhance readability and interaction rates.

Best Practices for Designing Emails for All Devices

  • Responsive Design: Use techniques to ensure your email layout adjusts to fit any screen size. Your email will look good whether viewed on a desktop, tablet, or smartphone.
  • Single-Column Layout: A single-column layout is more mobile-friendly and easily read on smaller screens. It also helps to keep the design simple and uncluttered.
  • Readable Fonts: Use a font size that is easy to read on small screens. Generally, a minimum of 14px for body text is recommended. Avoid overly decorative fonts that might be hard to read on mobile devices.
  • Touch-Friendly Buttons: Ensure that any buttons or links in your email are large enough to be easily tapped on a touchscreen. A minimum button size of 44×44 pixels is a good guideline.
  • Concise Content: Keep your content concise and to the point. Mobile users often scan emails, so make sure your main message and call to action are immediately apparent.
  • Optimized Images: Use images that load quickly and look good on all devices. Ensure that your pictures are manageable, which can slow down loading times, and always include alt text for images in case they load correctly.
  • Testing: Always test your emails on multiple devices and email clients to ensure they display correctly everywhere. Tools like Litmus or Email on Acid can help you see how your emails look on different screens and platforms.

Following these best practices, you can design emails that provide a seamless experience across all devices. This improves the user experience and enhances engagement and conversion rates. Ensuring your emails are accessible and visually appealing on any device is critical to effective email marketing.

Create Engaging Content

Creating engaging content is essential for capturing your audience’s attention and encouraging them to interact with your emails. High-quality content keeps your subscribers interested and helps build a strong relationship with them.Engaging content drives higher open rates, click-through rates, and conversions. It ensures that your emails are not only read but also acted upon. When your content resonates with your audience, they trust your brand and take the desired actions.

Best Practices for Creating Engaging Content

  • Value-Driven Content: Focus on providing content that is valuable to your audience. This could be informative articles, helpful tips, exclusive offers, or entertaining stories. Always ask yourself how your content can benefit your readers.
  • Clear and Concise Messaging: Keep your messages clear and to the point. Avoid long paragraphs and complicated language. Use bullet points and subheadings to make your content easy to scan.
  • Strong Call to Action (CTA): Every email should have a clear and compelling CTA. Whether you want your readers to visit your website, purchase a product, or download a resource, make sure the CTA stands out and is easy to follow.
  • Visual Elements: Use images, videos, and infographics to make your emails visually appealing. Visual content can break up text and make your emails more engaging. Ensure all visual elements are optimized for fast loading and display well on all devices.
  • Personalization: Tailor your content to your subscribers’ individual preferences and behaviors. Personalized content feels more relevant and can significantly increase engagement.
  • Interactive Elements: To encourage reader interaction, include interactive elements such as polls, quizzes, or clickable images. Interactive content can make your emails more engaging and fun.
  • Consistent Branding: Maintain a consistent brand voice and style across all your emails. This helps build brand recognition and trust. Use your brand colors, fonts, and logo to create a cohesive look.
  • Relevant Content: Ensure your content applies to your audience’s interests and needs. Use segmentation to send targeted messages likely to resonate with different groups of subscribers.

Types of Engaging Content

  • Educational Content: Share how-to guides, tips, and industry insights that help your audience solve problems or learn something new.
  • Promotional Content: Offer exclusive deals, discounts, and promotions to incentivize action.
  • Storytelling: Share stories about your brand, customers, or employees to create a personal connection.
  • User-Generated Content: Feature testimonials, reviews, and content your customers create to build trust and authenticity.

By following these best practices, you can create content that engages your audience and drives action. Engaging content is at the heart of successful email marketing campaigns, helping you build lasting relationships and achieve your marketing goals.

Implement Automation

Implementing automation in your email marketing campaigns can significantly enhance efficiency and effectiveness. Automation allows you to send the right message to the right person at the right time without manual effort.Automation saves time and ensures consistency in your email marketing efforts. It helps you nurture leads, engage with your audience, and drive conversions by delivering personalized and timely messages.

Best Practices for Implementing Automation

  • Welcome Series: Set up an automated welcome series to greet new subscribers. Introduce your brand, share valuable resources, and guide them on what to expect from your emails.
  • Drip Campaigns: Create drip campaigns to nurture leads over time. Drip campaigns consist of emails sent at specific intervals, providing valuable content and gradually leading the subscriber toward a purchase or other desired action.
  • Behavioral Triggers: Use behavioral triggers to send emails based on subscriber actions. For example, send a follow-up email when someone clicks a link in your email, visits a specific page on your website, or abandons their shopping cart.
  • Re-engagement Emails: Set up automated re-engagement emails to reconnect with inactive subscribers. Offer them incentives to come back, such as exclusive discounts or new content they might be interested in.
  • Birthday and Anniversary Emails: Send automated birthday or anniversary emails to celebrate special occasions. These personal touches can enhance customer loyalty and engagement.
  • Post-Purchase Follow-Up: Automate follow-up emails after a purchase. Thank the customer, offer related product recommendations, and ask for feedback or reviews.

Popular Automation Tools

  • Mailchimp: Offers a user-friendly platform with powerful automation features, including welcome series, abandoned cart emails, and more.
  • ActiveCampaign: Provides advanced automation capabilities focusing on customer journeys and behavioral triggers.
  • HubSpot: Combines email marketing with CRM features, allowing for highly personalized and automated workflows.
  • SendinBlue: Known for its robust automation features and affordability, it is ideal for businesses of all sizes.

Benefits of Automation

  • Increased Efficiency: Automation saves time by handling repetitive tasks, allowing you to focus on strategy and creative work.
  • Consistency: Ensures emails are sent consistently and on time, improving overall campaign reliability.
  • Personalization: Delivers personalized content based on subscriber behavior and preferences, enhancing engagement.
  • Scalability: Easily scales with your business, allowing you to manage growing subscriber lists and complex workflows without extra effort.
  • Improved Engagement: Timely and relevant automated emails can increase open rates, click-through rates, and conversions.

By implementing automation in your email marketing strategy, you can enhance the effectiveness of your campaigns, build stronger relationships with your audience, and drive better results with less effort. Automation is a powerful tool that can take your email marketing to the next level.

A/B Testing

A/B testing is a crucial practice in email marketing that helps you determine what elements of your emails are most effective. By comparing two versions of an email to see which one performs better, you can optimize your campaigns for higher engagement and conversions.

A/B testing allows you to make data-driven decisions and continuously improve your email marketing strategy. Understanding what works best for your audience can increase open rates, click-through rates, and overall campaign effectiveness.

Best Practices for A/B Testing

  • Test One Element at a Time: To accurately determine what impacts performance, test only one variable at a time. This could be the subject line, CTA, email layout, images, or copy.
  • Define Clear Goals: Establish what you want to achieve with your test. Are you looking to increase open rates, click-through rates, or conversions? Clear goals help you measure success accurately.
  • Create Variations: Develop two versions of your email, each with a single different element. For example, if you are testing subject lines, keep the email content the same in both versions.
  • Random Sampling: Ensure your test groups are randomly selected and large enough to provide statistically significant results. This avoids bias and ensures reliable data.
  • Monitor and Analyze Results: Track the performance of each variation using key metrics relevant to your goals. Compare open, click-through, and conversion rates to determine the winning version.
  • Implement the Winning Version: Once you have identified the better-performing version, use it as your standard. Apply the insights gained from the test to future emails.
  • Continuous Testing: A/B testing is not a one-time activity. Continually test new elements to keep improving your email marketing campaigns.

What to Test

  • Subject Lines: Experiment with different lengths, tones, and styles. Test personalization, emojis, and urgency.
  • Call to Action (CTA): Try different wording, colors, and placements to see what drives more clicks.
  • Email Layout: Test single-column vs. multi-column layouts and different image and text placements.
  • Content: Compare long-form content with short-form content and test different types of messaging or offers.
  • Send Times: Experiment with different days of the week and times of day to find the optimal time to reach your audience.

Benefits of A/B Testing

  • Improved Engagement: Discover what resonates best with your audience, leading to higher open and click-through rates.
  • Better Conversion Rates: Optimize elements that drive conversions, increasing your overall ROI.
  • Informed Decisions: Make data-driven decisions rather than relying on guesswork or assumptions.
  • Continuous Improvement: Regular testing and optimization lead to ongoing improvements in your email marketing strategy.

Implementing A/B testing in your email marketing campaigns can help you fine-tune your approach and achieve better results. It’s a powerful tool that enables you to understand your audience’s preferences and optimize your emails for maximum impact.

Monitor and Analyze Performance

Monitoring and analyzing the performance of your email marketing campaigns is essential for understanding what works and what doesn’t. You can make informed decisions and continuously improve your strategies by tracking critical metrics.Regularly reviewing your email campaign performance helps you identify strengths and weaknesses. It allows you to optimize your efforts, increase engagement, and achieve better results over time.

Key Metrics to Track

  • Open Rates: The percentage of recipients who open your email. A higher open rate indicates effective subject lines and a good sender reputation.
  • Click-Through Rates (CTR): The percentage of recipients clicking links within your email. This shows how engaging and relevant your content is.
  • Conversion Rates: The percentage of recipients completing the desired action, such as purchasing or filling out a form. This metric measures the overall effectiveness of your email in driving action.
  • Bounce Rates: The percentage of emails that could not be delivered. High bounce rates can indicate issues with your email list quality or problems with email deliverability.
  • Unsubscribe Rates: The percentage of recipients who opt out of your email list. While some unsubscribes are expected, a high rate may signal that your content needs to meet subscriber expectations.

Tools for Analytics

  • Email Marketing Platforms: Most email marketing tools, such as Mailchimp, ActiveCampaign, and HubSpot, provide built-in analytics to track these key metrics.
  • Google Analytics: Use Google Analytics to track traffic and conversions from your email campaigns to your website.
  • Third-Party Tools: Platforms like Litmus and Email on Acid offer additional insights and testing capabilities to optimize your emails.

Best Practices for Monitoring and Analysis

  • Set Clear Goals: Define what success looks like for each campaign. This could be increased sales, higher engagement, or growing your subscriber list.
  • Regular Reporting: Create reports to review your metrics and track progress. Identify trends and patterns that can inform future campaigns.
  • Benchmarking: Compare your performance against industry benchmarks to understand how your campaigns stack up. This can provide context for your metrics and highlight areas for improvement.
  • A/B Testing Results: Analyze the outcomes of your A/B tests to identify which elements drive better performance and apply these insights to future emails.
  • Feedback Loop: Use the data you gather to create a feedback loop. Continuously refine and adjust your strategies based on the metrics findings.

Benefits of Monitoring and Analysis

  • Data-Driven Decisions: Make informed decisions based on concrete data rather than assumptions.
  • Identify Areas for Improvement: Understand where your campaigns may need to catch up and how to address these issues.
  • Optimize Campaigns: Use insights to refine your content, design, and strategy for better results.
  • Enhanced Engagement: By understanding your audience’s response, you can create more engaging and effective emails.
  • Increased ROI: Continuous optimization leads to better performance, driving higher returns on your email marketing investment.

By consistently monitoring and analyzing your email marketing performance, you can ensure that your campaigns are effective and continuously improving. This process is critical to maximizing the impact of your email marketing efforts.

Ensure Compliance

Ensuring compliance with email marketing regulations is crucial for protecting your business and maintaining the trust of your subscribers. Adhering to legal requirements helps avoid penalties and ensures recipients welcome your emails.Compliance with email marketing laws is essential for building trust with your audience and avoiding legal issues. It demonstrates your commitment to respecting subscriber privacy and following best practices.

Key Regulations to Follow

To ensure compliance in email marketing, it is essential to adhere to several critical regulations designed to protect consumers and promote ethical marketing practices. Understanding and implementing these rules can help build trust with your audience and protect your business from legal repercussions. Here are the primary regulations you should follow:

CAN-SPAM Act (United States)

The CAN-SPAM Act sets the standards for commercial emails in the United States. Key requirements include:

  • Opt-Out Mechanism: Every email must consist of a straightforward way for recipients to opt out of receiving future emails. This opt-out mechanism should be concisely honored promptly, typically within ten business days.
  • No Deceptive Subject Lines: Subject lines should accurately reflect the content of the email. Misleading subject lines are prohibited.
  • Identify the message as an Advertisement: If the email is an advertisement, it must be disclosed.
  • Include Your Physical Address: The sender’s valid physical postal address must be included in each email.
  • Honor Opt-Out Requests Promptly: Any opt-out requests must be processed quickly to ensure compliance with the law.

GDPR (General Data Protection Regulation – European Union)

The GDPR is a comprehensive regulation that governs data protection and privacy for individuals within the European Union. Key aspects include:

  • Consent: Before sending emails, obtain explicit consent from recipients. This consent must be freely given, specific, informed, and unambiguous.
  • Data Protection: Personal data must be stored securely and processed lawfully. Companies must take appropriate measures to protect the data they handle.
  • Right to Access and Erasure: Recipients can access their data and request its deletion anytime.
  • Transparency: Inform recipients about how their data will be used. This includes providing details on data collection, processing, and storage.
  • Breach Notification: Data protection authorities must be notified within 72 hours of a data breach.

CASL (Canada’s Anti-Spam Legislation)

CASL is one of Canada’s strictest anti-spam laws and governs email marketing. Key points include:

  • Consent: Obtain express or implied permission from recipients before sending commercial emails. Express consent involves an explicit agreement, while implied consent can occur through existing business relationships.
  • Identification: Identify yourself and provide contact information in every email. This ensures transparency and builds trust with recipients.
  • Unsubscribe Mechanism: Include a straightforward way for recipients to unsubscribe from future emails. Unsubscribe requests must be processed quickly and efficiently.

PECR (Privacy and Electronic Communications Regulations – United Kingdom)

PECR complements the GDPR in the UK by providing specific rules for electronic communications. Important requirements are:

  • Consent: Obtain consent before sending unsolicited marketing emails. This is essential to ensure that recipients welcome communications.
  • Transparency: Inform recipients about who you are and how they can contact you. This helps build credibility and trust.
  • Unsubscribe Option: Provide a precise mechanism for opting out of future communications, ensuring recipients can easily withdraw their consent.

Australia’s Spam Act 2003

Australia’s Spam Act regulates commercial electronic messages. Key regulations include:

  • Consent: Ensure you have permission before sending marketing emails. This consent can be expressed or inferred based on prior relationships.
  • Identify Yourself: Include clear identification and contact details in every email. Transparency is crucial for maintaining trust.
  • Unsubscribe: Provide a functional unsubscribe facility and honor opt-out requests promptly to ensure recipients can easily opt out of future communications.

Best Practices for Compliance

  • Obtain Explicit Consent: Always get permission from individuals before adding them to your email list. Use double opt-in methods where subscribers confirm their subscription via email.
  • Provide Clear Opt-Out Options: Every email should include a visible and easy-to-use unsubscribe link. Ensure that opt-out requests are processed promptly and without complications.
  • Accurate Sender Information: Ensure your emails identify your business and provide a valid physical address. This builds trust and transparency with your audience.
  • Honest Subject Lines: Avoid misleading or deceptive subject lines. Ensure that the subject line accurately reflects the content of the email.
  • Protect Subscriber Data: Implement robust data protection measures to safeguard subscriber information. Ensure that your data collection and storage practices comply with relevant regulations.
  • Regularly Update Your List: Clean your email list regularly to remove inactive or invalid email addresses. This helps maintain a high sender reputation and reduces the risk of deliverability issues.
  • Document Compliance Efforts: Keep records of consent, unsubscribe requests, and data protection practices. This documentation can be helpful if you ever need to demonstrate compliance.

Benefits of Compliance

  • Builds Trust: Compliance shows that you respect your subscribers’ privacy and choices, helping to build trust and loyalty.
  • Avoids Penalties: Adhering to regulations helps prevent costly fines and legal issues associated with non-compliance.
  • Improves Deliverability: Compliant practices reduce the likelihood of your emails being marked as spam, improving deliverability rates.
  • Enhances Reputation: A strong reputation for compliance and respect for subscriber preferences enhances your brand image and credibility.

Ensuring compliance with email marketing regulations can protect your business, build trust with your audience, and maintain a positive reputation. Compliance is a crucial aspect of practical and ethical email marketing.

Effective email marketing requires a strategic approach and adherence to best practices. You can significantly enhance your email marketing campaigns by understanding your audience, crafting compelling subject lines, personalizing your emails, designing for all devices, creating engaging content, implementing automation, conducting A/B testing, monitoring performance, and ensuring compliance.

These practices improve engagement and conversion rates and build trust and long-term relationships with your subscribers. Continuously refining your email marketing strategy based on data and feedback will help you stay ahead in the competitive email marketing landscape.

Start applying these best practices today to elevate your email marketing efforts and achieve better results. With a thoughtful and well-executed approach, you can turn your email campaigns into powerful tools for business growth and customer engagement.

10 ways to Minimize Main Thread Work to Improve Core Web Vitals

What is Main Thread Work?

Main thread work refers to the tasks that the browser’s main thread handles to make a web page work properly. Think of the main thread as the browser’s control center. It does important jobs like:

  • Processing HTML and CSS: Building the page structure and style.
  • Running JavaScript: Adding interactive features and fetching data.
  • Rendering: Drawing the page on the screen and handling animations.
  • Handling User Actions: Responding to clicks, taps, and scrolls.

When the main thread is busy, the website can feel slow and unresponsive. Reducing the work on the main thread helps make websites faster and more user-friendly. This is important for a better user experience and improved performance metrics like Core Web Vitals.

Why is Minimizing Main Thread Work Important?

Minimizing main thread work is crucial for improving the performance and user experience of a website. When the main thread is overloaded, it struggles to keep up with tasks like rendering the page, running scripts, and responding to user interactions. This can make the website feel slow and unresponsive.

Improves User Experience

A smooth and responsive website keeps users happy. When the main thread isn’t bogged down with too many tasks, it can quickly respond to clicks, taps, and other interactions. This makes the website feel faster and more enjoyable to use. Users are more likely to stay on a site that feels responsive and doesn’t lag.

Boosts Performance Metrics

Core Web Vitals are a set of performance metrics that Google uses to measure the quality of user experience on a webpage. These include Largest Contentful Paint (LCP), First Input Delay (FID), and Cumulative Layout Shift (CLS). When you minimize main thread work, you improve these metrics. For example, less main thread work can lead to a lower FID, meaning the page responds faster to user input.

Enhances SEO

Google considers performance metrics like Core Web Vitals in its search rankings. A website that performs well and offers a good user experience can rank higher in search results. This means more visibility and more traffic to your site. By minimizing main thread work, you not only improve the user experience but also boost your site’s SEO.

Ways to Minimize Main Thread Work 

Optimize JavaScript Execution

Optimizing JavaScript execution is one of the most effective ways to minimize main thread work and improve your website’s Core Web Vitals. JavaScript can significantly impact the performance of a webpage because it requires processing power from the main thread. When you optimize how JavaScript is handled, you reduce the load on the main thread, making your site faster and more responsive.

Code Splitting

Code splitting is a technique that breaks down your JavaScript code into smaller chunks. Instead of loading a large JavaScript file all at once, the browser only loads the code needed for the initial page load. Additional code is loaded as needed. This reduces the initial load time and helps the main thread handle tasks more efficiently. Tools like Webpack can help you implement code splitting in your projects.

Tree Shaking

Tree shaking removes unused code from your JavaScript files. When you import libraries, not all parts of the library might be necessary for your project. Tree shaking identifies and eliminates this unnecessary code, reducing the overall size of your JavaScript files. Smaller files mean less work for the main thread, leading to faster execution and better performance.

Defer Non-Critical JavaScript

Using the async and defer attributes on script tags can defer the loading and execution of non-critical JavaScript. The async attribute allows the script to download in the background while the page continues to load. Once the script is downloaded, it executes immediately. The defer attribute also allows background downloading but ensures the script executes only after the HTML document is fully parsed. This approach prevents JavaScript from blocking the initial rendering of the page, improving load times and reducing main thread work.

Minify JavaScript

Minifying JavaScript involves removing unnecessary characters, such as spaces and comments, without changing its functionality. Minified code is smaller in size, which means the browser can download and execute it faster. Tools like UglifyJS and Terser can automate the minification process, helping you optimize your JavaScript with minimal effort.

Avoid Long-Running JavaScript

Long-running JavaScript tasks can monopolize the main thread, causing delays in rendering and responding to user input. Break down long tasks into smaller, asynchronous tasks using techniques like requestIdleCallback or setTimeout. This approach allows the browser to handle other critical tasks in between, improving overall performance and responsiveness.

Defer Non-Critical JavaScript

Deferring non-critical JavaScript is an effective method to minimize main thread work and improve Core Web Vitals. When you defer JavaScript that isn’t essential for the initial load, you allow the browser to focus on rendering the page quickly and efficiently. This approach helps ensure that users see the content faster and can interact with the page without delay.

Using async and defer Attributes

The async and defer attributes are tools that let you control how and when JavaScript is loaded and executed.

  • Async Attribute: When you add the async attribute to a script tag, the browser downloads the script while it continues to process the HTML. Once the script is downloaded, it executes immediately. This is useful for scripts that are independent and don’t rely on other scripts or the HTML structure.
  • Defer Attribute: The defer attribute works similarly by downloading the script while the HTML is being processed. However, it ensures that the script only executes after the HTML is fully parsed. This makes it ideal for scripts that need to interact with the DOM.

Using these attributes, you can prevent non-critical JavaScript from blocking the rendering of your webpage. For example, analytics scripts, social media widgets, and other third-party integrations are often non-critical and can be deferred. This way, the browser can prioritize rendering the essential content that users need to see first.

By deferring non-critical JavaScript, you reduce the load on the main thread during the initial page load. This leads to faster rendering times and a better user experience. Users can start interacting with the page sooner, and important performance metrics like First Input Delay (FID) and Largest Contentful Paint (LCP) improve.

Reduce JavaScript Payloads

Reducing JavaScript payloads is crucial for minimizing main thread work and improving your website’s Core Web Vitals. Large JavaScript files can slow down your site by increasing load times and adding more work for the main thread to process. By reducing the size of your JavaScript files, you can make your website faster and more responsive.

Minify JavaScript

Minifying JavaScript means removing unnecessary characters like spaces, comments, and line breaks from your code. This process reduces the file size without changing the code’s functionality. Smaller files load faster and put less strain on the main thread. Tools like UglifyJS and Terser can automate this process, making it easy to implement.

Avoid Long-Running JavaScript

Long-running JavaScript tasks can block the main thread, making your site feel slow and unresponsive. Breaking these tasks into smaller, asynchronous chunks can help. Use techniques like requestIdleCallback or setTimeout to split up long tasks. This approach lets the browser handle other important tasks between chunks, improving overall performance.

Optimize CSS

Optimizing CSS is essential for minimizing main thread work and improving Core Web Vitals. CSS (Cascading Style Sheets) determines the look and feel of your website, but if not managed properly, it can significantly slow down the rendering process. By optimizing CSS, you can enhance your site’s performance and provide a better user experience.

Minimize CSS Complexity

Minimizing CSS complexity means simplifying your stylesheets. Large, complex CSS files take longer to process, increasing the load on the main thread. You can reduce complexity by removing unused CSS rules, combining similar styles, and avoiding overly specific selectors. Tools like PurgeCSS can help identify and remove unused CSS, making your files smaller and faster to load.

Critical CSS

Critical CSS involves inlining the CSS needed for the initial view of the page directly in the HTML. This practice ensures that the essential styles are loaded and applied as soon as possible, reducing render-blocking and improving load times. The rest of the CSS can be loaded asynchronously. This approach helps the main thread render the initial content faster, improving metrics like Largest Contentful Paint (LCP).

Use Web Workers

Using Web Workers is a powerful way to minimize main thread work and improve Core Web Vitals. Web Workers allow you to run scripts in background threads, separate from the main thread. This means that heavy computational tasks don’t block the main thread, keeping your website responsive and fast.

Offloading Heavy Computations

Web Workers are ideal for handling tasks that require significant processing power, such as data processing, complex calculations, or handling large datasets. By offloading these tasks to Web Workers, you free up the main thread to focus on rendering the page and responding to user interactions.

For example, if your website needs to process a large amount of data or perform complex calculations, you can move these operations to a Web Worker. The Web Worker performs the tasks in the background, and when it finishes, it sends the results back to the main thread. This way, the main thread remains available to handle user inputs and render updates quickly.

Using Web Workers can significantly enhance the performance of your site, especially for web applications that rely on heavy computations. This leads to a smoother and more responsive user experience, improving metrics like First Input Delay (FID).

Reduce Layout Thrashing

Reducing layout thrashing is essential for improving Core Web Vitals. Layout thrashing happens when the browser has to repeatedly calculate the layout of a page due to changes in the DOM. This can slow down your site and make it less responsive. Here’s how you can reduce layout thrashing:

Avoid Forced Synchronous Layouts

Forced synchronous layouts occur when you read layout properties (like offsetHeight) immediately after modifying the DOM. This forces the browser to recalculate the layout, which takes time and can cause jank. To avoid this, batch your DOM reads and writes separately. For example, read all necessary properties first, then apply all changes afterward. This minimizes the number of layout recalculations.

Use Efficient CSS

Efficient CSS means writing styles that don’t trigger unnecessary layout calculations. Avoid using CSS properties that require intensive calculations, like complex animations or transitions. Simplify your stylesheets and ensure they are optimized to reduce the impact on layout recalculations.

Minimize Layout-Triggering JavaScript

JavaScript that frequently changes the DOM can cause layout thrashing. Minimize these changes by grouping them together or using techniques like requestAnimationFrame to batch updates. This allows the browser to handle the changes more efficiently and reduces the need for repeated layout calculations.

Debounce and Throttle Event Handlers

Event handlers that trigger frequently, like scroll or resize events, can cause layout thrashing if they involve DOM reads and writes. Use debounce and throttle techniques to limit the frequency of these handlers. This ensures that layout recalculations happen less often and the main thread isn’t overloaded.

Use CSS Transforms for Animations

When creating animations, prefer using CSS transforms (like translate, scale, rotate) instead of properties that trigger layout recalculations (like top, left, width, height). CSS transforms are handled by the GPU, which is more efficient and doesn’t cause layout thrashing.

Lazy Load Images and Videos

Lazy loading images and videos is a smart way to minimize main thread work and improve your website’s Core Web Vitals. By deferring the loading of non-essential media, you ensure that the main thread can focus on rendering critical content first. This makes your site load faster and improves user experience.

Deferring Off-Screen Content

Lazy loading involves loading images and videos only when they are about to enter the viewport (the visible part of the web page). Instead of loading all media files as soon as the page loads, lazy loading ensures that only the necessary content is fetched initially. This reduces the initial load time and decreases the workload on the main thread.

For example, if your webpage has several images and videos that are not immediately visible, you can set them to load only when the user scrolls down to that part of the page. This is achieved by using the loading=”lazy” attribute in the HTML img and iframe tags, or by using JavaScript libraries like LazyLoad.

Lazy loading significantly reduces the amount of data the browser needs to process during the initial load. This not only speeds up the page rendering but also helps in conserving the user’s bandwidth, especially important for mobile users. With less data to handle initially, the main thread can render the essential content more quickly, improving metrics like Largest Contentful Paint (LCP).

Optimize Third-Party Scripts

Optimizing third-party scripts is crucial for minimizing main thread work and improving your website’s Core Web Vitals. Third-party scripts, such as ads, analytics, and social media widgets, can significantly impact your site’s performance. By managing these scripts effectively, you can reduce their load on the main thread and enhance user experience.

Minimizing Impact of Third-Party Resources

Third-party scripts often come from external sources and can introduce performance bottlenecks. Here are some strategies to optimize their impact:

Identify Essential Third-Party Scripts: Not all third-party scripts are crucial for your website. Identify which scripts are essential for your site’s functionality and user experience. Remove any scripts that are not providing significant value.

Load Scripts Asynchronously: Use the async or defer attributes to load third-party scripts without blocking the rendering of your page. The async attribute allows the script to download while the HTML continues to parse, executing the script as soon as it finishes downloading. The defer attribute also allows the script to download while parsing but ensures the script executes only after the HTML is fully parsed.

Use Preconnect and DNS Prefetch: Use the rel=”preconnect” and rel=”dns-prefetch” link attributes to establish early connections to third-party domains. This reduces the time it takes to fetch the scripts when they are needed, speeding up the overall load time.

Bundle Third-Party Scripts: Where possible, bundle multiple third-party scripts together. This reduces the number of HTTP requests, which can speed up loading times.

Load Third-Party Scripts Later: Defer the loading of non-critical third-party scripts until after the main content has loaded. This ensures that the critical rendering path is not blocked by scripts that are not immediately needed.

Monitor Script Performance: Continuously monitor the performance impact of third-party scripts. Use tools like Lighthouse or Chrome DevTools to identify slow or blocking scripts and take action to optimize them.

By implementing these strategies, you can significantly reduce the negative impact of third-party scripts on your website’s performance. This optimization helps ensure that the main thread is not overloaded, leading to faster load times and a smoother user experience.

Efficiently Handle Event Listeners

Efficiently handling event listeners is a key strategy to minimize main thread work and improve your website’s Core Web Vitals. Event listeners respond to user actions like clicks, scrolls, and keyboard inputs. If not managed well, they can create performance bottlenecks, slowing down your site. By optimizing how event listeners are used, you can ensure a smoother, more responsive user experience.

Debouncing and Throttling

Debouncing and throttling are techniques to control the rate at which event handlers are executed.

Debouncing: This technique ensures that an event handler is invoked only after a specified period of inactivity. For example, if a user is typing in a search box, debouncing can delay the search function until the user stops typing for a few milliseconds. This reduces the number of times the search function runs, saving main thread resources.

Throttling: Throttling limits the number of times an event handler can be executed within a certain time frame. For example, when a user is scrolling, throttling ensures that the scroll event handler runs at most once every few milliseconds. This prevents the handler from executing too frequently and overloading the main thread.

Passive Event Listeners

Using passive event listeners can improve scrolling performance. When you add a passive event listener, you inform the browser that the event handler will not call preventDefault(). This allows the browser to perform optimizations for better performance.

To add a passive event listener, set the passive option to true:

javascript

window.addEventListener('scroll', handleScroll, { passive: true });

Unregister Unnecessary Event Listeners

Remove event listeners that are no longer needed to free up resources. For example, if a particular feature or element is no longer visible or relevant, unregister its event listeners to reduce the load on the main thread.

Optimize Event Handler Code

Ensure that the code inside your event handlers is optimized and efficient. Avoid heavy computations and complex operations within event handlers. If necessary, use techniques like requestAnimationFrame for smoother animations and updates.

Preload Key Requests

Preloading key requests is an effective way to minimize main thread work and improve your website’s Core Web Vitals. Preloading helps ensure that critical resources are available as soon as they are needed, reducing load times and enhancing user experience.

Prioritizing Important Resources

Preloading involves telling the browser to fetch important resources early, before they are needed. This can include CSS files, JavaScript files, fonts, and images that are essential for rendering the initial view of the webpage. By preloading these resources, you can ensure they are available immediately, speeding up the rendering process and reducing the time the main thread spends waiting for these resources.

To preload a resource, you can use the <link rel=”preload”> tag in your HTML. For example, to preload a CSS file, you would add the following line to your HTML <head> section:

html

<link rel="preload" href="styles.css" as="style">

This tells the browser to fetch the styles.css file early, so it’s ready when needed.

Improving Largest Contentful Paint (LCP)

Preloading key resources can significantly improve the Largest Contentful Paint (LCP) metric. LCP measures how long it takes for the largest visible content element to load on the screen. By preloading the resources required to render this element, you can reduce the LCP time, making the page appear faster to users.

Reducing Render-Blocking

Preloading helps reduce render-blocking, which occurs when the browser has to wait for critical resources to download before it can render the page. When you preload these resources, you ensure they are available when the browser needs them, reducing the time spent on render-blocking tasks.

Using as Attribute

When preloading resources, it’s important to use the correct as attribute value to specify the type of resource being preloaded. This helps the browser prioritize and handle the resource appropriately. For example:

  • Use as=”style” for CSS files.
  • Use as=”script” for JavaScript files.
  • Use as=”font” for web fonts.

Preconnect to Important Origins

In addition to preloading, you can use the rel=”preconnect” attribute to establish early connections to important origins. This reduces the time needed to set up connections when resources are fetched, further speeding up the loading process.

For example:

html

<link rel="preconnect" href="https://example.com">

In summary, preloading key requests is a powerful technique for improving Core Web Vitals. By prioritizing important resources, reducing render-blocking, and using the correct as attribute, you can ensure a faster, smoother loading experience for users. This leads to better performance metrics and a more responsive website.

How to avoid chaining critical requests.

Understanding Chaining Critical Requests

Chaining critical requests happens when your website makes several dependent network requests to load a page. Each request relies on the one before it, like a chain. This slows down your site because the browser has to wait for each link in the chain to finish before it can move on.

What are Critical Requests?

Critical requests are those that your website needs to load first to display the main content. These can be files like CSS, JavaScript, and images. If these files load slowly, your webpage takes longer to appear to users.

How Chaining Happens

Imagine you have a web page. First, the browser loads the HTML. The HTML then asks for a CSS file. Once the CSS is loaded, it asks for a font file. After the font file, the CSS needs to load images. This creates a chain: HTML → CSS → Font → Images. Each step depends on the one before it. This can cause delays.

Impact of Chaining Critical Requests on Core Web Vitals

Chaining critical requests can slow down your website and hurt your Core Web Vitals. These vitals are important measures of your website’s performance. They include Largest Contentful Paint (LCP), First Input Delay (FID), and Cumulative Layout Shift (CLS). Let’s look at how chaining critical requests affects each of these.

Largest Contentful Paint (LCP)

LCP measures how long it takes for the main content of a page to load. If you have a chain of critical requests, each one depends on the previous one. This means your main content takes longer to load. For example, if your HTML needs to load a CSS file, and the CSS needs to load a font, and then an image, this chain slows down the LCP. Users will have to wait longer to see the main part of your page, which can be frustrating.

First Input Delay (FID)

FID measures how long it takes for your page to respond when a user first tries to interact with it. While FID mainly looks at how quickly your page reacts to user actions, chaining critical requests can indirectly slow it down. If the browser is busy handling a long chain of requests, it might not respond quickly to user input. This can make your site feel sluggish and unresponsive.

Cumulative Layout Shift (CLS)

CLS measures how much your page layout moves around while loading. If critical resources load slowly because of chaining, parts of your page might jump around as they finally appear. For instance, if images or fonts load late, they can push other content around, causing layout shifts. This can make your page look unstable and annoy users.

Examples

CSS and Fonts: Your HTML file loads a CSS file, which then loads a font file. This creates a chain.

JavaScript and Images: Your HTML file loads a JavaScript file, which then loads an image. This also creates a chain.

Third-Party Scripts: Widgets or ads from other servers can add more chains of critical requests.

How to Avoid Chaining Critical Requests

Avoiding chaining critical requests helps your website load faster and perform better. Here are step-by-step strategies to break these chains and improve your Core Web Vitals.

Step 1: Minimize Dependencies

Reducing the number of dependencies is the first step to avoid chaining critical requests. When your HTML file depends on several other files to load, it creates a chain of requests. Here’s how to minimize these dependencies:

  • Combine Files: Combine your CSS and JavaScript files. Instead of loading multiple CSS files, combine them into one. Do the same for JavaScript files. This reduces the number of requests the browser has to make.
  • Inline Critical CSS: Inline the most critical CSS directly in the HTML file. This means putting the CSS code needed to style the above-the-fold content directly in the HTML file. This reduces the need for an extra request to load CSS.
  • Remove Unused Code: Remove any unused CSS and JavaScript. This makes your files smaller and reduces the number of dependencies. Tools like PurifyCSS can help you identify and remove unused CSS.
  • Use Conditional Loading: Load certain files only when necessary. For example, if a particular JavaScript file is only needed on certain pages, load it conditionally. This avoids making unnecessary requests on pages where the file isn’t needed.

By minimizing dependencies, you reduce the number of chained requests, helping your page load faster.

Step 2: Preload Key Resources

Preloading key resources ensures that the most important files are loaded as soon as possible. This helps break the chain of critical requests. Here’s how to do it:

Use <link rel=”preload”>: Preload your critical CSS, JavaScript, and fonts. This tells the browser to load these resources as soon as it encounters the HTML file.

html

<link rel="preload" href="critical.css" as="style">

<link rel="preload" href="critical.js" as="script">

<link rel="preload" href="font.woff2" as="font" type="font/woff2" crossorigin="anonymous">

Prioritize Key Resources: Identify which resources are critical for the initial rendering of your page. Preload these resources to ensure they are available as soon as the browser starts loading the page.

Optimize Fonts: Preload fonts to avoid delays caused by font loading. Use font-display: swap in your CSS to ensure text remains visible during font loading.

css

@font-face {
font-family: 'MyFont';
src: url('font.woff2') format('woff2');
font-display: swap;

}

By preloading key resources, you ensure that the most important files are loaded quickly, reducing the impact of chained requests.

Step 3: Optimize Resource Loading

Optimizing how your resources are loaded can significantly reduce the time it takes for your page to load. Here’s how to optimize resource loading:

Compress Files: Use gzip or Brotli compression to reduce the size of your CSS, JavaScript, and HTML files. Smaller files load faster, reducing the time spent on each request.

Asynchronous Loading: Load non-critical JavaScript files asynchronously. This means the browser can continue loading other resources while the JavaScript file loads in the background.
html


<script src="non-critical.js" async></script>

Defer Non-Critical JavaScript: Defer the loading of JavaScript files that are not needed immediately. This prevents them from blocking the rendering of your page.
html


<script src="non-critical.js" defer></script>

Lazy Load Images and Videos: Use lazy loading for images and videos to load them only when they come into the viewport. This reduces the initial load time.
html


<img src="image.jpg" loading="lazy" alt="Lazy Loaded Image">

By optimizing resource loading, you ensure that your critical resources are loaded quickly and efficiently, improving your page’s performance.

Step 4: Optimize Server Response Times

Fast server response times are crucial for reducing the time it takes to load your page. Here’s how to optimize your server response times:

Use a Content Delivery Network (CDN): A CDN distributes your content across multiple servers worldwide. This means users can download your files from a server close to them, reducing load times.

Cache Static Resources: Use caching to store static resources like CSS, JavaScript, and images. This reduces the number of requests to the server.
html


<meta http-equiv="Cache-Control" content="public, max-age=31536000">

Optimize Server Performance: Ensure your server is optimized for performance. Use server-side caching, optimize database queries, and reduce server processing time.

Monitor Server Response Times: Use tools like Google PageSpeed Insights or WebPageTest to monitor your server response times. Identify and fix any bottlenecks.

By optimizing server response times, you ensure that your critical resources are delivered quickly, reducing the impact of chained requests.

Step 5: Use Best Practices for Web Development

Following best practices for web development helps you avoid chaining critical requests and ensures your page loads quickly. Here are some best practices to follow:

  • Reduce Redirects: Avoid unnecessary redirects. Each redirect creates an additional request, slowing down your page.
  • Use HTTP/2: HTTP/2 allows multiple requests to be sent over a single connection, reducing the impact of chained requests.
  • Optimize Third-Party Scripts: Third-party scripts like ads and widgets can create additional chained requests. Optimize these scripts or consider removing unnecessary ones.
  • Regular Audits: Regularly audit your website for performance. Use tools like Lighthouse, PageSpeed Insights, and WebPageTest to identify and fix performance issues.

By following these best practices, you can avoid chaining critical requests and ensure your page loads quickly and efficiently.

Avoiding chaining critical requests is key to improving your website’s performance and Core Web Vitals. By minimizing dependencies, preloading key resources, optimizing resource loading, improving server response times, and following best practices, you can ensure your website loads quickly, providing a better experience for your users.

Avoiding chaining critical requests is crucial for improving your website’s performance and user experience. By understanding what chaining critical requests are and their impact on Core Web Vitals, you can take proactive steps to minimize dependencies, preload key resources, optimize resource loading, and improve server response times. Using tools like Google Lighthouse, PageSpeed Insights, WebPageTest, and Chrome DevTools, you can monitor your website’s performance, identify issues, and implement best practices for optimization. These efforts will lead to faster load times, better Core Web Vitals scores, and a more satisfying experience for your users.

Business Growth Ideas: Strategies to Scale Your Business Effectively

Growing your business is essential for long-term success. Scaling effectively means expanding your operations, reaching more customers, and increasing revenue without lowering quality. This blog explores practical business growth ideas to help you scale your business effectively. We will cover strategies like market penetration, product development, digital transformation, and financial management. These ideas will guide you on the path to sustainable growth. Let’s dive into these strategies and start your journey to scaling your business today.

Business growth means expanding and improving a company’s operations and performance. It involves increasing revenue, gaining more customers, and enhancing market share. Growth can also mean adding new products or services, entering new markets, or improving efficiency. Effective growth helps a business become more competitive and sustainable. In essence, business growth is about making a company bigger, stronger, and more successful over time.

Market Penetration

Market penetration involves increasing your sales in existing markets. This strategy focuses on gaining a larger share of the current market with your existing products or services. To achieve this, you can enhance your marketing efforts, offer promotions or discounts, and improve your product’s features. Understanding customer needs and preferences is crucial. By providing better value and improving customer satisfaction, you can encourage repeat purchases and attract new customers. Market penetration is an effective way to grow your business by maximizing opportunities in the markets you already serve.  

Key Strategies For Market Penetration

  • Enhance Marketing Efforts: Increase advertising and promotional activities to raise awareness.
  • Offer Promotions: Provide discounts or special deals to attract more customers.
  • Improve Product Features: Upgrade your products based on customer feedback.
  • Increase Distribution Channels: Expand your reach by selling through more channels.

Suggestions For Market Penetration

  • Customer Surveys: Regularly conduct surveys to understand customer needs.
  • Competitive Analysis: Analyze competitors to identify areas where you can improve.
  • Loyalty Programs: Implement loyalty programs to retain customers.
  • Local Advertising: Use local advertising to target specific geographic areas.

Market Development

Market development involves expanding into new markets to reach more customers. This can mean entering new geographic regions, targeting new customer segments, or both. This strategy helps you diversify your customer base and reduce dependency on existing markets.

Key Strategies For Market Development

  • Geographic Expansion: Enter new regions or countries.
  • Target New Segments: Identify and target new customer demographics.
  • Partnerships: Form partnerships with local businesses to enter new markets.
  • Tailor Marketing: Customize marketing strategies to fit new markets.

Suggestions For Market Development

  • Market Research: Conduct thorough market research to understand new markets.
  • Local Regulations: Ensure compliance with local laws and regulations.
  • Cultural Adaptation: Adapt your products and marketing to fit local cultures.
  • Pilot Programs: Start with pilot programs to test new markets.

Product Development

Product development is about creating new products or improving existing ones to better meet customer needs and drive business growth. This involves innovation and staying ahead of market trends. Start by gathering customer feedback to understand their preferences and pain points. Use this information to design products that offer enhanced solutions. Develop prototypes and test them to ensure quality and usability. Keep an eye on market trends and be ready to adapt your products accordingly. Effective product development can attract new customers, retain existing ones, and boost your business growth.

Key Strategies For Product Development

  • Customer Feedback: Gather insights from customers to guide development.
  • Market Trends: Stay updated with industry trends to identify opportunities.
  • Prototyping: Develop and test prototypes to ensure quality.
  • Innovation: Continuously innovate to meet changing customer needs.

Suggestions For Product Development

  • Focus Groups: Use focus groups to get detailed feedback on new products.
  • Beta Testing: Conduct beta testing to identify any issues before full launch.
  • Cross-Functional Teams: Involve different departments in product development.
  • Iterative Development: Use an iterative approach to refine products.

Diversification

Diversification involves expanding your business by adding new products or services or entering new markets. This strategy reduces risk by spreading it across different revenue streams. Start by researching potential opportunities that complement your existing business. For example, if you sell clothing, you might diversify by adding accessories. Ensure that your new offerings meet market demands and align with your brand. Diversification can help you reach new customers, increase revenue, and create a more resilient business. By not relying on a single product or market, you protect your business from market fluctuations and enhance growth potential.

Key Strategies For Diversification

  • Complementary Products: Add products that complement your existing ones.
  • New Services: Introduce new services related to your current offerings.
  • New Markets: Enter entirely new markets unrelated to your current business.
  • Strategic Partnerships: Partner with other companies to offer bundled solutions.

Suggestions For Diversification

  • Market Research: Conduct research to identify diversification opportunities.
  • Feasibility Studies: Perform feasibility studies to assess potential success.
  • Brand Alignment: Ensure new offerings align with your brand values.
  • Pilot Programs: Test new products or services with small pilot programs.

Digital Transformation

Digital transformation involves integrating digital technology into all areas of your business. This improves efficiency, enhances customer experiences, and drives growth. Start by assessing your current processes and identifying areas that can benefit from digital solutions. Implement tools like customer relationship management (CRM) systems, e-commerce platforms, and digital marketing strategies. Use data analytics to make informed decisions and personalize customer interactions. Embrace automation to streamline operations and reduce costs. Digital transformation helps you stay competitive in a fast-paced market, reach a broader audience, and adapt to changing customer needs, ultimately boosting your business growth.

Key Strategies For Digital Transformation:

  • CRM Systems: Implement CRM systems to manage customer relationships.
  • E-commerce Platforms: Utilize e-commerce platforms to expand online sales.
  • Data Analytics: Use analytics to make data-driven decisions.
  • Automation: Automate routine tasks to improve efficiency.

Suggestions For Digital Transformation:

  • Digital Tools: Invest in digital tools that integrate seamlessly with your processes.
  • Employee Training: Train employees to use new technologies effectively.
  • Cybersecurity: Ensure robust cybersecurity measures to protect digital assets.
  • Customer Focus: Use digital tools to enhance the customer experience.

Customer Relationship Management (CRM)

Customer Relationship Management (CRM) involves managing interactions with current and potential customers to improve relationships and drive business growth. Start by implementing a CRM system to organize customer information, track interactions, and streamline processes. Use CRM data to understand customer needs and preferences, allowing you to personalize communications and offers. Automate tasks like follow-ups and marketing campaigns to save time and increase efficiency. Effective CRM helps build stronger customer relationships, enhances satisfaction, and boosts loyalty. By focusing on customer needs and preferences, you can increase retention rates and drive sustainable business growth.

Key Strategies For Customer Relationship Management (CRM):

  • CRM Implementation: Set up a CRM system to manage customer data.
  • Personalized Communication: Use CRM data to tailor communications.
  • Automation: Automate routine tasks like follow-ups and campaigns.
  • Customer Feedback: Use CRM to gather and analyze customer feedback.

Suggestions For Customer Relationship Management (CRM):

  • Choose the Right CRM: Select a CRM system that fits your business needs.
  • Employee Training: Train employees to use the CRM system effectively.
  • Data Integration: Integrate CRM with other systems for a unified view of customers.
  • Regular Updates: Keep your CRM data up to date for accurate insights.

Content Marketing and SEO

Content marketing and SEO (Search Engine Optimization) are vital for business growth in the digital age. Content marketing involves creating valuable, relevant content to attract and engage your target audience. This includes blog posts, videos, infographics, and social media updates. The goal is to provide information that addresses your audience’s needs and positions your business as an industry expert.

SEO focuses on optimizing your content to rank higher in search engine results. Use keywords that your audience is searching for, and ensure your content is easy to read and navigate. Include meta descriptions, headers, and alt text for images to improve visibility. Regularly update your content to keep it relevant.

Effective content marketing and SEO increase your online visibility, drive traffic to your website, and generate leads. By consistently providing valuable content and optimizing it for search engines, you can attract and retain customers, ultimately driving business growth.

Key Strategies For Content Marketing and SEO :

  • Content Creation: Develop valuable content that addresses customer needs.
  • Keyword Research: Identify keywords your audience is searching for.
  • SEO Optimization: Optimize content with keywords, meta descriptions, and alt text.
  • Regular Updates: Keep your content fresh and relevant with regular updates.

Suggestions For Content Marketing and SEO:

  • Content Calendar: Create a content calendar to plan and organize your content.
  • Guest Blogging: Write guest posts on relevant websites to reach a wider audience.
  • Analytics: Use analytics to track content performance and make improvements.
  • Engagement: Encourage audience engagement through comments and social media.

Financial Management

Financial management is crucial for scaling your business effectively. It involves planning, organizing, controlling, and monitoring financial resources to achieve your business goals. Start by creating a detailed budget that outlines your expected revenue and expenses. Track your cash flow to ensure you have enough funds to cover operational costs and invest in growth opportunities.

Implement accounting software to manage your finances accurately and efficiently. Regularly review financial statements to assess your business’s performance and identify areas for improvement. Optimize your costs by negotiating better terms with suppliers and reducing unnecessary expenses.

Consider different funding options, such as loans, grants, or investors, to support your growth initiatives. Maintain a good credit score to access financing when needed. Effective financial management ensures your business remains profitable, sustainable, and ready to seize growth opportunities. By keeping your finances in order, you can make informed decisions and drive your business towards long-term success.

Key Strategies For Financial Management:

  • Budgeting: Create a detailed budget to manage revenue and expenses.
  • Cash Flow Management: Monitor cash flow to ensure financial stability.
  • Accounting Software: Use accounting software for accurate financial management.
  • Cost Optimization: Negotiate better terms with suppliers and reduce expenses.

Suggestions For Financial Management:

  • Financial Reviews: Regularly review financial statements to assess performance.
  • Funding Options: Explore various funding options to support growth.
  • Credit Management: Maintain a good credit score for financing opportunities.
  • Financial Advisors: Consult with financial advisors for expert guidance.

Employee Development

Employee development is essential for scaling your business effectively. It involves investing in the growth and skills of your team to enhance their performance and contribute to your business’s success. Start by identifying the skills and knowledge your employees need to excel in their roles. Provide regular training and development opportunities, such as workshops, online courses, and seminars.

Encourage continuous learning by fostering a culture that values personal and professional growth. Offer mentorship programs to help employees learn from experienced colleagues. Regularly review and discuss career goals with your team to align their development with business objectives.

Recognize and reward achievements to motivate your employees and boost morale. Create a supportive work environment where employees feel valued and engaged. Effective employee development leads to higher productivity, innovation, and job satisfaction. By investing in your team’s growth, you build a stronger, more capable workforce that drives your business forward.

Key Strategies For Employee Development:

  • Training Programs: Provide regular training and development opportunities.
  • Mentorship: Offer mentorship programs to support employee growth.
  • Career Development: Align employee development with business objectives.
  • Recognition: Recognize and reward employee achievements.

Suggestions For Employee Development:

  • Learning Culture: Foster a culture that values continuous learning.
  • Performance Reviews: Conduct regular performance reviews to identify growth areas.
  • Professional Development: Encourage participation in professional development activities.
  • Employee Engagement: Create a supportive environment to boost employee engagement.

Scaling your business effectively requires a strategic approach and dedication to continuous improvement. By implementing the business growth ideas discussed—market penetration, market development, product development, diversification, digital transformation, CRM, content marketing and SEO, financial management, and employee development—you can position your business for sustainable growth and success.

Each of these strategies plays a crucial role in expanding your reach, enhancing your offerings, and optimizing your operations. Start by evaluating your current practices and identifying areas for improvement. Take action on these growth ideas, and remain adaptable to changes in the market and your business environment.

Remember, growth is an ongoing process. Stay committed to your goals, invest in your team, and continually seek opportunities to innovate and improve. With a clear plan and the right strategies, you can achieve significant growth and take your business to new heights. Embrace the journey and watch your business thrive.

Steps to Start Your Entrepreneurial Journey

Starting an entrepreneurial journey is exciting and challenging. It involves turning your passion and ideas into a successful business. This guide outlines the essential steps to help you navigate this journey. Each step is crucial, from identifying your strengths and market opportunities to creating a business plan and launching your product. Follow these steps to build a strong foundation and increase your chances of success.

What is Entrepreneurship?

Entrepreneurship is the process of starting and running a new business. It involves creating something new, whether a product, service, or solution to a problem. Entrepreneurs identify opportunities, take risks, and innovate to build successful ventures. They drive economic growth by bringing fresh ideas to the market and creating jobs. Entrepreneurship is about turning dreams into reality through hard work and determination. Let’s dive in and start your entrepreneurial journey with confidence!

Identify Your Passion and Skills

Begin your entrepreneurial journey by identifying what you love and what you are. Your passion drives motivation, while your skills provide the tools to succeed. Reflect on activities that excite you and evaluate your strengths. This alignment between passion and skills is vital, as it keeps you committed and capable of overcoming challenges. Start with self-assessment and seek feedback from friends or mentors to understand your unique potential clearly.

  • Self-Assessment: List your interests and skills. What activities make you lose track of time? What do people often praise you for?
  • Seek Feedback: Ask friends, family, and mentors about your strengths and passions. Sometimes, others can see our potential more clearly.
  • Combine Passion and Skills: Look for areas where your interests and abilities overlap. This combination will fuel your entrepreneurial drive and help you stay resilient.

Key Suggestions For Identifying Your Passion and Skills

  • Journal Your Thoughts: Write down your thoughts and feelings about different activities. This can help you identify patterns and areas of genuine interest.
  • Take Personality and Skills Assessments: Tools like Myers-Briggs Type Indicator (MBTI) or StrengthsFinder can provide insights into your strengths and preferences.
  • Network: Engage with professionals in fields you are interested in. Their experiences and advice can provide valuable insights.

Conduct Market Research

Market research is essential for understanding your target audience and the competitive landscape. Start by identifying your potential customers and their needs. Analyze your competitors to see what they offer and where you can stand out. Use surveys, interviews, and online research to gather data. This information helps refine your business idea, ensuring it meets market demand and positions you for success. Solid market research lays the groundwork for a strong business strategy.

  • Identify Target Audience: Who are your potential customers? What are their demographics, preferences, and pain points?
  • Analyze Competitors: What are your competitors doing well? Where are they lacking? How can you differentiate your offering?
  • Gather Data: Use tools like surveys, interviews, focus groups, and online research to collect relevant information. Platforms like Google Trends and social media can provide valuable insights.

Key Suggestions For Conducting Market Research

  • Create Buyer Personas: Develop detailed profiles of your ideal customers. Include demographics, interests, and behaviors.
  • Utilize Online Tools: Use SurveyMonkey, Google Analytics, and SEMrush to gather data.
  • Engage with Potential Customers: Conduct interviews or focus groups to get direct feedback from your target audience.

Develop a Business Idea

Developing a business idea starts with brainstorming solutions to problems you’ve identified through market research. Think creatively about how you can meet the needs of your target audience. Validate your ideas by seeking feedback from potential customers and industry experts. Focus on unique value propositions that differentiate you from competitors. This process helps refine your concept into a viable business idea that has the potential to succeed in the market.

  • Brainstorm Solutions: List potential solutions to the problems identified in your market research. Think outside the box.
  • Seek Feedback: Present your ideas to potential customers and industry experts. Gather their opinions and refine your concept.
  • Focus on Value: What unique value does your product or service offer? How does it solve your customers better than existing solutions?

Key Suggestions For Developing a Business Idea

  • Use Mind Mapping: Visualize your ideas and how they relate to each other using mind maps.
  • Prototype Early: Create simple prototypes or mock-ups of your product to gather feedback.
  • Conduct Feasibility Studies: Assess your business idea’s practicality and potential success.

Create a Business Plan

Creating a business plan is crucial for outlining your business goals and strategies. Start with an executive summary that captures your vision. Include market analysis to demonstrate demand and detail your product or service offerings. Outline your marketing strategy and financial projections to show profitability. A solid business plan guides your actions and attracts investors by clearly presenting your business for success.

  • Executive Summary: Provide a concise overview of your business idea, including the mission, vision, and goals.
  • Market Analysis: Present data on your target market, including size, growth, and trends. Show evidence of demand for your product or service
  • Marketing Strategy: Outline how you will attract and retain customers. Include details on pricing, distribution, and promotional tactics.
  • Financial Projections: Provide estimates of revenue, expenses, and profitability. Include a break-even analysis and funding requirements.

Key Suggestions For Creating a Business Plan

  • Set Clear Objectives: Define specific, measurable, achievable, relevant, and time-bound (SMART) goals.
  • Use Business Plan Software: Tools like LivePlan and Bizplan can simplify creating a business plan.
  • Review and Revise: Regularly update your business plan to reflect changes in the market or your business strategy.

Secure Funding

Securing funding is essential to bring your business idea to life. Explore various funding options such as personal savings, loans, or investors. Prepare a compelling pitch highlighting your business plan, market potential, and financial projections. Determine how you will use the funds and the expected return on investment. Effective funding strategies provide the financial support needed to launch and grow your business successfully.

  • Explore Funding Options: Consider personal savings, loans, angel investors, venture capital, crowdfunding, or grants.
  • Prepare a Pitch: Create a concise and compelling presentation highlighting your business idea, market opportunity, and financial projections.
  • Be Transparent: Clearly outline how you will use the funds and the potential return on investment. Transparency builds trust with potential investors.

Key Suggestions For Securing Funds

  • Network with Investors: Attend industry events, pitch competitions, and networking meetings to connect with potential investors.
  • Leverage Crowdfunding Platforms: Use platforms like Kickstarter and Indiegogo to raise funds and build a customer base simultaneously.
  • Prepare Thorough Documentation: Prepare detailed financial statements, business plans, and projections to share with potential funders.

Build Your Team

Building a solid team is vital for your business success. Hire individuals who complement your skills and share your vision. Look for diverse talents that bring different perspectives and expertise. Foster a collaborative and supportive work environment to encourage innovation and commitment. A great team can drive your business forward, helping you overcome challenges and achieve your goals more effectively.

  • Identify Key Roles: Determine the roles and skills needed to build your business. Prioritize hiring for essential positions first.
  • Seek Diversity: Hire individuals with diverse backgrounds and perspectives. This diversity can drive creativity and innovation.
  • Create a Positive Culture: Foster a supportive and collaborative work environment. Encourage open communication and recognize team achievements.

Key Suggestions For Building Your Team

  • Define Clear Roles and Responsibilities: Ensure each team member understands their role and how it contributes to the overall business.
  • Invest in Training and Development: Provide ongoing training and development opportunities to help your team grow.
  • Build a Strong Company Culture: Promote values such as collaboration, innovation, and respect within your team.

Develop Your Product or Service

Developing your product or service starts with creating a minimum viable product (MVP) to test your concept. Focus on essential features that satisfy your customers. Gather feedback from early users and make necessary improvements. This iterative process ensures your product meets market needs and quality standards. Continuously refine and enhance your offering based on user input and market trends. A well-developed product or service sets the foundation for your business success.

  • Create an MVP: Focus on the core features that solve your customer’s problems. This allows you to test and validate your concept with minimal resources.
  • Gather Feedback: Use surveys, interviews, and user testing to gather feedback from early users and identify areas for improvement.
  • Iterate and Improve: Continuously refine your product based on user feedback and market trends. Stay adaptable and open to change.

Key Suggestions For Developing Your Product or Service

  • Use Agile Development Methods: Implement agile methodologies to develop your product in iterative cycles.
  • Engage with Early Adopters: Build a community of early adopters who can provide valuable feedback and advocacy.
  • Monitor Market Trends: Stay informed about industry trends and technological advancements that can impact your product development.

Set Up Your Business Operations

Establishing your business operations involves establishing your company’s legal and structural foundation. Register your business, obtain the necessary licenses, and set up your accounting and financial systems. Create efficient processes for production, sales, and customer service. Implement tools and software to streamline operations and manage tasks effectively. Ensuring your operations run smoothly will help you focus on growth and customer satisfaction.

  • Legal and Regulatory Compliance: Register your business and obtain necessary licenses or permits. Ensure compliance with local, state, and federal regulations.
  • Accounting and Financial Systems: Set up accounting software to track income, expenses, and cash flow. Establish financial controls and budgeting processes.
  • Operational Efficiency: Create standard operating procedures (SOPs) for production, sales, and customer service. Use tools and software to streamline operations and improve efficiency.

Key Suggestions For Setting Up Your Business Operations

  • Use Project Management Tools: Tools like Trello, Asana, or Monday.com can help manage tasks and improve team collaboration.
  • Automate Routine Tasks: Use automation tools for invoicing, payroll, and customer communication.
  • Establish Clear Policies: Develop policies for operations, employee conduct, and customer service.

Launch Your Business

Launching your business is an exciting milestone. Start with a strong marketing strategy to create buzz around your product or service. Use social media, email campaigns, and other promotional activities to reach your target audience. Ensure your website is user-friendly and provides essential information. Offer special promotions or discounts to attract initial customers. A well-planned launch helps you make a solid first impression and sets the stage for future growth.

  • Marketing Strategy: Develop a comprehensive marketing plan that includes social media, email marketing, content marketing, and advertising.
  • Online Presence: Ensure your website is professional, user-friendly, and optimized for search engines. Provide clear information about your product or service.
  • Promotions and Discounts: Offer special promotions or discounts to attract initial customers. These offers should generate buzz and encourage word-of-mouth referrals.

Key Suggestions For Launching Your Business

  • Leverage Social Media: Use platforms like Facebook, Instagram, and LinkedIn to promote your launch and engage with your audience
  • .Optimize for SEO: Ensure your website is optimized for search engines to improve visibility and attract organic traffic.
  • Host a Launch Event: Organize an online or offline event to celebrate your launch and attract media attention.

Monitor and Grow Your Business

Monitoring and growing your business involves regularly tracking key performance metrics. Use analytics to understand sales trends, customer behavior, and operational efficiency. Set measurable goals and adjust your strategies based on data insights. Focus on customer feedback to improve your product or service. Explore new markets and opportunities for expansion. Continuously invest in marketing and innovation. Staying adaptable and proactive helps your business thrive and achieve long-term success.

  • Track Metrics: Use analytics tools to monitor sales, customer behavior, and operational performance. Identify trends and areas for improvement.
  • Set Goals: Establish clear, measurable growth goals. Review and adjust your strategies regularly to stay on track.
  • Customer Feedback: Actively seek and respond to customer feedback. Use this information to enhance your product or service and improve customer satisfaction.
  • Explore New Opportunities: Continuously look for new markets, products, or services to expand your business. Stay innovative and open to change.

Key Suggestions For Monitoring and Growing Your Business

  • Use Analytics Tools: Platforms like Google Analytics, HubSpot, and Mixpanel can provide valuable insights into your business performance.
  • Regularly Review KPIs: Keep track of key performance indicators (KPIs) such as customer acquisition cost, lifetime value, and churn rate.
  • Innovate Continuously: Invest in research and development to stay ahead of market trends and meet evolving customer needs.

Starting your entrepreneurial journey is both exciting and challenging. By following the key steps outlined in this guide, you can build a strong foundation for your business. Identify your passion and skills to fuel your drive. Conduct market research to understand your audience and refine your business idea. Develop a solid business plan to guide your actions and attract investors. Secure the necessary funding to bring your idea to life and build a team that complements your skills. Develop your product or service based on feedback, set up efficient business operations, and launch with a strong marketing strategy. Finally, continuously monitor and grow your business by staying adaptable and innovative.

Taking the first step is crucial. Embrace the journey with confidence and determination. Remember, every successful entrepreneur started where you are now. Your dedication and hard work will turn your vision into reality. Begin your entrepreneurial adventure today and move closer to achieving your business dreams.

How to reduce payload sizes.

Payload size is the total amount of data your website needs to load a page. This includes all the HTML, CSS, JavaScript, images, and other files. When a user visits your website, their browser must download all these files to display the page correctly. The larger these files are, the longer it takes to download them, which can slow down the loading time of your website.

Why Does Payload Size Matter?

The size of the payload matters because it directly affects the speed at which your website loads. If your website has a large payload, it will take longer for users to see the content. This can lead to frustration and cause users to leave your site before it fully loads. A slow website can also hurt your search engine rankings, as search engines like Google prioritize faster sites that provide a better user experience.

How Does Payload Size Affect Core Web Vitals?

Core Web Vitals are three important metrics that measure user experience on your site.

Largest Contentful Paint (LCP) measures how long it takes for the largest element on the page to load. If your payload size is large, it takes longer for this element to appear, making your site feel slow.

First Input Delay (FID) measures the time it takes for your site to respond to the first user interaction, like clicking a button. A large payload can delay this response because the browser is busy loading and processing all the data.

Cumulative Layout Shift (CLS) measures how much the content moves around while the page is loading. Large payloads can cause more layout shifts, making the page look unstable and hard to read.

Example

Imagine you are moving into a new house. If you have many heavy boxes, it takes more time and effort to move them all inside. Similarly, if your website has many large files, it takes more time to load them all. By keeping your payload size small, your website can load faster and provide a better experience for your users. This helps improve your Core Web Vitals and makes your site more enjoyable to visit.

Image Optimization

Optimizing images is crucial because large images can slow down your website. When images are too big, they take longer to load, making users wait. This can lead to frustration and cause users to leave your site. By optimizing images, you can reduce their file size, making your site load faster and providing a better experience for visitors.

Use Modern Formats

Modern image formats like WebP and AVIF are better than older formats like JPEG and PNG. These new formats compress images more efficiently, which means they reduce the file size without losing quality. By using WebP or AVIF, you can make your images smaller and your site faster, improving the overall performance.

Resize Images

Resizing images means making sure they are not larger than necessary. For example, if your website only needs an image to be 800 pixels wide, you should not use an image that is 2000 pixels wide. Large images that are not resized take up more space and slow down your site. Always resize images to the exact dimensions needed for your website.

Compress Images

Compressing images reduces their file size without significantly affecting their quality. You can use tools like ImageOptim or TinyPNG to compress your images. These tools work by removing unnecessary data from the images, making them smaller and quicker to load. This helps improve your website’s speed and user experience.

Use Responsive Images

Responsive images change size based on the device being used. This means that smaller images are loaded on phones, while larger images are used for desktops. You can implement this by using the srcset attribute in your image tags. This ensures that users only download the image size they need, which speeds up the loading time on all devices.

By optimizing your images through these methods, you can significantly improve your website’s performance. Faster loading times lead to better user experiences, which can help increase the time users spend on your site and improve your search engine rankings.

Minifying and Optimizing CSS and JavaScript

Minification is the process of removing unnecessary characters from CSS and JavaScript files without changing their functionality. These characters include spaces, comments, and line breaks. By minifying your code, you reduce the file size, which helps your website load faster. Tools like UglifyJS for JavaScript and CSSNano for CSS can automatically minify your files, making them smaller and quicker to download.

Tree Shaking

Tree shaking is a technique used to remove unused code from your JavaScript files. When you write code, especially with libraries and frameworks, not all of it may be needed for your website to function. Tree shaking helps eliminate this unnecessary code, reducing the file size and improving load times. This is particularly useful when using modular JavaScript bundlers like Webpack, which can automatically perform tree shaking during the build process.

Code Splitting

Code splitting is the practice of breaking down your JavaScript files into smaller chunks that can be loaded on demand. Instead of loading a large JavaScript file all at once, code splitting allows you to load only the parts needed for the current page or feature. This reduces the initial load time and makes your site more responsive. Modern bundlers like Webpack and Rollup support code splitting, helping you optimize your JavaScript delivery.

Bundling and Caching

Bundling is the process of combining multiple CSS and JavaScript files into one file for each type. This reduces the number of HTTP requests your browser needs to make, speeding up the page load time. After bundling, setting up proper caching mechanisms ensures that users do not have to download the same files repeatedly. By configuring your server to cache these files, you can significantly reduce load times for returning visitors.

By minifying and optimizing your CSS and JavaScript, you can reduce the payload size of your website. This leads to faster loading times and a better user experience. Implementing these techniques helps improve your Core Web Vitals, making your website more efficient and enjoyable for users.

Using Content Delivery Networks (CDNs)

A Content Delivery Network (CDN) is a network of servers distributed across different locations worldwide. These servers store copies of your website’s static files, such as images, CSS, and JavaScript. When a user visits your website, the CDN delivers these files from the server closest to the user. This reduces the distance data has to travel, making your website load faster.

Benefits of CDNs

CDNs offer several benefits for your website’s performance. The main advantage is speed. By serving content from a nearby server, CDNs reduce latency and improve load times. This is especially important for users who are far from your main server. Additionally, CDNs help handle traffic spikes by distributing the load across multiple servers, preventing your website from slowing down or crashing during high traffic periods. They also provide better security by protecting your site from Distributed Denial of Service (DDoS) attacks.

Choosing a CDN

When selecting a CDN, consider factors like coverage, performance, and cost. Look for a CDN with servers in locations where most of your users are based. This ensures optimal performance. Check the CDN’s track record for speed and reliability. Some popular CDN providers include Cloudflare, Akamai, and Amazon CloudFront. Evaluate their features and pricing to find the best fit for your needs.

Using a CDN is a straightforward and effective way to improve your website’s performance. By delivering content from the nearest server, CDNs help reduce load times, enhance user experience, and boost your site’s reliability and security. Implementing a CDN can make a significant difference in how quickly and smoothly your website operates.

Optimizing Fonts

Here’s the optimizing fonts

Font Subsetting

Font subsetting involves including only the characters you need in your web fonts. Most font files come with a wide range of characters and symbols, many of which you may not use on your website. By creating a subset of the font that contains only the necessary characters, you can significantly reduce the file size. This makes your website load faster because the browser has fewer characters to download and render.

Font Compression

Font compression reduces the size of your font files without sacrificing quality. Using the WOFF2 format is an effective way to achieve this. WOFF2 is a modern font format that provides better compression than older formats like TTF or OTF. By compressing your fonts, you decrease the amount of data that needs to be transferred, speeding up your website’s loading time.

Loading Fonts Efficiently

Efficiently loading fonts means using techniques that ensure fonts do not delay the rendering of your page. One method is to use the font-display property in your CSS. The font-display property allows you to control how fonts are displayed while they are loading. For example, font-display: swap; ensures that the text is displayed using a fallback font until the custom font is fully loaded. This prevents the user from seeing a blank space where the text should be, improving the perceived performance of your site.

By optimizing your fonts through subsetting, compression, and efficient loading techniques, you can make your website faster and more user-friendly. These optimizations reduce the amount of data the browser needs to download and render, resulting in quicker load times and a better overall experience for your visitors. Implementing these simple strategies can have a significant positive impact on your site’s performance.

Implementing Lazy Loading

Here’s the implementation of lazy loading.

Lazy Loading Images and Videos

Lazy loading is a technique that delays the loading of images and videos until they are needed. Instead of loading all media files when the page first loads, lazy loading only loads these files as the user scrolls down the page and they come into view. This reduces the initial load time, making your website faster and more responsive. To implement lazy loading for images and videos, you can use the loading=”lazy” attribute in your HTML. For example, <img src=”image.jpg” loading=”lazy” alt=”Example Image”> will ensure the image only loads when it is about to appear in the viewport.

Lazy Loading Scripts

Lazy loading can also apply to JavaScript files. By deferring or asynchronously loading non-critical JavaScript, you prevent these scripts from blocking the rendering of the page. The async and defer attributes in the <script> tag can help achieve this. The async attribute loads the script while the HTML is still parsing and executes it as soon as it is available. The defer attribute, on the other hand, ensures that the script is executed only after the HTML is fully parsed. Using these attributes allows the main content of your page to load faster, improving the overall user experience.

Example

Imagine you are at a buffet. If all the food is served at once, it can be overwhelming and slow down the process of getting what you want. But if the food is brought out gradually, as you need it, the experience is smoother and quicker. Similarly, lazy loading ensures that your website only loads what is necessary at the moment, making the page load faster and providing a better experience for your visitors.

By implementing lazy loading for images, videos, and scripts, you can significantly enhance your website’s performance. This technique reduces the initial load time and ensures that users can access your content quickly and smoothly. Lazy loading is an effective and easy way to improve the speed and efficiency of your website.

Removing Unnecessary Plugins and Libraries

Regularly auditing your website for unnecessary plugins and libraries is crucial for maintaining optimal performance. Over time, you may add various plugins and libraries to enhance functionality or design. However, not all of them remain useful. Conduct a thorough review of all the plugins and libraries on your site. Identify those that are outdated, redundant, or no longer serving a vital purpose. Removing these unnecessary components reduces the overall size of your website, which can significantly improve loading times and reduce potential security risks.

Impact on Performance

Unnecessary plugins and libraries can slow down your website. Each plugin or library you add increases the amount of data your site needs to load. This can lead to longer loading times and a poorer user experience. By removing what you don’t need, you streamline your website’s codebase, making it leaner and faster. This directly contributes to better performance metrics, such as faster page loads and improved Core Web Vitals scores.

Alternatives and Replacements

Sometimes, you might need the functionality provided by a plugin or library, but the one you’re using is too bulky or inefficient. In such cases, look for lightweight alternatives that offer similar features without the bloat. For instance, if you use a heavy slider plugin, you could replace it with a more efficient one that offers the same functionality but with a smaller footprint. Research and test alternatives to ensure they meet your needs without compromising on performance.

Example

Think of your website as a backpack. If you fill it with items you don’t need, it becomes heavy and difficult to carry. By removing unnecessary items, your backpack becomes lighter and easier to manage. Similarly, by removing unnecessary plugins and libraries from your website, you make it faster and more efficient.

By regularly auditing and cleaning up your website, you can ensure it remains fast and responsive. Removing unnecessary plugins and libraries helps streamline your site, reducing load times and improving the overall user experience. This simple maintenance task can have a significant impact on your website’s performance and reliability.

Enabling Compression

Compression reduces the size of your website’s files before they are sent to the user’s browser. This includes HTML, CSS, JavaScript, and image files. By compressing these files, you can significantly decrease the amount of data that needs to be transferred over the internet. This makes your website load faster and improves the overall user experience.

Gzip Compression

Gzip is a widely used compression method that reduces the size of your files by up to 70%. When a user visits your website, the server compresses the files using Gzip before sending them to the browser. The browser then decompresses the files and displays the content. Enabling Gzip compression on your server is usually straightforward and can be done by adding a few lines of code to your server configuration. Most modern browsers and servers support Gzip, making it an effective way to speed up your site.

Brotli Compression

Brotli is a newer compression algorithm that often performs better than Gzip. Developed by Google, Brotli can compress files even more efficiently, leading to smaller file sizes and faster load times. Like Gzip, Brotli is supported by most modern browsers and servers. To enable Brotli, you need to configure your server to use it. Many web hosting providers offer Brotli support, or you can enable it manually through your server settings.

Benefits of Compression

The primary benefit of compression is faster loading times for your website. When files are smaller, they take less time to download, which means users can access your content more quickly. This not only improves user satisfaction but also helps with search engine rankings, as faster sites tend to rank higher. Additionally, using compression reduces bandwidth usage, which can save on hosting costs and make your website more efficient.

By enabling compression on your website, you can significantly enhance its performance. Using methods like Gzip and Brotli, you reduce the size of your files, leading to quicker load times and a better user experience. This simple yet powerful optimization technique is essential for maintaining a fast and responsive website.

Upgrading to HTTP/2

HTTP/2 is the latest version of the Hypertext Transfer Protocol (HTTP), which is the foundation of data communication on the web. It was designed to improve the speed and efficiency of web communications. HTTP/2 introduces several key features that help websites load faster compared to the older HTTP/1.1. It is widely supported by modern browsers and web servers, making it a beneficial upgrade for most websites.

Benefits for Payload Size

One of the main advantages of HTTP/2 is its ability to handle multiple requests simultaneously over a single connection. This is known as multiplexing. In HTTP/1.1, each request and response pair had to wait for the previous one to finish, leading to delays. HTTP/2 eliminates this bottleneck by allowing multiple requests and responses to be sent and received at the same time. This reduces the time it takes to load all the elements of a webpage, especially those with many images, scripts, and stylesheets.

Server Push

HTTP/2 also includes a feature called server push. This allows the server to send resources to the browser before it even asks for them. For example, if the server knows that a webpage requires certain CSS and JavaScript files, it can start sending these files immediately after the HTML, even before the browser requests them. This proactive approach can further reduce load times and improve the user experience.

Simple Example

Think of HTTP/2 like a multi-lane highway compared to HTTP/1.1, which is like a single-lane road. On a single-lane road, cars (data) have to wait in line, causing traffic jams (delays). On a multi-lane highway, many cars can travel side by side, reducing traffic and getting everyone to their destination faster. Similarly, HTTP/2 allows multiple pieces of data to travel simultaneously, speeding up the loading process.

By upgrading to HTTP/2, you can take advantage of these advanced features to make your website faster and more efficient. This upgrade can lead to quicker load times, better performance metrics, and a smoother user experience. Implementing HTTP/2 is a straightforward way to enhance your website’s performance and keep up with modern web standards.

Upgrading your website to HTTP/2 is a simple yet powerful way to improve its speed and efficiency. By leveraging features like multiplexing and server push, you can significantly reduce load times and enhance the user experience. Embracing HTTP/2 ensures your website remains fast, responsive, and aligned with modern web standards, ultimately benefiting both your users and your search engine rankings.

Optimize Time to First Byte

Understanding Time to First Byte (TTFB)

Time to First Byte (TTFB) measures how long it takes for a web server to send the first byte of data to your browser after you make a request. Think of it as the time between knocking on someone’s door and when they open it. The faster they open the door, the quicker you can start your conversation.

TTFB is a crucial part of how quickly a website loads. It’s like the starting gun in a race. If the gun takes too long to fire, the race can’t start, and the runners can’t begin.

Here are the three main parts of TTFB:

DNS Lookup Time: When you type a website address into your browser, it needs to find the correct server to connect to. This is called DNS lookup. It’s like looking up someone’s phone number in a directory. The faster you find the number, the sooner you can call.

Connection Time: Once the browser knows where to go, it needs to connect to the server. This is like dialing the phone number and waiting for the person to pick up. The quicker the server picks up, the better.

Server Processing Time: After connecting, the server processes your request. This means it finds the information you asked for and prepares to send it to you. It’s like the person on the other end of the phone finding the information you need before telling you. The quicker they find it, the sooner you get it.

Why is TTFB important? Because a low TTFB means a faster website, and faster websites keep users happy. When websites load quickly, people are more likely to stay and explore.

The Relationship Between TTFB and Core Web Vitals

Core Web Vitals are a set of metrics that Google uses to measure a website’s user experience. They focus on loading speed, interactivity, and visual stability. Time to First Byte (TTFB) is closely related to these metrics because it affects how quickly a website can start loading. Let’s explore how TTFB impacts each of the Core Web Vitals.

Largest Contentful Paint (LCP)

Largest Contentful Paint (LCP) measures how long it takes for the main content of a page to become visible. It’s like the time it takes for a big picture to appear on your screen. When TTFB is low, the server responds quickly, and the browser can start loading the page faster. This helps the main content appear sooner, improving the LCP score.

First Input Delay (FID)

First Input Delay (FID) measures how long it takes for a page to respond when a user first tries to interact with it, like clicking a button or a link. If TTFB is high, the server takes longer to start sending data, which can delay when the page is fully ready to interact. A low TTFB helps ensure that the page responds quickly to user actions, improving the FID score.

Cumulative Layout Shift (CLS)

Cumulative Layout Shift (CLS) measures the visual stability of a page. It tracks how often things on the page move around unexpectedly. While TTFB doesn’t directly affect CLS, a faster TTFB can lead to better overall loading performance. When a page loads smoothly, there’s less chance of elements shifting around, which helps improve the CLS score.

Why TTFB Matters for Core Web Vitals

TTFB is like the first domino in a chain reaction. When it’s low, it sets off a series of positive effects that improve the Core Web Vitals. A quick server response means the browser can start loading the page sooner, leading to faster content display, quicker interaction, and more stable layouts.

Improving TTFB for Better Core Web Vitals

To improve your Core Web Vitals, focus on reducing TTFB. Here are a few tips:

Optimize Your Server: Make sure your server is configured for speed.

Use a Content Delivery Network (CDN): CDNs bring your content closer to users, reducing response time.

Enable Caching: Cache static content so the server can deliver it faster.

Minimize Server Processing: Simplify your server-side code to process requests more quickly.

In summary, TTFB plays a crucial role in determining the performance of Core Web Vitals. By improving TTFB, you can enhance loading speed, interactivity, and visual stability, leading to a better user experience on your website.

Factors Affecting TTFB

Time to First Byte (TTFB) is influenced by several factors. Understanding these factors helps you identify ways to improve your website’s performance. Here are the main factors affecting TTFB:

Server Configuration and Hosting

Your server’s setup plays a big role in TTFB. A well-configured server responds faster to requests. Choose a reliable hosting provider that offers fast and stable servers. Shared hosting can slow down your site because you share resources with others. Consider using dedicated or virtual private servers (VPS) for better performance.

Content Delivery Network (CDN)

A Content Delivery Network (CDN) helps reduce TTFB by storing copies of your website’s content in various locations worldwide. When a user requests a page, the CDN delivers it from the nearest server. This reduces the distance data has to travel, speeding up response times. Using a CDN is especially helpful for global audiences.

Server-Side Caching

Server-side caching stores frequently accessed data in a temporary storage area. This means the server doesn’t need to process the same request repeatedly. Caching static content like images, CSS, and JavaScript files can significantly reduce TTFB. Implement caching strategies to make your server respond faster.

Database Performance

If your website relies on a database, its performance affects TTFB. Slow database queries can delay the server’s response. Optimize your database by indexing important fields and using efficient queries. Regularly clean and maintain your database to ensure it runs smoothly.

Application Code Efficiency

The code running on your server can impact TTFB. Complex or poorly written code takes longer to execute, slowing down the response. Review your server-side code and optimize it for speed. Remove unnecessary computations and streamline processes to improve efficiency.

Network Latency

Network latency is the time it takes for data to travel from the user’s browser to your server and back. This can be affected by the physical distance between the user and the server. Using a CDN can help reduce network latency. Additionally, optimizing your network setup and using faster protocols like HTTP/2 can improve response times.

Load Balancing

If your website experiences high traffic, load balancing can help distribute requests across multiple servers. This prevents any single server from becoming overwhelmed and ensures faster response times. Load balancers can also direct traffic to the server with the quickest response, further reducing TTFB.

How to Measure TTFB

Measuring Time to First Byte (TTFB) is essential for understanding how quickly your server responds to requests. Several tools can help you measure TTFB accurately. Here’s how to use them and interpret their results:

Google PageSpeed Insights

Google PageSpeed Insights is a free tool that analyzes your website’s performance and provides recommendations for improvement. To measure TTFB with this tool, go to PageSpeed Insights and enter your website URL. Click “Analyze” to get your results. Look for the “Server Response Time” under the “Opportunities” section. This section shows how long it took for the server to start sending data. The tool also gives you suggestions on how to improve server response time.

WebPageTest

WebPageTest is another useful tool that provides detailed performance analysis, including TTFB. Visit WebPageTest and enter your website URL. Click “Start Test” to begin. Once the test is complete, look at the “First Byte” time in the results. WebPageTest also provides a waterfall chart, which shows how long each element of your page takes to load. This chart helps you identify any delays and understand where improvements can be made.

Pingdom Tools

Pingdom Tools offers a simple way to measure TTFB. Go to Pingdom Tools and enter your website URL. Select a test location and click “Start Test.” In the results, you’ll see the “Wait” time, which represents TTFB. Pingdom also provides a summary of your website’s overall performance and suggests ways to speed it up. This tool is easy to use and gives a clear picture of how quickly your server responds to requests.

GTmetrix

GTmetrix is a powerful tool that analyzes your website’s performance, including TTFB. Visit GTmetrix and enter your website URL. Click “Test your site” to begin. Review the “Performance” tab to find the TTFB. GTmetrix gives you a detailed report with recommendations for improving your site’s speed. It also provides a visual representation of your site’s loading process, helping you see where delays occur.

How to Interpret the Results

When you measure TTFB, you get a time value, usually in milliseconds (ms). Here’s how to understand what it means:

Good: Less than 200ms. Your server responds quickly, which is excellent for user experience.

Average: Between 200ms and 500ms. There is some room for improvement, but it’s not too bad.

Poor: More than 500ms. Your server is slow, and you need to take action to improve it.

Regularly measuring TTFB allows you to monitor your website’s performance and make necessary adjustments. By understanding and improving TTFB, you can ensure a fast and responsive experience for your users.

Monitoring and Maintaining Low TTFB

Keeping Time to First Byte (TTFB) low is crucial for a fast, responsive website. Regular monitoring and maintenance ensure that your server continues to perform well. Here are key strategies to help you monitor and maintain low TTFB:

Continuous Monitoring Practices

Regularly checking TTFB helps you spot performance issues early. Use tools like Google PageSpeed Insights, WebPageTest, Pingdom Tools, and GTmetrix to monitor your site’s performance. Set up automated tests to run at regular intervals and review the results. By continuously monitoring TTFB, you can identify trends and address any issues before they impact your users.

Tools for Ongoing Performance Tracking

Several tools can help you keep track of TTFB and other performance metrics. Google Analytics provides insights into your site’s speed over time. Services like New Relic and Datadog offer real-time monitoring and alerting for server performance. These tools can notify you if TTFB exceeds a certain threshold, allowing you to take quick action. Using a combination of these tools ensures comprehensive monitoring of your website’s performance.

Regular Updates and Maintenance Tips

Keeping your server software up to date is essential for maintaining low TTFB. Regularly update your web server, database, and any other software components to the latest versions. Apply security patches and performance improvements as they become available. Regularly review your server configuration and make adjustments as needed. Clean and optimize your database to prevent it from becoming a performance bottleneck. By performing regular maintenance, you ensure your server remains fast and efficient.

Analyzing and Addressing Performance Bottlenecks

If you notice an increase in TTFB, analyze the data to identify potential bottlenecks. Look at server logs and performance reports to find the root cause. It could be slow database queries, inefficient code, or network issues. Once you’ve identified the problem, take steps to address it. Optimize database queries, improve server-side code, or upgrade your hosting plan if necessary. Addressing performance bottlenecks quickly helps maintain low TTFB.

Maintaining a low Time to First Byte (TTFB) is essential for a fast and responsive website. By understanding the factors that affect TTFB, using the right tools to measure it, and implementing effective strategies to optimize it, you can significantly improve your website’s performance. Regular monitoring and maintenance ensure that your server continues to respond quickly to user requests. Keeping TTFB low enhances user experience, boosts search engine rankings, and ensures your website runs smoothly. By prioritizing TTFB, you can create a more efficient and enjoyable online presence for your visitors.

Which Web Hosting Type is Right for Your Website?

Choosing the right web hosting is a critical decision that can significantly impact the success and performance of your website. The right hosting ensures your site runs smoothly, loads quickly, and provides a reliable experience for your visitors. Conversely, selecting an inappropriate hosting type can lead to slow load times, frequent downtimes, and a poor user experience, ultimately affecting your website’s reputation and performance.

Importance of Choosing the Right Web Hosting

Web hosting serves as the foundation for your website. It’s where all your site’s files, databases, and resources are stored and accessed by visitors around the world. The type of hosting you choose affects several key aspects of your website, including:

  • Performance and Speed: Different hosting types offer varying levels of performance. A well-suited hosting plan ensures fast load times, crucial for user experience and SEO.
  • Scalability: As your website grows, your hosting needs will change. The right hosting type will allow you to scale up resources to accommodate increasing traffic and data without significant disruptions.
  • Security: Web hosting plays a vital role in securing your website. Different hosting plans have various security features that help protect your site from threats and vulnerabilities.
  • Support: Reliable customer and technical support is essential for resolving issues quickly. The right hosting provider offers robust support, ensuring minimal downtime and quick problem resolution.
  • Cost Efficiency: While choosing the cheapest option is tempting, it’s important to balance cost with the features and resources you need. Choosing the right plan can save money in the long run by avoiding potential issues arising from inadequate hosting.

Different Web Hosting Types

To make an informed decision, it’s essential to understand the various types of web hosting available, each designed to cater to different needs and levels of traffic. Here’s a brief overview of the most common web hosting types:

  • Shared Hosting: This is the most basic and cost-effective type of hosting, where multiple websites share the same server resources. It’s ideal for small websites and blogs with low to moderate traffic.
  • VPS Hosting (Virtual Private Server): VPS hosting provides a virtualized server environment, offering more resources and greater control than shared hosting. It’s suitable for growing websites and small businesses that need more reliability and performance.
  • Dedicated Hosting: In dedicated hosting, you rent an entire server exclusively for your website. This type offers maximum control, performance, and security, making it perfect for large websites with high traffic.
  • Cloud Hosting: Cloud hosting uses a network of virtual servers to host websites, providing scalability and flexibility. It’s ideal for websites with variable traffic patterns and those needing high availability.
  • Managed WordPress Hosting: Specifically designed for WordPress sites, this hosting type includes optimized performance, security features, and support tailored for WordPress users. It’s great for those who prefer a hands-off approach to technical management.
  • Reseller Hosting: Reseller hosting allows individuals or businesses to sell hosting services to others. It’s suitable for web developers and agencies looking to offer hosting as an additional service.
  • Colocation Hosting: With colocation, you own the server hardware and rent space in a data center. This option provides full control over the server while benefiting from the data center’s infrastructure and security.

Understanding Your Website Needs

Choosing the right web hosting starts with understanding your website’s specific requirements. Here’s a brief guide to help you assess your needs:

Traffic Expectations

Estimate your expected traffic. Low-traffic sites (e.g., personal blogs) can use shared hosting, while high-traffic sites (e.g., popular blogs, e-commerce) may need VPS, cloud, or dedicated hosting.

Type of Website

Identify your site’s purpose. Blogs and portfolios might need simple shared hosting, while e-commerce sites with higher security and performance demands often require VPS or dedicated hosting.

Required Resources

Consider the necessary storage and bandwidth. Media-rich sites need more storage and bandwidth compared to text-heavy sites. Evaluate the potential growth to ensure scalability.

Budget Considerations

Balance your needs with your budget. Shared hosting is budget-friendly but limited in resources. Investing in VPS, cloud, or dedicated hosting might be necessary for better performance and scalability as your site grows.

Types of Web Hosting

Shared Hosting

Shared hosting is like living in an apartment building where you share resources like water and electricity with other tenants. Your website shares the server with many others, which keeps costs down and makes it easy to get started.

This type of hosting is perfect for small blogs, personal websites, and small business sites that don’t get much traffic. It’s affordable and straightforward, making it a great choice for beginners.

VPS Hosting (Virtual Private Server)

Think of VPS hosting as a townhouse. You get more space and control compared to an apartment. Your website gets its portion of the server’s resources, providing better performance and more customization options.

VPS hosting is suitable for growing websites, small to medium-sized businesses, and sites that need more reliability and the ability to handle increased traffic. It’s a solid step up from shared hosting without breaking the bank.

Dedicated Hosting

Dedicated hosting is like owning your own house. You have the entire server to yourself, offering maximum control, performance, and security. You can customize everything to fit your needs.

This is perfect for large websites, high-traffic sites, and businesses that need top-notch performance and security. If your site gets a lot of visitors or handles sensitive data, dedicated hosting is the way to go.

Cloud Hosting

Cloud hosting is like living in a luxury condo with amenities spread across multiple buildings. Your website uses resources from a network of servers, making it highly scalable and reliable. If one server has issues, another can seamlessly take over.

Ideal for scalable applications, websites with fluctuating traffic, and projects that need high availability. It’s great for businesses that want flexibility and reliability without worrying about server management.

Managed WordPress Hosting

Managed WordPress hosting is like hiring a property manager for your WordPress site. Everything is optimized specifically for WordPress, from speed and security to updates and support.

It’s perfect for WordPress sites, bloggers, and anyone who prefers to focus on content rather than technical details. It ensures your WordPress site runs smoothly without the hassle of maintenance.

Reseller Hosting

Reseller hosting lets you rent out space in your server, like subletting an apartment. You can create and manage your clients’ hosting accounts under your brand.

This type of hosting is great for web developers, agencies, and entrepreneurs looking to offer hosting services to their clients. It’s a way to generate additional revenue while providing a valuable service.

Colocation Hosting

Colocation hosting is like owning your house but parking it in a high-security garage. You own the server hardware and rent space in a data center that provides power, cooling, and internet connectivity.

Best for businesses needing full control over their server hardware with the added benefits of data center infrastructure. It’s perfect for companies with specific hardware needs and high-security requirements.

Choosing the Right Hosting for Your Website

Assessing Your Needs

To select the best hosting for your website, start by thoroughly understanding your specific requirements. Match your website’s needs with the features offered by various hosting types. For example, a small personal blog might thrive on shared hosting due to its lower traffic and resource demands. In contrast, a growing e-commerce site with high traffic and security needs might benefit more from VPS or dedicated hosting.

Create a checklist of requirements that includes factors such as expected traffic, necessary storage, bandwidth, the importance of uptime, security needs, and any specific software or applications your website will use. This checklist will help you identify which hosting types and providers align best with your needs.

Considering Future Growth

When choosing a hosting plan, it’s essential to think about your website’s future. Plan for scalability to ensure your hosting can easily adapt to increased traffic and resource demands as your site grows. Opt for a hosting provider with flexible plans, allowing you to upgrade seamlessly without significant downtime or data migration issues.

Choosing a scalable hosting solution, like cloud hosting or a VPS, can provide the flexibility you need. Ensure the provider supports easy resource adjustments and has a clear path for scaling up your plan as your website expands.

Evaluating Hosting Providers

When evaluating hosting providers, consider key factors that impact your website’s reliability and performance. Look for providers with a strong track record of uptime and reliability, as consistent availability is crucial for maintaining your site’s credibility and user satisfaction. Customer reviews and testimonials can provide insights into other users’ experiences and the provider’s level of support.

Every website is unique, and the best hosting solution for one site may not be suitable for another. Take the time to evaluate your specific needs and thoroughly research the available options. By carefully considering your requirements and planning for future growth, you can choose a web hosting solution that ensures your website runs smoothly, remains secure, and can handle increased traffic as your business or blog grows.

Making an informed choice now will save you time, money, and potential headaches in the future. Take the first step towards finding the perfect website hosting by assessing your needs, planning for growth, and evaluating your options. Your website’s success depends on a strong, reliable hosting foundation.

Image File Types: A Comprehensive Guide to Formats and Uses

Images are crucial in communication, design, and information sharing in the digital age. From stunning photographs and intricate graphics to simple icons and web images, the type of image file you choose can significantly impact your digital content’s quality, usability, and performance. Understanding the different image file types is essential for anyone working with digital media, as it helps ensure that images are used and presented in the best possible way.

Importance of Understanding Different Image File Types

Each image file type has unique characteristics that make it suitable for specific applications. For instance, some formats are optimized for web use, offering smaller file sizes and faster loading times, while others prioritize high-quality and detailed imagery, making them ideal for print. Understanding which format to use can enhance the visual appeal of your project, improve performance, and ensure compatibility across various platforms and devices. Understanding image file types is crucial for preserving image quality during editing, conversion, and storage.

Raster vs. Vector Images

Understanding the differences between raster and vector images is fundamental to working with digital graphics. Each type of image has distinct characteristics and uses, making them suitable for different applications.

Raster Images

Definition: Raster images, or bitmap images, are composed of a grid of individual pixels, each representing a single point of color. When combined, these pixels create a complete picture.

Characteristics:

  • Resolution-Dependent: Raster images are defined by their resolution, the total number of pixels in the image. For digital displays, common resolutions are measured in dots per inch (DPI) for print or pixels per inch (PPI).
  • Detail and Color Depth: Raster images can display various colors and intricate details, making them ideal for photographs and complex images.
  • File Size: A raster image’s file size can be large, especially at higher resolutions and color depths. Compression techniques, such as JPEG and PNG, are often used to reduce file size.
  • Scalability: Raster images do not scale well. Enlarging a raster image results in a loss of quality, making the image pixelated or blurry.

Common Raster Image Formats:

  • JPEG (Joint Photographic Experts Group)
  • PNG (Portable Network Graphics)
  • GIF (Graphics Interchange Format)
  • BMP (Bitmap Image File)
  • TIFF (Tagged Image File Format)
  • WebP

Vector Images

Definition: Vector images are composed of paths defined by mathematical equations, which include points, lines, curves, and shapes. These paths can be scaled infinitely without any loss of quality.

Characteristics:

  • Resolution-Independent: Vector images can be resized to any dimension without losing quality, making them ideal for graphics that need to be used at various sizes.
  • Smaller File Size: Typically, vector files are smaller than high-resolution raster images, as they only store mathematical definitions of shapes rather than information for every pixel.
  • Editability: Vector graphics are highly editable. Each component can be individually manipulated, making them perfect for graphic design tasks.
  • Limited Color and Detail: While vectors are excellent for illustrations, logos, and designs that require clear lines and shapes, they are unsuitable for detailed images like photographs.

Common Vector Image Formats:

  • SVG (Scalable Vector Graphics)
  • EPS (Encapsulated PostScript)
  • AI (Adobe Illustrator)
  • PDF (Portable Document Format)

Common Raster Image Formats

JPEG (Joint Photographic Experts Group)

Features and Compression:

  • Lossy Compression: JPEG uses lossy compression to reduce file size, which means some image data is discarded to achieve smaller files. This can result in a slight loss of quality.
  • Adjustable Quality: The compression level can be adjusted, allowing a balance between image quality and file size.
  • Wide Color Range: Supports millions of colors, making it suitable for complex images like photographs.

Common Uses and Applications:

  • Photography: Ideal for digital photos due to its balance of quality and file size.
  • Web Images: These are commonly used for website images to ensure fast loading times.
  • Email and Document Sharing: Frequently used for sharing images via email or embedding in documents.

PNG (Portable Network Graphics)

Features and Transparency Support:

  • Lossless Compression: PNG uses lossless compression, preserving all image data without sacrificing quality.
  • Transparency: This feature supports alpha transparency, allowing for varying opacity levels, which is useful for web graphics and overlays.
  • High Quality: Maintains high image quality even after compression.

Common Uses and Applications:

  • Web Graphics: Ideal for transparent web images, such as logos, icons, and other graphics.
  • Digital Art: Used for storing and sharing high-quality digital art and illustrations.
  • Screenshots: Preferred for taking and sharing screenshots due to their lossless nature.

GIF (Graphics Interchange Format)

Features and Animation Support:

  • Lossless Compression: GIF uses lossless compression but is limited to 256 colors, making it less suitable for detailed images.
  • Animation: Supports simple animations, allowing for sequences of images to be played in a loop.
  • Transparency: Supports simple binary transparency (fully transparent or opaque pixels).

Common Uses and Applications:

  • Web Animations: Commonly used for simple web animations, memes, and short looping animations.
  • Icons and Buttons: These are used for web buttons and icons where simple transparency and small file sizes are needed.
  • Low-Color Images: Suitable for images with limited color palettes, such as line art and simple graphics.

BMP (Bitmap Image File)

Features and Uncompressed Nature:

  • Uncompressed: BMP files are typically uncompressed, resulting in large file sizes but preserving all image data.
  • High Quality: Stores image data in a straightforward format, ensuring high image quality.
  • Simple Structure: Easy to read and write, making it a basic format for image storage.

Common Uses and Applications:

  • Windows System: Commonly used in Windows applications and system graphics.
  • Raw Image Data: Suitable for storing raw, uncompressed image data for further processing.
  • Basic Graphics: Used in scenarios where simplicity and quality are prioritized over file size.

TIFF (Tagged Image File Format)

Features and High-Quality Storage:

  • Lossless Compression: TIFF can use lossless compression, preserving all image data without sacrificing quality.
  • Multiple Layers: Supports multiple layers and pages within a single file.
  • High Quality: Maintains the highest possible quality, suitable for detailed images.

Common Uses and Applications:

  • Professional Photography: Preferred by photographers for storing high-quality images without compression artifacts.
  • Publishing: Used in the publishing industry for high-quality image storage and printing.
  • Archiving: It is ideal for archiving important images due to its lossless nature and ability to store large amounts of data.

WebP

Features and Web Optimization:

  • Efficient Compression: WebP offers both lossy and lossless compression, achieving smaller file sizes while maintaining quality.
  • Transparency and Animation: Supports transparency and animation, similar to PNG and GIF.
  • Fast Loading: Optimized for web use, providing fast loading times without compromising quality.

Common Uses and Applications:

  • Web Images: Increasingly used for web images due to its balance of quality and file size.
  • Responsive Design: Ideal for responsive web design, ensuring images load quickly on various devices.
  • Modern Web Development: Adopted in contemporary web development practices to optimize website performance.

Specialized Image Formats

RAW

Features and Professional Photography Usage:

  • Uncompressed Data: RAW files contain unprocessed and uncompressed data directly from the camera’s sensor, preserving all the details and dynamic range.
  • Editable: These files offer extensive flexibility for post-processing, allowing photographers to adjust exposure, white balance, and other settings without degrading image quality.
  • Camera-Specific: Each camera manufacturer has its RAW format (e.g., CR2 for Canon, NEF for Nikon), which may require specific software for processing.

Common Uses and Applications:

  • Professional Photography: Preferred by professional photographers for capturing high-quality images that require detailed post-processing.
  • Editing and Retouching: Used in scenarios where significant editing, color correction, and retouching are needed.
  • Archiving: Ideal for archiving original, high-quality images with all details preserved.

HEIF (High-Efficiency Image Format)

Features and Modern Usage:

  • Efficient Compression: HEIF uses advanced compression techniques to produce smaller file sizes without compromising quality, often resulting in higher efficiency than JPEG.
  • High-Quality: Supports high-resolution images with a wide color gamut and depth, including 16-bit color.
  • Advanced Features: Includes support for transparency, multiple images (ideal for burst photos), and live photos (animation).

Common Uses and Applications:

  • Mobile Photography: Widely used in modern smartphones, such as iPhones, for efficiently capturing and storing high-quality images.
  • Web and App Development: Adopted in web and app development for its balance of quality and file size, enhancing performance and user experience.
  • Modern Imaging is ideal for scenarios requiring efficient storage of high-quality images, such as photo libraries and cloud storage.

PSD (Photoshop Document)

Features and Design Flexibility:

  • Layered Files: PSD files support multiple layers, including adjustment layers, text layers, and image layers, allowing complex edits and adjustments without altering the original image data.
  • High Quality: Maintains high image quality with support for various color modes (RGB, CMYK, Grayscale).
  • Extensive Editing Capabilities: Offers advanced editing features, such as masks, filters, and vector paths, making it a versatile tool for designers.

Common Uses and Applications:

  • Graphic Design: Graphic designers widely use it to create and edit detailed graphics, illustrations, and layouts.
  • Web Design: Employed in web design to create mockups, user interface designs, and web graphics.
  • Photo Editing: Preferred by photographers and retouchers for detailed image editing and manipulation.

ICO (Icon File)

Features and Use in Software Development:

  • Multi-Resolution: ICO files can contain multiple sizes and color depths of an icon, allowing the same file to be used across different resolutions and display settings.
  • Transparency Support: Supports transparency, enabling icons to blend seamlessly with various backgrounds.
  • Compact Size: Designed to be small and efficient, suitable for use in software and application interfaces.

Common Uses and Applications:

  • Software Development: Used to create icons for software applications, ensuring a consistent look across different platforms and devices.
  • Web Design: Employed for website favicons, providing a recognizable symbol in browser tabs.
  • User Interfaces: Used in operating systems and application interfaces for icons representing files, folders, and functions.

Understanding the features and applications of these specialized image formats allows you to choose the right format for your specific needs, ensuring optimal quality, efficiency, and functionality in your projects.

Choosing the Right Format

The right image format ensures quality, performance, and compatibility. Here’s a brief guide to help you choose the best format based on your needs.

For web use, prioritize formats that balance quality and file size. JPEG is ideal for photographs due to its small size and decent quality, while PNG is perfect for graphics needing transparency and higher quality. WebP offers both small file sizes and good quality, making it great for modern web applications.

High-quality formats are essential for print use. TIFF is the top choice for professional printing, providing excellent detail and color accuracy. PNG is also suitable for printing high-resolution graphics with transparency. JPEG can be used for prints if you select the highest quality settings.

For archiving, choose formats that preserve image quality. RAW files are perfect for storing original photos with all data intact. TIFF is excellent for high-quality image storage without losing detail. PNG is useful for archiving web graphics and images that need to remain high-quality.

In graphic design and editing, PSD is best for detailed work in Photoshop, while AI is ideal for vector graphics in Illustrator. EPS is commonly used for print designs and transferring artwork between programs.

For animation and interactive content, GIF works well for simple animations, while WebP is better for higher quality and smaller file sizes. HEIF is a modern choice for efficient storage of high-quality images and animations.

Considering these factors, you can choose the right image format to ensure optimal quality, performance, and compatibility.

How to Convert WebP to PNG: A Step-by-Step Guide

Two popular formats often come into play for digital images: WebP and PNG. WebP, developed by Google, is known for its ability to provide high-quality images with significantly reduced file sizes, making it a preferred choice for web developers looking to enhance website performance. On the other hand, PNG (Portable Network Graphics) is a widely supported format that offers lossless compression and excellent transparency support, making it ideal for various uses, from web design to professional graphic editing.

WebP

  • Developed by Google to improve web performance.
  • Offers both lossy and lossless compression.
  • Reduces file sizes significantly without compromising much on quality.
  • Supports transparency and animation.
  • Modern web browsers and tools increasingly support it.

PNG

  • Created as a non-patented replacement for GIF.
  • It provides lossless compression, ensuring no loss of image quality.
  • Widely supported across all browsers, devices, and image editing software.
  • Ideal for images requiring transparency (like logos and icons).
  • Supports a wide range of colors and high-quality graphics.

Reasons for Converting WebP to PNG

While WebP is excellent for web use due to its smaller file size, there are several reasons why one might need to convert WebP images to PNG:

  1. Compatibility: WebP is not universally supported across all platforms and software despite growing support. Converting to PNG ensures the image can be viewed and edited universally.
  2. Editing: Many graphic design tools and software are more compatible with PNG than WebP, making PNG a preferred choice for editing and professional use.
  3. Transparency Needs: PNG offers better support for transparency and higher quality alpha channels, which is crucial for specific design projects.
  4. Archiving and Sharing: PNG is a standard format for archiving high-quality images and sharing them across various platforms without worrying about compatibility issues.

Benefits of Using PNG over WebP

1. Universal Compatibility: PNG files are universally recognized and can be opened and edited in virtually any image viewer or editor. 

2. Lossless Compression: PNG provides lossless compression, ensuring no image quality is lost during the saving process, which is crucial for high-quality graphic work. 

3. Better Transparency Support: PNG handles transparency better than WebP, with support for high-quality alpha channels, making it ideal for images that need to be placed over various backgrounds.

 4. Wider Application: PNG is versatile and suited for numerous applications, from professional graphic design to simple web use, due to its broad support and quality.

Converting WebP to PNG ensures your images remain accessible, editable, and high-quality across different platforms and uses. This guide will walk you through converting WebP images to PNG using various methods, ensuring you choose the best approach for your needs.

What is WebP?

WebP is a modern image format developed by Google. It is designed to reduce file sizes while maintaining high image quality. It was introduced to enhance web performance by reducing the load time of web pages without compromising the visual experience.

Key Features of WebP:

  • Compression: WebP offers both lossy and lossless compression. Lossy compression reduces file size by discarding some data, which might affect quality. Lossless compression, on the other hand, retains all image data, ensuring no quality loss.
  • File Size: WebP images are significantly smaller than traditional formats like JPEG and PNG, making them ideal for web use where speed and efficiency are crucial.
  • Quality: Despite the smaller file sizes, WebP maintains good image quality, making it a preferred choice for websites looking to optimize performance.
  • Transparency and Animation: WebP supports transparency (alpha channel) in lossy and lossless modes, similar to PNG. It also supports animations, similar to GIFs, but with better compression.

What is PNG?

PNG (Portable Network Graphics) is a widely used image format known for its lossless compression and robust support for transparency. It was created as a replacement for GIF and has since become a standard format for high-quality graphics on the web and in professional settings.

Key Features of PNG:

  • Lossless Compression: PNG uses lossless compression, meaning the image retains all its data and quality. This makes it an excellent choice for detailed graphics and images where quality is paramount.
  • Transparency Support: PNG supports transparency with an alpha channel, allowing for varying opacity levels. This makes it ideal for images placed over different backgrounds without a visible border or background.
  • Color Depth: PNG supports various colors and can handle high-quality, detailed images. It is beneficial for images that require fine detail and precision.
  • Universal Compatibility: PNG is universally supported across all browsers, devices, and image editing software, making it a versatile and reliable format for various applications.

Tools for Conversion

Several tools are available for converting WebP to PNG, each with its own advantages and drawbacks. Here, we will explore online tools, software solutions, and command-line tools to help you choose the best method for your needs.

Online Tools

Pros:

  • Accessibility: Can be used from any device with an internet connection.
  • Ease of Use: User-friendly interfaces that require no installation or technical knowledge.
  • No Cost: Most online converters are free to use.

Cons:

  • Privacy Concerns: Uploading images to online services can raise privacy and security issues.
  • File Size Limitations: Some online tools restrict the size of files you can upload and convert.
  • Internet Dependency: Requires a stable internet connection for uploading and downloading files.

Popular Online Converters:

  • Convertio: A versatile tool that supports a wide range of formats. Simple drag-and-drop interface and fast conversion.
  • Online-Convert: Offers a variety of conversion options with customizable settings. Supports batch conversions and provides high-quality output.
  • Zamzar: Known for its simplicity and support for multiple file formats. Offers email notifications for completed conversions.
  • CloudConvert: Provides high-quality conversions and integrates with cloud storage services like Google Drive and Dropbox.

Software Solutions

Pros:

  • Advanced Features: More control over conversion settings and quality.
  • Batch Processing: Ability to convert multiple files simultaneously.
  • Offline Use: Can be used without an internet connection, ensuring privacy and security.

Cons:

  • Installation Required: Downloading and installing software might take up storage space.
  • Learning Curve: Some software may have a steeper learning curve than online tools.
  • Cost: Some software solutions may require a purchase or subscription.

Recommended Software:

  • Adobe Photoshop: Industry-standard software for image editing. Supports WebP with plugins and offers high-quality conversions.
  • GIMP: A free, open-source alternative to Photoshop. Supports WebP and PNG with powerful editing tools.
  • XnConvert: A user-friendly, free tool that supports batch conversion and various formats. Easy to use with efficient processing.

Command Line Tools

Pros:

  • Flexibility: Offers extensive customization and scripting capabilities for advanced users.
  • Batch Processing: Efficiently handle large volumes of files with a single command.
  • Integration: This can be integrated into automated workflows and scripts.

Cons:

  • Technical Knowledge: Requires familiarity with command line interface and commands.
  • Learning Curve: This may intimidate users who are uncomfortable with command-line operations.

Using ImageMagick:

  • Installation: ImageMagick is available for Windows, macOS, and Linux. It can be installed from the command line or downloaded from the official website.

Basic Command: To convert a WebP file to PNG, you can use a simple command:
magick input.webp output.png

Batch Conversion: Convert multiple WebP files to PNG with a single command:
magick mogrify -format png *.webp

  • Advanced Options: ImageMagick offers a variety of options for adjusting quality, resizing images, and more. Consult the ImageMagick documentation for detailed usage.

Choosing the right tool depends on your specific needs, technical comfort level, and the volume of images you need to convert. Online tools are great for quick, one-off conversions, while software solutions and command-line tools offer more control and efficiency for larger or more complex tasks.

Step-by-Step Conversion Process Using Online Tools

Converting WebP files to PNG using online tools is straightforward and convenient. Here’s a step-by-step guide to help you through the process:

1. Selecting a Reliable Online Converter

Start by choosing a reputable online converter. Some popular options include Convertio, Online-Convert, Zamzar, and CloudConvert. These tools are known for their ease of use and reliable conversion quality.

2. Uploading WebP Files

Once you’ve selected an online converter, follow these steps:

  • Visit the Website: Navigate to the homepage of the chosen online converter.
  • Upload Button: Look for the upload button prominently displayed on the main page.
  • Select Files: Click the upload button to open a file selection dialog. Navigate to the folder containing your WebP files and select the ones you wish to convert. Most converters allow you to select multiple files at once for batch conversion.

3. Choosing Output Format (PNG)

After uploading your WebP files, you need to specify the output format:

  • Output Format Menu: Look for a dropdown menu or a list of output formats. This is usually found next to or below the uploaded files.
  • Select PNG: From the list of available formats, choose PNG as your desired output format. Some converters may also offer additional settings for image quality or size adjustments.

4. Initiating the Conversion

With your files uploaded and the output format selected, you can start the conversion process:

  • Convert Button: Look for the convert button, which might be labeled as “Convert,” “Start Conversion,” or something similar.
  • Initiate Conversion: Click on the convert button to begin the process. The converter will start processing your files. Depending on the size and number of files, this may take a few seconds to a few minutes.

5. Downloading the Converted PNG Files

Once the conversion is complete, you’ll need to download your new PNG files:

  • Download Links: The converter will provide download links for your converted files. These links are displayed on the same page or redirected to a download page.
  • Download Files: Click each link to save the PNG files to your computer. Some converters offer a “Download All” button to download a ZIP file containing all the converted images simultaneously.
  • Check Files: After downloading, open a few PNG files to ensure they have been converted correctly and maintain the desired quality.

Tips for Effective Conversion

When converting WebP files to PNG, it’s important to ensure that the process is efficient and maintains the quality of your images. Here are some tips to help you achieve effective conversion:

1. Maintaining Image Quality

  • Choose High-Quality Settings: If the converter offers options for adjusting the quality of the output file, always select the highest-quality setting to ensure the image retains as much detail as possible.
  • Avoid Multiple Conversions: Repeatedly converting images between different formats can degrade quality. Limit the number of conversions and always start with the highest quality source file.
  • Resolution Settings: Ensure that the resolution of the converted PNG matches the original WebP file to avoid loss of detail.

2. Managing Large Batches

  • Batch Conversion Tools: Use tools that support batch conversion to save time. Many online converters and software solutions, like XnConvert and ImageMagick, allow you to convert multiple files simultaneously.
  • Organize Files: Before converting, organize your files into folders based on their purpose or destination. This makes it easier to manage and locate them post-conversion.
  • Stable Internet Connection: When using online tools for large batches, ensure a stable internet connection to avoid interruptions during the upload or download.

3. Ensuring Transparency is Preserved

  • Check Settings: Verify that the conversion tool supports alpha channels when converting transparent images. Some converters might have specific settings for preserving transparency.
  • Test Conversion: Before converting a large batch, test the conversion on a single file to maintain transparency. This helps avoid issues that could affect a larger set of images.
  • Software Solutions: Use reputable software solutions like GIMP or Adobe Photoshop, which are known for handling transparency effectively.

4. Checking File Integrity Post-Conversion

  • Visual Inspection: Open a few of the converted PNG files to inspect them visually for loss of quality, changes in resolution, or missing details.
  • Compare File Sizes: Due to their lossless nature, PNG files are generally larger than WebP files, and any drastic differences in file size could indicate potential issues.
  • Metadata Check: If necessary, ensure that any essential metadata (such as creation date, camera settings, etc.) is preserved during the conversion. Some tools allow you to maintain metadata during the process.
  • Software Validation: Open the converted PNG files in image editing software and verify that all features (like transparency) are intact. This is particularly important for files used in professional or web design projects.

Common Issues and Troubleshooting

Converting WebP files to PNG can sometimes come with challenges. Here are some common issues you might encounter and how to troubleshoot and resolve them:

1. Errors During Conversion

Possible Issues

  • Internet Connectivity: If you’re using an online converter and experience errors, it might be due to an unstable internet connection.
  • File Corruption: The original WebP file might be corrupted, causing conversion errors.
  • Server Issues: The online conversion service might be experiencing downtime or server problems.

Solutions

  • Check Internet Connection: Ensure you have a stable and strong internet connection before starting the conversion process.
  • Try Another File: Test the conversion process with another WebP file to determine if the issue is with the specific file or the service.
  • Use Different Tools: If an online converter fails, try another reliable service or switch to a software solution like GIMP or Photoshop.
  • Contact Support: If using a paid service, contact customer support for assistance.

2. Quality Loss Issues

Possible Issues

  • Improper Settings: The converter might use default settings that reduce the image quality.
  • Multiple Conversions: Converting images numerous times between different formats can degrade quality.

Solutions

  • Adjust Settings: Ensure you select the highest quality settings available during conversion.
  • Use High-Quality Tools: Choose tools known for preserving image quality, like Adobe Photoshop or ImageMagick.
  • Limit Conversions: Avoid converting images back and forth between formats to minimize quality loss.

3. Unsupported File Errors

Possible Issues

  • Format Compatibility: Your tool might not support WebP files or be updated to handle the latest WebP specifications.
  • File Type Mistake: The file might not be a WebP file or be mislabeled.

Solutions

  • Check File Type: Verify that the file is indeed in WebP format. Sometimes, files need to be labeled correctly and renamed correctly.
  • Update Software: Ensure your software or online tool is up-to-date and supports WebP conversion.
  • Try Different Tools: Use another converter that explicitly supports WebP files, such as Convertio or GIMP.

4. Solutions and Fixes

General Tips

  • Test Before Batch Conversion: Always test the conversion with a single file before processing large batches to ensure the tool works as expected.
  • Use Reputable Tools: Stick to well-known and frequently updated tools for conversions. This reduces the chances of encountering unsupported file errors and other issues.
  • Follow Guides and Tutorials: If you’re new to using certain software or command-line tools, follow online guides and tutorials to ensure you’re using them correctly.

Specific Solutions

  • GIMP:
    • Open GIMP.
    • Go to File > Open and select your WebP file.
    • Once opened, go to File > Export As and choose PNG as the format.
    • Ensure settings preserve transparency and high quality before exporting.
  • ImageMagick (Command Line):
    • Install ImageMagick from the official website.
    • Use the command: magick input.webp output.png
    • For batch conversion: magick mogrify -format png *.webp

By addressing these common issues with appropriate solutions and fixes, you can ensure a smoother and more reliable conversion process from WebP to PNG, maintaining the quality and integrity of your images.

Use Cases and Applications

Converting WebP to PNG is a crucial process in various fields due to the versatility and wide compatibility of PNG files. Here are some specific use cases and applications:

1. Web Development and Design

Optimizing Web Performance

  • Faster Load Times: While WebP is great for reducing file sizes and speeding up website load times, not all browsers support it fully. Converting to PNG ensures compatibility without sacrificing too much on performance.
  • Responsive Design: PNG files can be used alongside WebP to ensure images display correctly on all devices and browsers. Developers can use a fallback mechanism where the browser loads a PNG if it doesn’t support WebP.

Ensuring Visual Quality

  • High-Quality Graphics: PNG’s lossless compression ensures the highest quality for elements like logos, icons, and detailed graphics, making it perfect for responsive and visually appealing web design.
  • Transparency: PNG’s support for transparency is crucial for overlaying images and graphics that blend seamlessly with different backgrounds.

2. Graphic Design Projects

Precision and Detail

  • Detailed Artwork: PNG’s lossless nature makes it ideal for graphic design projects that require detailed and high-resolution images, such as illustrations, infographics, and digital art.
  • Editing Flexibility: Graphic designers often prefer PNG files because they retain all details and quality, making them suitable for iterative design processes.

Print Media

  • High-Resolution Prints: When preparing digital artwork for print, designers convert WebP files to PNG to ensure the highest resolution and quality in printed materials.

3. Digital Content Creation

Multimedia Projects

  • Videos and Animations: PNG is often used in editing and animation for high-quality image sequences and sprites. Converting WebP to PNG ensures compatibility with most video editing software.
  • Social Media Content: PNG’s quality and transparency support make it a preferred choice over WebP for creating visually striking social media posts.

E-Books and Publications

  • Quality Illustrations: Digital publications like e-books and online magazines often require high-quality images. Converting WebP to PNG ensures that images are clear and professional.
  • Interactive Content: PNG is suitable for interactive digital content where image clarity and detail are paramount.

4. Ensuring Compatibility Across Platforms and Browsers

Cross-Browser Support:

  • Widespread Compatibility: While WebP is gaining traction, it’s not yet universally supported by all browsers and platforms. Converting to PNG ensures that images are viewable across all browsers, including older versions.
  • Fallback Mechanisms: Developers often use PNG as a fallback for WebP images in HTML and CSS to ensure that all users have a consistent experience regardless of their browser.

Cross-Platform Applications

  • Mobile and Desktop Apps: PNG files are universally supported across various operating systems and applications, making them ideal for mobile and desktop applications.
  • Email Marketing: Emails with embedded images must be displayed correctly on various email clients. PNG’s broad compatibility ensures that images are adequately rendered by all email clients.

Converting WebP files to PNG ensures your digital content is accessible, high-quality, and compatible across various platforms, browsers, and applications. This makes PNG an essential format for web developers, graphic designers, and digital content creators aiming to deliver a seamless and visually appealing user experience.

Conclusion

Converting WebP files to PNG is a straightforward process that can significantly enhance the accessibility, compatibility, and quality of your digital images. Each conversion tool has strengths and weaknesses; the best choice often depends on your requirements and preferences. Feel free to try multiple tools to see which works best for you. Experiment with different online converters, software solutions, and command-line tools to find the perfect balance of convenience, quality, and functionality. Doing so, you’ll be better equipped to handle various conversion tasks and ensure your images are always presented at their best.

15 Tagline & Brand Slogan Examples (+ Why They’re Effective)

Taglines and brand slogans are crucial in shaping a company’s identity and connecting with its audience. These brief phrases capture the essence of a brand’s promise, values, and personality, making them memorable and impactful. An effective slogan can enhance brand recognition, evoke emotions, and differentiate a company from its competitors.

This article will explore 15 examples of successful taglines and brand slogans, analyzing what makes them effective. By examining these examples, we can uncover the strategies behind their success and learn how to craft powerful slogans for any brand.

What Makes a Slogan Effective?

Successful taglines share several key characteristics that make them stand out and resonate with audiences. They are:

  • Memorable: A good slogan sticks in the mind and is easy to recall. It uses catchy phrasing and rhythm to ensure it is not easily forgotten.
  • Simple: Simplicity is crucial. Effective slogans use clear, concise language to convey the message without complexity.
  • Unique: They differentiate the brand from competitors by highlighting what makes it special or distinct.
  • Relevant: The slogan should be appropriate to the brand’s identity and resonate with its target audience.

The Role of Memorability, Simplicity, and Emotional Connection

Memorability: A memorable slogan ensures that the brand stays top-of-mind for consumers. This is achieved through catchy wording, alliteration, rhyme, or clever wordplay.

Simplicity: Simplicity aids in quick understanding and retention. Short, straightforward slogans are more likely to be remembered and repeated by consumers.

Emotional Connection: Effective slogans often evoke an emotional response, whether it’s joy, trust, excitement, or nostalgia. By tapping into emotions, a slogan can create a deeper bond between the brand and its audience, making it more relatable and engaging.

How to Write a Brand Slogan

Writing a brand slogan may seem challenging, but with a few helpful tips, you can create an effective one:

  1. Identify Your Audience: Understand your target audience’s values and needs to create a slogan that resonates with them.
  2. Outline Your Mission: Reflect your brand’s core values and mission in your slogan to ensure it aligns with your brand’s goals.
  3. Keep It Short and Simple: Aim for a concise slogan, ideally eight words or less, to convey your message clearly and memorably.
  4. Use Power Words: Incorporate impactful words and phrases that evoke emotion and prompt action.
  5. Test and Refine: Gather feedback from family, friends, and customers to refine your slogan based on their input.

Tagline and Brand Slogan Examples

Nike – “Just Do It.”

Nike’s slogan inspires action and perseverance, resonating with athletes and anyone pursuing goals. It’s short, memorable, and universally motivating, encouraging people to push their limits.

Apple – “Think Different.”

Apple’s slogan celebrates innovation and creativity, positioning the brand as a leader in technology and appealing to individuals who see themselves as forward-thinkers and non-conformists.

McDonald’s – “I’m Lovin’ It.”

This slogan creates a positive emotional connection, emphasizing enjoyment and satisfaction. It’s simple, catchy, and invokes a sense of happiness and comfort associated with McDonald’s food.

KFC – “It’s Finger-Lickin’ Good.”

KFC’s slogan highlights its food’s delicious, indulgent nature, appealing to sensory experiences. It emphasizes taste and satisfaction, making the brand memorable and mouth-watering.

Burger King – “Have It Your Way.”

Burger King’s slogan promotes customization and customer satisfaction, highlighting the brand’s commitment to providing personalized dining experiences where customers can have their meals tailored to their preferences.

Subway – “Eat Fresh.”

Subway’s slogan emphasizes the freshness and healthiness of its ingredients, appealing to health-conscious consumers who want quick yet nutritious meal options.

Dunkin’ – “America Runs on Dunkin’.”

This slogan positions Dunkin’ as an essential part of daily life, especially for coffee lovers and busy individuals. It suggests that Dunkin’ products are integral to starting the day right.

Coca-Cola – “Open Happiness.”

Coca-Cola’s slogan associates the brand with joy and positive experiences. It evokes feelings of happiness and moments of pleasure shared with others, making it emotionally appealing.

Rice Krispies – “Snap! Crackle! Pop!”

This playful slogan emphasizes the distinctive sounds and fun aspect of eating Rice Krispies, making it memorable and engaging for children.

M&M’s – “Melts in Your Mouth, Not in Your Hands.”

M&M’s slogan highlights the product’s quality and convenience. It reassures customers of a pleasant, mess-free eating experience, emphasizing both the candy’s enjoyment and practicality.

Lay’s – “Betcha Can’t Eat Just One.”

Lay’s slogan plays on the irresistibility of their chips, suggesting that they are so tasty that it’s impossible to stop at just one. This creates a sense of challenge and engagement with the consumer.

Walmart – “Save Money. Live Better.”

Walmart’s slogan emphasizes value and quality of life. It appeals to budget-conscious shoppers by promising that saving money at Walmart will enhance their lives.

Target – “Expect More. Pay Less.”

Target’s slogan promises high quality and good value, setting the expectation that customers will receive more for their money, balancing quality and affordability.

Levi’s – “Quality Never Goes Out of Style.”

Levi’s slogan underscores the timelessness and durability of their products, appealing to consumers looking for long-lasting and stylish apparel.

Mercedes-Benz – “The Best or Nothing.”

Mercedes-Benz’s slogan conveys a commitment to excellence and luxury, appealing to consumers who seek the highest quality and are willing to invest in superior products.

Analyzing Common Themes

Common Elements Among the Slogans

Effective slogans often share key elements such as simplicity, memorability, and emotional resonance. These taglines are concise and easy to recall, frequently using catchy phrases or rhythmic patterns that stick in the mind. They convey the brand’s message and values, making them instantly recognizable.

How They Appeal to Emotions, Values, or Lifestyle

Many successful slogans tap into emotions, values, or lifestyle aspirations. For instance, Nike’s “Just Do It” inspires action and perseverance, appealing to the drive for achievement. Apple’s “Think Different” speaks to creativity and innovation, resonating with those who value originality. Coca-Cola’s “Open Happiness” invokes joy and connection, while Walmart’s “Save Money. Live Better.” appeals to the desire for financial prudence and improved living standards. By connecting with these deeper emotional and aspirational themes, slogans create a strong, lasting impact on their audience.

Conclusion

Effective taglines and brand slogans are simple, memorable, and emotionally resonant. They convey a brand’s message and values, often using catchy phrases that stick in the mind. Slogans like Nike’s “Just Do It” inspire action, while Apple’s “Think Different” appeals to innovation and creativity. These taglines connect with audiences on a deeper level, making the brand more relatable and engaging.

When crafting memorable and impactful slogans, focus on clarity, emotional connection, and relevance to your brand’s core values. A well-crafted slogan can enhance brand recognition, foster loyalty, and differentiate your brand in a competitive market.

20 Green Company Logos from Famous Brands

In today’s world, sustainability and environmental consciousness are more important than ever. Many companies are adopting greener practices and reflecting their ecological commitment through branding. One of the most potent ways they do this is by incorporating green into their logos. Green is universally associated with nature, growth, and eco-friendliness, making it an ideal choice for brands looking to communicate their dedication to sustainability.

Psychology Behind Green Color in Branding

Color psychology is crucial in branding, as colors can evoke specific emotions and associations influencing consumer behavior. Green colors are commonly used in branding due to their powerful psychological impacts. Here’s a closer look at the psychology behind color and how it affects brand perception.

Nature and Environment

Green is universally associated with nature, plants, and the environment. It evokes feelings of tranquility, health, and freshness. Green brands often want to emphasize their connection to nature and their commitment to environmental sustainability.

Growth and Renewal

Green symbolizes growth, renewal, and rebirth. It suggests progress and forward-thinking. Companies may use green to convey innovation and their efforts to evolve and improve.

Safety and Calm

Green has a calming effect and is often associated with safety. It is a restful color for the human eye and can help create a sense of balance and harmony. Green is an excellent choice for brands looking to establish trust and reliability.

Company Logos: 20 Examples from Well-Known Brands

Logos play a crucial role in branding, serving as the visual representation of a company’s identity, values, and mission. Among the myriad of colors available, green stands out due to its psychologically solid impacts and associations. Many well-known brands incorporate these colors into their logos to convey specific messages and connect with their audience on a deeper level. Here are 20 examples of company logos from famous brands that effectively use green in their designs.

Starbucks

Starbucks Logo

The Starbucks logo is one of the world’s most recognizable and iconic. It is known for its distinctive green color and the mythical siren at its center. This logo represents the brand’s identity and conveys deeper meanings through its design and color choice.

Sprite

Sprite Logo

The Sprite logo is a striking example of how color can effectively convey a brand’s identity and message. Known for its crisp, clean taste, Sprite uses a vibrant green color in its logo to reinforce its brand values and appeal to its audience. Here’s a closer look at the psychology and symbolism behind the green Sprite logo.

Hulu

Hulu Logo

Hulu, the popular streaming service, has chosen green as the primary color for its logo, creating a distinctive and memorable brand identity. The choice of green in Hulu’s logo is visually appealing and carries deeper psychological and symbolic meanings that align with the brand’s mission and values.

Garnier

Garnier, a well-known beauty and personal care brand, prominently features green in its logo. This color choice is more than just a design preference; it strategically conveys the brand’s commitment to natural ingredients and eco-friendly practices. 

Lacoste

Lacoste Logo

Lacoste, the renowned French fashion brand, is instantly recognizable by its distinctive green crocodile logo. This logo is more than just a brand emblem; it carries deep symbolism and reflects Lacoste’s unique identity and heritage. 

Shopify

Shopify Logo

Shopify, a leading e-commerce platform, features a distinctive green shopping bag logo representing its brand identity and values. The choice of green in the Shopify logo is intentional, conveying several psychological and symbolic meanings that resonate with its users and reflect the company’s mission.

Heineken

Heineken Logo

One of the world’s most recognizable beer brands, Heineken, features a distinctive green logo synonymous with quality and tradition. The green color in the Heineken logo is more than just a design choice; it carries deep psychological and symbolic meanings that align with the brand’s identity and values.

Tropicana

Tropicana Logo

Tropicana, a well-known brand in the beverage industry, prominently features green in its logo. The green color conveys various psychological and symbolic meanings, perfectly aligning with Tropicana’s brand identity and mission to provide fresh, healthy, and natural products.

Subway

Subway Logo

Subway, a global fast-food chain known for its sandwiches and salads, features a distinctive green logo. Green in Subway’s branding is strategic, conveying health, freshness, and environmental consciousness messages. 

WhatsApp

WhatsApp Logo

WhatsApp, one of the world’s most popular messaging apps, features a distinctive green logo synonymous with seamless communication. The choice of green is strategic, reflecting the app’s values and enhancing its appeal.

Mirinda

Mirinda Logo

Mirinda, a popular carbonated soft drink brand known for its bold flavors and vibrant image, features a distinctive green logo. This color choice is not merely aesthetic but carries significant psychological and symbolic meanings that align with the brand’s identity and appeal.

Xbox

Xbox Logo

Xbox, Microsoft’s renowned gaming brand, features a distinctive green logo that has become an icon in the gaming world. The green color in the Xbox logo is a strategic choice, reflecting various psychological and symbolic meanings that resonate with gamers and convey the brand’s identity. 

John Deere

John Deere Logo

John Deere, a leader in agricultural machinery and equipment, is instantly recognizable by its iconic green and yellow logo. The choice of green is deeply symbolic and carries significant psychological meanings that align with the brand’s heritage and values.

Android

Android Logo

Android, Google’s mobile operating system, features a distinctive green logo that has become one of the most recognizable symbols in the tech world. The choice of green for the Android logo is strategic and carries significant psychological and symbolic meanings that align with the brand’s identity and appeal. 

Carlsberg

Carlsberg Logo

Carlsberg, a renowned Danish brewing company, is easily recognized by its iconic green logo. Green in Carlsberg’s branding is deliberate and deeply symbolic, reflecting the company’s heritage, quality, and commitment to sustainability.

Greenpeace

Greenpeace Logo

Greenpeace, one of the most prominent environmental organizations in the world, features a distinctive green logo. The use of green in Greenpeace’s branding is deeply symbolic and aligns perfectly with the organization’s mission to protect the environment.

Land Rover

Land Rover Logo

Land Rover, a renowned British automobile brand known for its robust and versatile vehicles, features a distinctive green logo. The green color in Land Rover’s branding is intentional, reflecting the brand’s identity and values. 

Tic Tac

Tic Tac Logo

Tic Tac, a globally recognized brand of breath mints, features a distinctive green logo that effectively communicates its brand values and appeal. Using green in Tic Tac’s branding is strategic, conveying various psychological and symbolic meanings. 

Acer

Acer Logo

Acer, a globally recognized brand in the technology industry, features a distinctive green logo that symbolizes its commitment to innovation, growth, and environmental consciousness. The choice of green in Acer’s logo is strategic, reflecting various psychological and symbolic meanings that resonate with consumers and align with the brand’s mission.

Animal Planet

Animal Planet Logo

Animal Planet, a popular television network dedicated to nature and wildlife, features a distinctive green logo that effectively conveys the channel’s mission and values. The choice of green in Animal Planet’s logo is intentional, reflecting various psychological and symbolic meanings that resonate with viewers and align with the brand’s identity.

Do you know How Top Brands Use Color Psychology in Logo Design?

Creating the Perfect Pairing with Green Company Logos: What Goes with Green?

Choosing the right colors to pair with green in company logos is essential for creating a visually appealing and compelling brand identity. Green is a versatile color that can evoke various emotions and meanings, such as nature, growth, freshness, and sustainability. When paired correctly, it can enhance the overall impact of a logo. Here are some colors that complement green beautifully, along with examples and the psychological effects of each combination.

Green and White

White adds a sense of purity, simplicity, and clarity to the vibrant energy of green. This combination often feels fresh, clean, and environmentally friendly.

Green and Yellow

Yellow brings warmth, optimism, and energy to green, enhancing feelings of growth and positivity. This pairing is lively and can attract attention.

Green and Black

Black adds sophistication, strength, and elegance to green. This bold combination can convey a sense of luxury and professionalism.

Green and Orange

Orange brings enthusiasm, creativity, and warmth to green. This combination is vibrant and can stimulate energy and excitement.

Green and Grey

Grey adds a sense of balance, neutrality, and sophistication to green. This combination can be modern and understated, conveying reliability and professionalism.